Meadow Muffin Gardens logo
Showing posts with label children. Show all posts

Friday, November 12, 2021

Homemade Granola


Making your own granola puts you in full charge of what goes into it. The nutritional powerhouse list in this recipe can be altered however you want. Some people may want to add things like chia seeds, hemp seeds, oat bran, millet, lecithin granules or cacao nibs. As long as the general ratio of dry to wet ingredients is about the same you can leave out or substitute ingredients. 

Granola is a great way to get your family to ingest not only more fiber in their diet but the abundance of vitamins, minerals, antioxidants, amino acids found in these grains, nuts and seeds.


HOMEMADE GRANOLA

6 - 8 cups rolled oats 

(alternative or addition to oats can be rolled rye, spelt, kamut, wheat or barley)

2 cups shredded coconut

(I use unsweetened coconut but that is a personal decision)

1 cup wheat germ

(I use raw wheat germ but you can use toasted wheat germ)

1 cup ground flax seeds

(Whole flax seeds tend to pass right through the body so better to grind them or purchase them already ground. Once they're ground they oxidize so you'll find them in the refrigerated section of the store)

1 cup slivered almonds

1 cup hulled sunflower seeds

(I use roasted unsalted sunflower seeds but you can get them raw or salted)

1 cup pumpkin seeds

(I use roasted unsalted pepita seeds but you can get them raw or salted) 

1 cup hulled or unhulled sesame seeds

1 cup roasted soybeans

1 cup dried apple pieces

1 - 2 cups raisins (don't add raisins until after granola is baked)


Combine the dry ingredients in a large bowl


3/4 cup vegetable oil

1 cup honey

2 tsp vanilla extract


Combine oil and honey in a saucepan and heat till blended but don't let boil

Add vanilla extract


Stir wet ingredients into the dry ingredients till everything is coated with the honey/oil blend

Grease two large greased baking sheets 

(the type with edges makes stirring easier without making a mess)

(stoneware pans work very nicely)


Bake in a 250 degree oven 20 minutes, stir (edges bake faster so blend into center)

Bake another 20 minutes till developing a light toasted look to it, don't overbake or the mix will be too crunchy and dry once it cools.

Cool on sheets and then add the raisins

Store in an airtight container


Granola can be eaten in a number of ways:

As a cereal with milk

Sprinkle on top of yogurt

Make homemade granola bars

Eat dry as a trail mix type snack

Substitute for rolled oats in a cookie recipe


Sunday, April 18, 2021

Allergy Season, Irritated Eyes....Chickweed Relief


Plants that many consider weeds make their appearance with the first spring like days for reasons other than to annoy those who view these plants as nothing more than to aggravate the need for control over that perfect lawn. Before grocery stores offered off season fresh foods any time of the year, people spent long winters surviving on canned, pickled, dried or fermented vegetables. Those first signs of green were very appreciated and supplied much needed nutrition and system detox. 

Dandelions, violets, plantain, nettles, chickweed, deadnettle...all eagerly foraged and used for not only food but for medicine. 

Chickweed is one of those creeper plants hardly noticed unless one is looking for it or as a gardener, cursing its prolific ability to self-sow. Forming a low growing mat over any bare soil available, it is difficult to eradicate. While it is easy to pull out, its weak stems easily break off and leave spilled seed and roots behind. 

Chickweed is Stellaria  media which in Latin means little star. The little white flowers appear to be made up of five petals but look closer and you'll see each petal has a cleft to become ten little slivers. It is a little fun to get poetic and compare the little star to the cool evening sky. Considered a cooling herb, conditions associated with heat such as fevers, infections and inflammation, can be eased with the use of chickweed.

Seasonal allergy sufferers can get some relief from this little plant. Itchy, irritated, red eyes can be soothed by using a chickweed infusion or as an eye poultice.

To avoid the mess of dirt getting mixed in with your greens, use a scissors and give the chickweed patch a haircut. Cut a handful and chop into small pieces to increase the surface area. Add about 1/2 cup to a sauce pan along with 1 cup water. Bring to almost the boiling point and then turn down the heat to a simmer for about ten minutes. This makes a strong herbal tea or infusion. Strain out the plant material and cool. Soak a cloth in the infusion and lay over your eyes for about 10 minutes. An alternative to straining is to leave the chickweed folded in the cloth and use over your eyes like a poultice.

Do this a few times a day if necessary for soothing relief from inflammation, redness, burning and itch. You can cut extra chickweed and store in the freezer for future use. Chickweed dies back once the heat of summer kicks in so take advantage of it while it is abundant in the spring.


Chickweed in April


Monday, April 12, 2021

SNEAK IT IN POWER MUFFINS


EMPIRE STATE MUFFINS

(Taste of Home...Beverly Collins)


2 CUPS SHREDDED UNPEELED APPLES

1 1/3 CUPS SUGAR

1 CUP CHOPPED CRANBERRIES

1 CUP SHREDDED CARROTS

1 CUP CHOPPED WALNUTS

2 ½ CUPS ALL-PURPOSE FLOUR

1 TBSP BAKING POWDER

2 TSP BAKING SODA

½ TEASPOON SALT

2 TSP GROUND CINNAMON

2 EGGS, SLIGHTLY BEATEN

½ CUP VEGETABLE OIL


In a large mixing bowl, combine the apples and sugar.

In another bowl combine the flour, baking powder, baking soda, salt and cinnamon.

To the dry ingredients add the cranberries, carrots and walnuts.

Add the apple/sugar mixture and mix well to combine.

In a small bowl, mix the eggs and oil.

Stir eggs and oil into the batter.

Fill about 18 greased muffin tins 2/3 full.

Bake at 375 F for 20 – 25 minutes or until a toothpick tests done.

Cool about five minutes before removing muffins.


MORNING GLORY MUFFINS

(Taste of Home...Paddy Webber)


2 CUPS FLOUR

1 ¼ CUPS SUGAR

2 TSP BAKING SODA

2 TSP CINNAMON

½ TSP SALT

2 CUPS SHREDDED CARROT

½ CUP RAISINS

½ CUP SHREDDED COCONUT

½ CHOPPED PECANS

3 EGGS

1 CUP VEGETABLE OIL

1 CUP SHREDDED UNPEELED APPLE

2 TSP VANILLA EXTRACT


In a large mixing bowl, combine flour, sugar, baking soda, cinnamon and salt.

Stir in the carrots, raisins, coconut and pecans.

In another bowl, combine eggs, oil, apples and vanilla.

Add to flour mixture.

Stir only until combined.

Fill about 18 greased muffin tins 2/3 full and bake at 350 F for 15 – 20 minutes


Thursday, October 24, 2019

Oat-Hemp-Peanut Butter-Chocolate Chip Cookies.....So Good

Whether you just have to include chocolate in your cookies or simply want the treat to at least be a little bit healthy to make it worth the indulgence, this recipe is a winner. Ideal for those milk and cookie after school snacks, coffee breaks, holiday cookie exchanges or gift ideas. They freeze well too!

Taken from Taste Of Home magazine, contributed by Jaymie Noble of Michigan, this recipe just has one alteration which is the addition of hemp seeds.

OAT-RAGEOUS CHOCOLATE CHIP COOKIES


1 cup butter, softened (2 sticks)
1 cup creamy peanut butter
1 cup sugar
2/3 cup brown sugar
2 large egg
1 tsp vanilla extract
2 cup all-purpose flour
3/4 cup oats or oatmeal
1/4 cup hemp seeds
2 tsp baking soda
1/2 tsp salt
2 cups or 12 oz semisweet chocolate chips

DIRECTIONS

In a large bowl, cream butter, peanut butter, sugar and brown sugar
Beat in the eggs and vanilla

In another bowl, combine the flour, oats, hemp seed, baking soda and salt. 

Add the dry mixture to the creamed mixture and mix well
Stir in the chocolate chips

Drop by rounded teaspoonfuls onto ungreased baking sheets
Bake at 350 for 10 - 12 minutes till lightly browned 
Cool a bit before removing to wire racks so they don't fall apart
Makes about 4 dozen
ENJOY


Tuesday, September 11, 2018

Clean Green, More Ideas Using Household Products

Keeping up with maintaining a clean home is a challenge enough, so when ideas come up to help make tasks easier, safer, cheaper and more rewarding, it is worth noting.

A prior post about green clean covered the more common products to use, such as vinegar, baking soda, borax and lemons. This post will cover a few ideas you may not have heard about but are probably already in your cabinets: cream of tarter and hydrogen peroxide


CREAM OF TARTER

Found in the spice aisle, cream of tartar often is only pulled out to make an angel food cake.
But it can be a great non-toxic source for laundry stains, warding off bugs and cleaning.
A byproduct of the wine making process, cream of tartar is acidic enough to tackle tough cleaning jobs.

1. Ring around the collar
Dampen the shirt collar with a little water and then sprinkle the area with some cream of tartar. Rub the fabric together to work in the powder and then launder as usual.
2. Whiten whites
Pretreat white clothes with a cream of tartar soak. Add a tsp. of powder for each quart of water and soak the clothes before washing.
3. Remove stains on clothes and carpets
Mix some cream of tartar and lemon juice to form a paste. Apply the paste to the stain and let sit for at least an hour. Machine wash clothes as usual or with carpets, blot with a damp cloth. Think of this idea for those ink stains that can ruin a good dress shirt.
4. Cleaning toilet stains and bathtub rings
Mix some cream of tartar and hydrogen peroxide (or white vinegar) to form a paste. Apply the paste to the stains and wait till it dries before rinsing with water.
5. All-purpose kitchen cleaner
Mix some cream of tartar and white vinegar to form a paste. Use on stove burner pans, grout, ovens, kitchen sinks, spigots, stainless steel appliances, coffee pots, even cleans mildew.
6. Clean copper
Mix 2:1 cream of tartar to lemon juice (2 tbsp. cream of tartar and 1 tbsp. lemon juice). Rub onto copper pots and wipe clean with a damp cloth
7. Clean silver
Tarnished silver can be cleaned by dipping a damp magic eraser into some cream of tartar and wipe away the tarnish on old trays and utensils.
8. Sooty fireplace
Wet some cream of tartar with water and apply to the soot. Wipe away soot with a damp cloth.
9. Deter ants
Sprinkle where you suspect the ants are coming into the house.
10. Out of baking powder?
Mix 2:1 cream of tartar and baking soda (2 tsp. cream of tartar and 1 tsp. baking soda) to make 1 tbsp baking powder.

Note:
Be careful with how you clean granite counter tops. Acids such as vinegar and lemon juice can what they call "etch" granite and dull the surface.


HYDROGEN PEROXIDE

We all recognize the typical brown bottle of hydrogen peroxide usually found in the first-aid section next to the rubbing alcohol. You want the 3% H2O2 antibacterial strength, nothing higher.
Hydrogen peroxide is amazing stuff and so cheap, keep a bottle in stock at all times. You'll be amazed how many different ways you'll find to use this safe and natural product.

Hydrogen peroxide is a weak acid, consisting of water (H2O) and an extra oxygen molecule (H202). It could even be called oxygen water and is so safe to use since it quickly breaks down into oxygen and water. Hydrogen peroxide can even be found in rainwater and snow.
All living things contain this oxygen water. Our white blood cells naturally produce it to fight infection and being it is in fruits and vegetables, that is another reason to eat more of these foods.

H2O2 FOR THE KITCHEN
Have two bottles under your sink, one with the cap it comes with and one replace that cap with a sprayer top.
1. Remove dirt and pesticides from fruits and vegetables. Add 1/4 cup H2O2 to a sink of cold water, add your produce, wait a bit and rinse thoroughly with water.
2. Help your dishwasher sanitize your dishes by adding 2 oz. to your regular detergent.
3. Regular dish soap can be improved too by adding 2 tbsp. to the dish soap bottle.
4. Spray counter tops and cutting boards with hydrogen peroxide, let it bubble for a few minutes before wiping clean.
5. Spray the interior of the microwave and refrigerator to clean and disinfect. Spray and wait a few minutes before wiping it away.
6. Clean those kitchen sponges. Mix hydrogen peroxide and water at a ratio of 50:50 and soak sponges for about ten minutes. Rinse the sponges afterwards.
7. Clean crud from the bottoms of ovens, pots and pans. Combine hydrogen peroxide and enough baking soda to form a paste and rub onto the dirty areas, let sit for a while before scrubbing.
8. Clean floors by combining 1/2 cup of hydrogen peroxide to a gallon of hot water. Because this mixture is so mild it is safe for floors as well as pets and children who'll be crawling around on those floors.

H2O2 FOR THE BATHROOM
1. Soak toothbrushes and hairbrushes in hydrogen peroxide to keep them clean and fresh.
2. Make your own mouthwash to kill bacteria and freshen breath. Use at a 50:50 ratio with water.
3. Help whiten teeth by mixing a little salt and baking soda with enough hydrogen peroxide to make a paste. Do not overdo this. Using higher concentrations than 3% H2O2 or using too often can harm tooth enamel.
4. Add natural highlights to hair by making a 50:50 mix of hydrogen peroxide and water, add to spray bottle and spray onto wet hair.
5. Add a bit of hydrogen peroxide to a cotton square and apply directly to pimples.
6. Help kill foot fungus by spraying a 50:50 mix of hydrogen peroxide and water onto feet or make a foot bath with it and soak the feet.
7. Deter bacteria on shower curtains and shower stall by spraying down with H2O2.
8. Wash shower curtains to remove mildew and soap scum. Place curtains in washer with a bath towel and regular detergent. Run through the usual wash cycle but then add a cup of hydrogen peroxide to the rinse cycle.

H2O2 FOR KIDS AND PETS
1. Spray lunch boxes, toys and anything else your child touches.
2. Clean pet bowl with hydrogen peroxide to keep them fresh and slime free (often the case with plastic bowls).
3. De-skunk recipe solution for your pet. Combine 1 quart 3% hydrogen peroxide with 1/4 cup baking soda, 1 tsp Dawn dish soap and 2 quarts warm water. Apply this mix to your pet's fur and wait a bit before rinsing it all off.


Tuesday, June 19, 2018

The Song of the Elder Fairy


THE SONG OF THE ELDER FAIRY
When the days have grown in length,
When the sun has greater power,
Shining in his noonday strength;
When the Elder Tree's in flower;
When each shady kind of place
By the stream and up the lane,
Shows its mass of creamy lace
Summer's really come again
"The Complete Book of the Flower Fairies"


One of nature's medicines is the wild elder (Sambucus species). A shrubby, unruly bush found among hedgerows, this small tree is lanky and not much to look at when not in bloom. Attempts to rid unkept landscapes of this shrub are often in vain as it easily resprouts even after a hard pruning.


However, every June this versatile herb is beautiful as it is covered with large, saucer-shaped off-white flowers. 


These flowers can be gathered and used as a food source such as flower fritters, a wash or toner to maintain clear skin, soothing skin care salves, a medicinal tea to clear congestion in the respiratory tract, relieve hay fever or aid in reducing fevers. Poultices for minor burns, wounds and swollen joints are made with mashed flowers wrapped in layers of cheesecloth. Elder flower water was once considered a valuable beauty aid among women to keep the face blemish and freckle free, as well as a great aid for sunburn.


The following vinegar spritz combines elderflowers and rose petals with raw apple cider vinegar to create a soothing sunburn relief body spray.
A variation in the recipe for the sunburn soothing spray and we have a wonderful ph balancing facial toner. Raw apple cider vinegar helps bring balance to troubled skin and helps with blemishes.

Elderflower & Rose Facial Toner


Sunburn Spritz

The use of elderflowers for a balm or salve is a win win from the delicate skin of baby bottoms to the fragile skin of the elderly. The flowers are rich in anti-oxidants and contain anti-microbial and anti-fungal properties that help keep the skin healthy. Below is a very soothing salve which combines elderflowers, calendula flowers and lavender buds, all safe and soothing for any age.


Baby Bottom Balm
In the late summer, the flowers have turned to dark blue berries often sought after for jam, wine and syrups. If you wait too long the bushes are soon stripped clean by the birds. Don't eat these right off the bush. The fresh berries can upset your stomach. Dry or cook the berries before eating them. If you do collect your own elderberries, make sure they are the dark blue or black ones and not the red berries. The red berries belong to S. racemosa which is toxic.


Elderberry Syrup

More information on Elderberry Syrup


Sunday, November 19, 2017

Holiday Quick Breads, Entertaining, Gifts


Home baked goods are always welcome on any party table or in a gift basket. Recipients of such thoughtful offerings just know a little touch of love is sprinkled into every batch.

Pumpkins, apples, dates, nuts and cranberries are tradition in holiday festivities and what better and easier way to use them than for quick breads. Below are the recipes for an apple bread, a pumpkin cranberry bread, a date/nut bread and a cranberry orange bread. Quick breads freeze well so you can get some holiday baking done early.

APPLE BREAD

3 cups chopped apples
2 cups sugar
1 cup vegetable oil
2 eggs
3 cups flour
1 1/2 tsp baking soda
1 tsp salt
1 cup chopped nuts or 1 cup rolled oats
2 tsp vanilla

You'll need two bowls
Peel and chop the apples
Combine the apples and sugar
Let sit for 30 minutes
Add the oil and eggs
Beat well
Combine the flour, baking soda and salt
Add the dry ingredients to the wet ingredients
Stir in the nuts (or oats) and vanilla
Dip into 2 greased loaf pans
Bake at 350 degrees for 60 minutes
Cool before removing from pans

PUMPKIN CRANBERRY BREAD

3 cups sugar
1/2 tsp baking powder
2 tsp baking soda
4 cups flour
1 cup vegetable oil
1 cup cold water
1 tsp cinnamon
1 tsp cloves
1 tsp nutmeg
2 cups pumpkin
4 eggs
2 cups dried cranberries

You'll need a large bowl
Combine the dry ingredients and sift well to blend
Add the oil, water, pumpkin and eggs and mix thoroughly
Fold in the dried cranberries
Pour into 2 greased loaf pans
Bake at 325 degrees for 60 - 70 minutes
Cool before removing from pans

DATE NUT BREAD

2 cups chopped dates
2 cups boiling water
2 tsp baking soda
2 eggs
2 cups sugar
1 cup vegetable oil
2 tsp vanilla
3 1/2 cups flour
2 tsp baking powder
1 1/2 cups chopped nuts

You'll need three bowls
Pour boiling water over dates and baking soda
Set aside
Beat eggs and sugar
Blend in the oil and vanilla
Combine the flour and baking powder
Add dry ingredients alternately with the date mixture to the batter
Fold in the nuts
Pour into 2 greased loaf pans
Bake at 350 degrees for 60 minutes
Cool before removing from pans

CRANBERRY ORANGE BREAD

2 cups sugar
4 cups flour
1 tsp salt
1 tbsp baking soda
2 tbsp grated orange rind
2 beaten eggs
4 tbsp melted butter
1 cup orange juice
4 tbsp hot water
1 1/2 cup chopped nuts or raisins
2 cups cut up cranberries

You'll need one large bowl
Combine the dry ingredients
Make a hole in the center and add the eggs and wet ingredients
Blend well
Fold in the nuts (or raisins) and the cranberries
Pour into two greased loaf pans
Bake at 350 degrees for 60 minutes
Cool before removing from pans


Tuesday, October 24, 2017

CRANBERRY PUMPKIN COOKIES, ENERGY BOOST BITES


This little cookie nugget is the perfect grab and go morning meal for those who say they just don't have time for breakfast. Loaded with hearty ingredients that will hold you over without the empty calories of typical baked goods.

The prep time on the recipe said 10 minutes, but it took me 15 minutes just to gather together all the ingredients! With 14 ingredients your counter will be crowded but what a win win for a cookie. There is oat flour rather than wheat. There is only a fraction of the usual sugar called for and the type used is brown sugar rather than white. There is no added fat such as unhealthy shortening. The fat comes from peanut butter and needed moisture comes from pumpkin. Rolled oats help hold it all together and additional taste and sweetness come from dried cranberries and coconut.

Basically, this sounds like a granola shaped into a more portable form. Not sweet at all, it is still tasty and delicious, great with milk or coffee. Perfect for morning but also wonderful for the lunchbox or after school snack

These cookies are chewy rather than crispy. They freeze well and are good warmed up, still half frozen or room temperature from the cookie jar.


CRANBERRY PUMPKIN BREAKFAST COOKIES
By Sarah@The Gold Lining Girl

1 1/2 cup old-fashioned oats
1 cup oat flour
1/4 cup packed brown sugar
1/2 tsp. baking powder
1/2 tsp. baking soda
1 tsp. cinnamon
pinch of salt

In a large bowl, whisk together the above dry ingredients

1 1/4 cup canned pumpkin puree
1 egg
1/4 cup melted peanut butter (smooth or chunky)
2 tsp. vanilla extract

In another bowl, whisk together the above wet ingredients
Add the wet ingredients to the dry ingredients and stir until just moistened

1/2 cup chopped pecans or walnuts
1/2 cup shredded coconut
1/2 cup sweetened dried cranberries

Fold in the nuts, coconut and cranberries

Drop by spoonfuls onto either parchment lined or greased baking sheets
Bake at 350 degrees
10 minutes for small cookies or 12 - 14 minutes for large cookies
Cookies are ready when lightly browned
Remove to wire racks to cool
Store in a cool, airtight container


Sunday, September 10, 2017

Jewelweed...Can Native Species Be Labeled An Invasive Plant?


 Jewelweed (Impatiens capensis) is actually a wild native Impatiens to North America.  Also called Touch-Me-Not or Orange Balsam, this wildflower is a fun plant and often one of the first people learning to identify wildflowers can easily recognize. The flowers are a speckled orange and look like little trumpets. Personally, I think they resemble little shrimp. Preferring damp to wet soil, Jewelweed can grow to 4 - 5 feet tall and even before flowering in late summer, it isn't difficult to identify by its stalks, stems and leaves. The stalks are a lovely light green shade and after a rain, the droplets seems to lay on the surface. 

Should you find this plant after exposure to poison ivy or stinging nettles, break off the stems and crush them in your hands. You'll see that the stems are hollow and contain the itch relieving juice inside. Apply like a poultice to the areas of exposure for relief.

Children love to play with those little trumpets but actually they have a second kind of flower not usually noticed. There are tiny flowers without any petals that don't open but form the seeds. At the end of the summer season when they are ripe, the slightest disturbance sends the seed flying, very amusing for any age group. 


There are many articles out there calling this plant an invasive. Technically they are not an invasive species in North America, but can be aggressive when happy with its habitat.  Therefore it shouldn't be labeled as an invasive. They are native to North America, especially in the Northeast, but spread with such enthusiasm that many people consider them a pest. If they like their location they will spread and happily take over the space of other plants. What is nice to control this is to simply pull them out. They have shallow roots and gardeners just have to pull them where they aren't wanted, no gloves needed to get a grip as is the case with many plants considered weeds. 

Hopefully people encourage a natural habitat spot in their landscaping because these flowers are adored by bees, butterflies and birds. Insects need the nectar and the birds love the seeds. 

Exposure to poison ivy or stinging nettles is never planned so it is a good idea to have a remedy on hand. You don't want to push off applying something to appease the itch or you'll end up with oozing blisters and the tendency to spread. Jewelweed infused in apple cider vinegar is a perfect home remedy that works. Lavender essential oil is added for its healing properties to help with inflammation and harm done from scratching.

Once you learn what a wild plant is called and its beneficial uses, oftentimes attitudes change and it isn't just a weed. By September Jewelweed is in full bloom and brightens up roadsides, hedgerows and wet areas.

The natural world is a fascinating place and it is wonderful if children are introduced at a young age and learn to appreciate and take notice of it all.

Here is a good article all about "leaves of three, let it be" 


Monday, June 12, 2017

Summer Nights and No Fireflies...What's Happening to Them?


Summer is a time for picnics and outdoor parties that often extend into the evening hours. Watching the children running around having a ball with glow sticks got me sadly contemplating on what was missing in this picture. Years ago there were no glow sticks to entertain children after dark. Kids were enchanted with the stars and the magical mystery of fireflies. Some people call them june bugs, others simply call them lightning bugs. What is happening to them?


Just as with the bees, the answer lies with habitat loss, and pesticide use, but there is another factor and it is called light pollution.

These insects aren't flies, they are actually beetles, and that glow comes from a chemical reaction. 
Both male and female fireflies use their flashing lights to communicate. Their language of light is used to attract mates, ward off predators and defend their territory. Too much light caused by streetlights, car lights and suburbia in general, interrupts the sync of firefly flash patterns. Difficulty for fireflies to signal each other results in fewer larvae being born with every passing season.

Open fields and forests, waterways and bogs, are all disappearing as development makes its slow crawl across what was once uninterrupted habitats. Most species of fireflies thrive as larvae in rotting wood and forest litter at the margins of ponds and streams. As they go through their life cycle, most stay around where they were born. The environment of choice is warm with areas of wet spots.

The female lays about 500 eggs in sheltered areas that contain damp soil. After about a month the tiny larva hatch and begin feeding as they get ready for the next stage when they become pupae. The larval period can last from one to three years. During this stage the fireflies look like small worms and crawl along the ground. They are carnivorous and eat worms, snails and slugs by injecting a digestive enzyme and then sucking out the liquid. When big enough, the larvae digs into the ground and goes through the pupae stage. It forms a hard exterior shell that is what we are familiar with when we see them. This stage of metamorphosis takes them to the adult firefly which emerges in early summer. Once adults, the fireflies only live another few weeks. They may or not even eat during this short span. The purpose is to find mates and reproduce. So if light pollution creates enough of a problem to interfere with this process, these adults won't have the time to mate and lay their eggs before their life span ends.

This little video shows the life cycle of the firefly:


There are ways we can make a difference for these little guys. Make your own difference where you live. Avoid the use of herbicides and pesticides. Don't feel every part of your landscape has to be under control. Let spots naturalize to provide the habitats needed for all the stages of life. Learn what invasive species are a problem in your area and remove them to encourage the natives to thrive. Unless you have good reason for outdoor lighting to shine throughout the night, turn it off.

Children don't miss what they've never seen. Fireflies bring a sense of magic to our world and it would be a real loss to lose them.


Saturday, April 8, 2017

The Perfect Chocolate Chip Cookie


If you like your chocolate chip cookies soft yet chewy than this recipe just may replace your old favorite. The recipe came from The Ladies Corner and they even let us in on the secret behind these cookies. It's something as simple as the amount of salt that is added, leaving out an egg white and a lower oven temperature.

CHEWY CHOCOLATE CHIP COOKIES

Preheat the oven to 325 degrees F

2 cups all-purpose flour
1/2 tsp baking soda
1/2 tsp salt

Sift together the flour, baking soda and salt and set this bowl aside.

3/4 cup or 1 1/2 sticks butter, softened or almost melted
1 cup packed brown sugar
1/2 cup white sugar

In a larger bowl, blend the butter and sugars till nice and creamy.

1 tbsp vanilla extract
1 egg
1 egg yolk

Beat the vanilla and the eggs into the butter/sugar mixture.
Blend till creamy.

Add the sifted, dry ingredients to the wet ingredients and mix just until blended.

2 cups chocolate chips

If you used a hand blender for the previous steps, for this part use a wooden spoon.
Gently stir in the chocolate chips

Either lightly grease your cookie sheets or line them with parchment paper.

For MONSTER COOKIES
Drop cookie dough 1/4 cup at a time onto the cookie sheets 3 inches apart
Makes 6 cookies
Bake 15 - 17 minutes

For LARGE COOKIES
Drop large spoonfuls of cookie dough onto the cookie sheets 2 inches apart 9 cookies per sheet
Makes about 2 dozen cookies
Bake 13 - 14 minutes

For REGULAR SIZE COOKIES
Drop spoonfuls of cookie dough onto the cookie sheets 2 inches apart 12 cookies per sheet
Makes about 4 dozen cookies
Bake 11 - 12 minutes 

Remove cookies from oven and allow to cool a few minutes before removing to a wire rack to cool.


ENJOY!


Monday, February 27, 2017

Tea Garden...It's What the Doctor Ordered


Themed herb gardens can be a lot of fun and many of these plants are not only suitable for a tea garden, but are also right at home in a kitchen theme, cosmetic theme or medicinal theme.

Most of us have only ever had tea from dried plants. Think how good it could be if picked fresh from your own backyard! Below are some ideal plants to get to know as they grow and it'll soon become apparent why people develop such a connection with their gardens. There is a certain pride in the nurturing, harvesting, storing and utilizing your own food, and knowing the conditions and quality of the plants makes it all the more satisfying.


Chamomile
For many, the introduction into the world of herbs all started with the famous children's book, The Tale of Peter Rabbit by Beatrix Potter. Most mother's can relate with how to handle mischievous children who don't listen and then come whimpering to Mom when hurting or upset. Mama rabbit simply put her little bunny to bed with a cup of chamomile tea and let him reflect on his lesson learned after such an adventurous day.

Be it frazzled nerves or an upset tummy, chamomile tea was the best remedy to calm both conditions at the same time. Better yet, chamomile tea lulled little Peter Rabbit into the la la land of sleep.
Much of chamomile's medicinal effects are targeted toward the digestive tract and the nervous system.


Chamomile tea can be a godsend for parents pacing the floor with a colicky baby. The build-up of intestinal gas is very painful. Just a teaspoon of cooled chamomile tea given every ten minutes can relieve a baby's misery amazingly fast. Catnip and lemon balm are two other wonderful herbs safe for babies.

Combine a hot water bottle placed over the lower abdomen and sipping chamomile tea every 15 minutes for a sure relief from those dreaded PMS menstrual cramps. 

Be it a child or an adult, everyone has occasional trouble falling asleep. A cup of chamomile tea with a spoonful of honey can become a nightly ritual to look forward to in readiness for bed. The nerve relaxing properties of this herb are wonderful for settling down overtired children and the cluttered minds of over stressed adults.

Growing your own chamomile is fairly easy. Chamomile is an annual which once it is planted and gets established, it will pop up on its own every year. The flowers are the parts collected and if you harvest on a regular basis during the growing season the flowers will continue before finally going to seed.


Apple or Woolly Mint
Spearmint and Peppermint

Peppermint and Spearmint are just two of many types of mint in the Lamiacae (Labiatae) family.
Known as the herb of hospitality, mint has long been used everywhere from the kitchen to the sickroom. Peppermint and spearmint are the most common types of mint, but there are several varieties that can be found at your local nursery in the herb section. You can find apple mint, chocolate mint, mimosa mint, mountain mint, pennyroyal, orange mint, catnip, etc A good way to identify whether a plant is in the mint family is to feel the stem. If it is squared rather than round it is in the mint family. Mints are low to no maintenance perennial plants. They are so hardy, they'll be happy to take over your entire garden. The roots spread by way of runners, so if you don't want it to continue to creep along, it is best to plant it in buried containers. These plants like the sun but do tolerate some shade. Another perk with mints is that the bees adore the flowering tops.

Peppermint in particular has a powerful, menthol aroma that refreshes, energizes and improves mental clarity just by inhaling the steam from a cup of hot tea. So many ailments can be eased with this one type of plant. Nausea can be relieved, cramping belly aches can be settles, pounding headaches can fade away, congestion can open up, aching feet can perk up, heat flashes can be cooled, and sore muscles can relax.


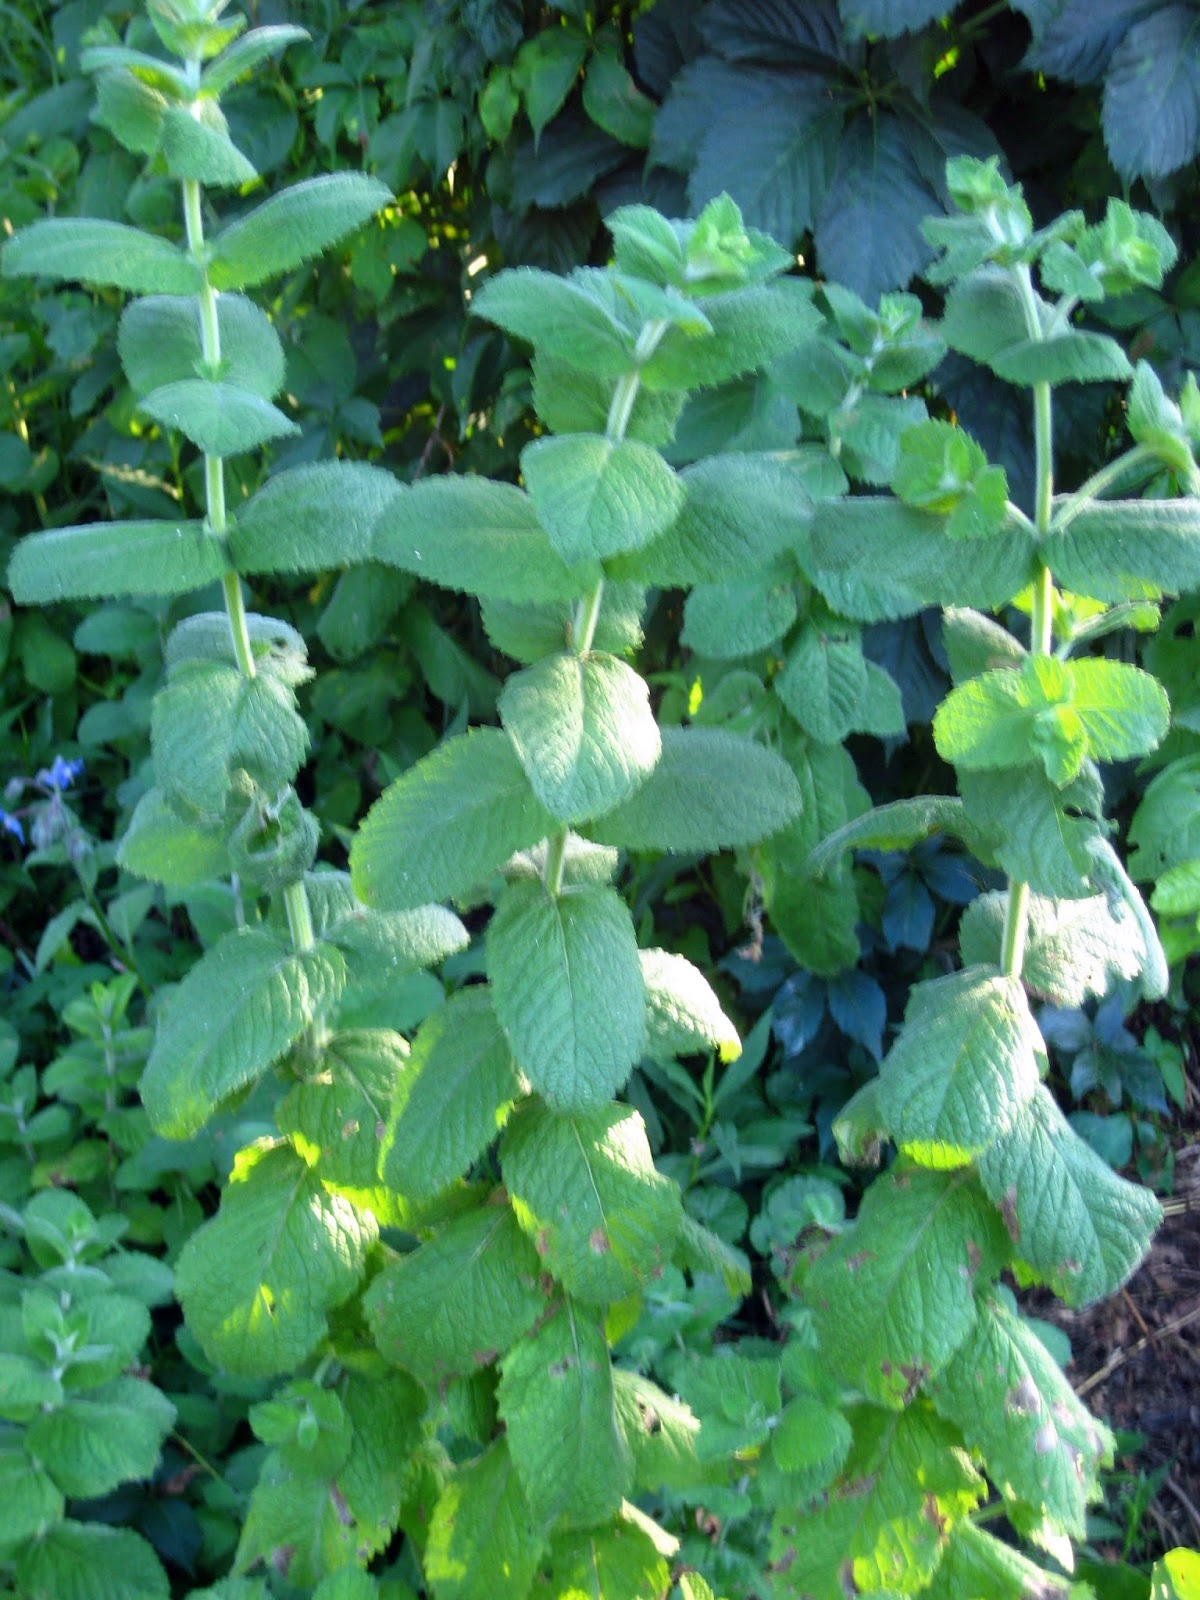
Lemon Balm is wonderful for relaxing children or anyone under stress. Called the "happy tea", lemon balm is invaluable for not only snapping a child out of a cranky mood, but can help anyone feeling down in the dumps. With it's hint of lemon, add some honey and you have a delicious tea most people really enjoy. With anti-viral properties, lemon balm is great for colds and fever blisters (cold sores). Also called Sweet Melissa, if you let it flower as in the photo below, you'll be making a lot of bees very happy. This type of mint spreads as any other mint but it is easier to control since it grows in clumps. One thing with lemon balm is that if you do dry it, don't crumble the leaves until ready to use or you'll lose a lot of the lemony scent.

Lemon Balm


Catnip
Catnip is great for colicky babies, upset tummies, jangled nerves and to bring down a fever. And of course you can grow it as a great treat and source of greens for your cat. Catnip spreads on its own but like lemon balm, it grows in clumps so is easier to control than some mints that creep over the ground. Without cutting back, catnip actually becomes almost shrub-like with woody stems.


Monarda
Bee Balm or Monarda is often grown in butterfly, bee and hummingbird gardens. It's red or pink tubular flower petals are beautiful when in bloom. Monarda gets taller than the usual 2 ft. mints. This plant reaches 3 - 4 ft. so makes a great backdrop plant. Also known as Oswego, this plant was used extensively by Native Americans as a medicinal tea. During the American Revolution, Bee Balm was the replacement for black tea after the Boston Tea Party. And you can guess why the word "bee" is in the name. Great beneficial plant.


Anise Hyssop
The last mint we'll mention is Anise Hyssop (Agastache foeniculum) which smells and tastes like anise. Although it is called a hyssop, it isn't the same plant as the Hyssopus officinalis, which is in the mint family, but of European descent. Anise hyssop is a must for anyone who wants a scent garden. Even if you don't like it as a tea, to resist the urge to take a moment to pick a leaf for a sniff is nearly impossible. 

Pineapple Sage
Any of the sages can be used as a tea but Pineapple Sage tastes much better than regular garden sage. This tea is a good remedy for indigestion and heartburn. Sage makes a good gargle for a sore throat, especially if first infused in vinegar. Garden Sage is a perennial but Pineapple Sage is a tender perennial which in colder areas is grown as an annual. This plant grows much larger than garden sage. It actually becomes like a shrub and by September it flowers beautiful red tubular flowers adored by the hummingbirds, a great late season food source.


Stinging Nettles

Nettles, (Uritica dioica), are invaluable if you want one of the most nourishing plants around for your health. A word of caution though with stinging nettles, they sting due to the formic acid they contain. Nettles need to be grown somewhere where no one will be wandering around touching all the plants. It is a spreading perennial that will take over if allowed. But having access to the health benefits of nettle plants is wonderful for anyone needing a boost of energy or help with blah skin, hair or nails. Nettles make a great cooked green like spinach but best in the spring when the plants are young and tender. Be sure to wear long sleeves, long pants and gloves when in your nettle patch. Nettles are important as a food source for the larvae stages of many butterfly types, namely the peacocks, red admiral, commas, painted lady and tortoiseshell butterflies.


TIPS ON HOW TO HARVEST YOUR HERBS

Harvest late morning after they've dried off but before the heat of the day.

Most fresh herbs are highest in potency right before they bloom. But using the flowering tops is fine as well.

To dry, you can bundle small bunches by the stems and hang to dry in an airy, cool area out of direct sunlight. When dry, strip off the leaves and store in paper bags.
Don't crumble the leaves until you are ready to use them or you'll lose much of the essential oils.

Or you can spread your herbs out on the trays of a kitchen dehydrator for much quicker drying.

Before the arrival of frost, harvest all the herbs you desire and dry for storage. Herbs like basil are best if the leaves are frozen in ice cubes. Basil doesn't dry well without losing potency.

When ready to use the usual rule is 1 teaspoon dry herb to 1 cup of hot water.
If using fresh, use 3 teaspoons herb to 1 cup hot water.

You don't want to boil tender teas. You pour the hot water over them and let simmer. On average, teas only need about 3 - 5 minutes to simmer. then sweeten with honey and add a wedge of lemon if desired.

A very simple, yet delicious way to enjoy mint is to simply add a few fresh stems to a pitcher of water. The water will have a subtle, refreshing minty taste. Start with fresh plant material with each refill of the pitcher. If the water hasn't been drunk within about 3 days, toss and start again because it'll start to taste funky.

 A memory I have as a child is being sent down to the water's edge of a pond to collect enough fresh mint to fill a large soup pot. If you do collect plants outside of your own yard, be sure the plants you are cutting were not sprayed with pesticides or herbicides. Mint shouldn't need either one but just know for sure before using the plants. Rinse off the stems of any dirt, cut to fit in the pot (stems, leaves and any flowering tops), add enough water to cover the plants, cover the pot and gently bring to the boiling point but don't boil, Cock the lid so it doesn't overflow and let the tea simmer about 5 to 10 minutes, depending how strong you like your tea. You don't want to simmer it too long or you'll lose the important essential oils in the steam. Strain out the plant material and add sugar to taste. For sweet tea, 1 cup sugar to a gallon of tea is tasty. Enjoy a cup of hot tea right away and let the rest cool and store in the refrigerator for ice tea. This is wonderfully refreshing on a hot day.


Find a spot to set up a little table and chairs and enjoy your serenity time with a cup of tea. You'll soon discover that once your tea garden is established it returns every spring with little effort on your part. Annuals such as chamomile, fennel and dill reseed themselves and perennials such as the mints, lavender, sage, nettles and thyme return from the established root ball. If you had rosemary overwintering in the house, it can be brought back outside in the spring.