Meadow Muffin Gardens logo
Showing posts with label cleaning. Show all posts

Tuesday, September 11, 2018

Clean Green, More Ideas Using Household Products

Keeping up with maintaining a clean home is a challenge enough, so when ideas come up to help make tasks easier, safer, cheaper and more rewarding, it is worth noting.

A prior post about green clean covered the more common products to use, such as vinegar, baking soda, borax and lemons. This post will cover a few ideas you may not have heard about but are probably already in your cabinets: cream of tarter and hydrogen peroxide


CREAM OF TARTER

Found in the spice aisle, cream of tartar often is only pulled out to make an angel food cake.
But it can be a great non-toxic source for laundry stains, warding off bugs and cleaning.
A byproduct of the wine making process, cream of tartar is acidic enough to tackle tough cleaning jobs.

1. Ring around the collar
Dampen the shirt collar with a little water and then sprinkle the area with some cream of tartar. Rub the fabric together to work in the powder and then launder as usual.
2. Whiten whites
Pretreat white clothes with a cream of tartar soak. Add a tsp. of powder for each quart of water and soak the clothes before washing.
3. Remove stains on clothes and carpets
Mix some cream of tartar and lemon juice to form a paste. Apply the paste to the stain and let sit for at least an hour. Machine wash clothes as usual or with carpets, blot with a damp cloth. Think of this idea for those ink stains that can ruin a good dress shirt.
4. Cleaning toilet stains and bathtub rings
Mix some cream of tartar and hydrogen peroxide (or white vinegar) to form a paste. Apply the paste to the stains and wait till it dries before rinsing with water.
5. All-purpose kitchen cleaner
Mix some cream of tartar and white vinegar to form a paste. Use on stove burner pans, grout, ovens, kitchen sinks, spigots, stainless steel appliances, coffee pots, even cleans mildew.
6. Clean copper
Mix 2:1 cream of tartar to lemon juice (2 tbsp. cream of tartar and 1 tbsp. lemon juice). Rub onto copper pots and wipe clean with a damp cloth
7. Clean silver
Tarnished silver can be cleaned by dipping a damp magic eraser into some cream of tartar and wipe away the tarnish on old trays and utensils.
8. Sooty fireplace
Wet some cream of tartar with water and apply to the soot. Wipe away soot with a damp cloth.
9. Deter ants
Sprinkle where you suspect the ants are coming into the house.
10. Out of baking powder?
Mix 2:1 cream of tartar and baking soda (2 tsp. cream of tartar and 1 tsp. baking soda) to make 1 tbsp baking powder.

Note:
Be careful with how you clean granite counter tops. Acids such as vinegar and lemon juice can what they call "etch" granite and dull the surface.


HYDROGEN PEROXIDE

We all recognize the typical brown bottle of hydrogen peroxide usually found in the first-aid section next to the rubbing alcohol. You want the 3% H2O2 antibacterial strength, nothing higher.
Hydrogen peroxide is amazing stuff and so cheap, keep a bottle in stock at all times. You'll be amazed how many different ways you'll find to use this safe and natural product.

Hydrogen peroxide is a weak acid, consisting of water (H2O) and an extra oxygen molecule (H202). It could even be called oxygen water and is so safe to use since it quickly breaks down into oxygen and water. Hydrogen peroxide can even be found in rainwater and snow.
All living things contain this oxygen water. Our white blood cells naturally produce it to fight infection and being it is in fruits and vegetables, that is another reason to eat more of these foods.

H2O2 FOR THE KITCHEN
Have two bottles under your sink, one with the cap it comes with and one replace that cap with a sprayer top.
1. Remove dirt and pesticides from fruits and vegetables. Add 1/4 cup H2O2 to a sink of cold water, add your produce, wait a bit and rinse thoroughly with water.
2. Help your dishwasher sanitize your dishes by adding 2 oz. to your regular detergent.
3. Regular dish soap can be improved too by adding 2 tbsp. to the dish soap bottle.
4. Spray counter tops and cutting boards with hydrogen peroxide, let it bubble for a few minutes before wiping clean.
5. Spray the interior of the microwave and refrigerator to clean and disinfect. Spray and wait a few minutes before wiping it away.
6. Clean those kitchen sponges. Mix hydrogen peroxide and water at a ratio of 50:50 and soak sponges for about ten minutes. Rinse the sponges afterwards.
7. Clean crud from the bottoms of ovens, pots and pans. Combine hydrogen peroxide and enough baking soda to form a paste and rub onto the dirty areas, let sit for a while before scrubbing.
8. Clean floors by combining 1/2 cup of hydrogen peroxide to a gallon of hot water. Because this mixture is so mild it is safe for floors as well as pets and children who'll be crawling around on those floors.

H2O2 FOR THE BATHROOM
1. Soak toothbrushes and hairbrushes in hydrogen peroxide to keep them clean and fresh.
2. Make your own mouthwash to kill bacteria and freshen breath. Use at a 50:50 ratio with water.
3. Help whiten teeth by mixing a little salt and baking soda with enough hydrogen peroxide to make a paste. Do not overdo this. Using higher concentrations than 3% H2O2 or using too often can harm tooth enamel.
4. Add natural highlights to hair by making a 50:50 mix of hydrogen peroxide and water, add to spray bottle and spray onto wet hair.
5. Add a bit of hydrogen peroxide to a cotton square and apply directly to pimples.
6. Help kill foot fungus by spraying a 50:50 mix of hydrogen peroxide and water onto feet or make a foot bath with it and soak the feet.
7. Deter bacteria on shower curtains and shower stall by spraying down with H2O2.
8. Wash shower curtains to remove mildew and soap scum. Place curtains in washer with a bath towel and regular detergent. Run through the usual wash cycle but then add a cup of hydrogen peroxide to the rinse cycle.

H2O2 FOR KIDS AND PETS
1. Spray lunch boxes, toys and anything else your child touches.
2. Clean pet bowl with hydrogen peroxide to keep them fresh and slime free (often the case with plastic bowls).
3. De-skunk recipe solution for your pet. Combine 1 quart 3% hydrogen peroxide with 1/4 cup baking soda, 1 tsp Dawn dish soap and 2 quarts warm water. Apply this mix to your pet's fur and wait a bit before rinsing it all off.


Thursday, February 18, 2016

Salt, Lemons, Vinegar, Baking Soda...Helping Hand to Raising Children


Though many of us are aware how useful the Fab Four (Salt, Lemons, Vinegar, and Baking Soda) by Shea Zukowski can be around the house for anyone seeking earth-friendly solutions, it is difficult to actually remember which is for what purpose.

I came across this little gem of a book and now I have all these tips in one place for reference instead of forgetting where I read those tips and to where I filed them away. The book is categorized into sections including kitchen, laundry, personal, pet and outdoors. For this post I am just going to center on what can be useful to make life easier in raising children.

CLOTH DIAPER CLEANER

1/2 cup baking soda
1/4 cup vinegar
Fragrance-free liquid laundry detergent

Add the baking soda to the wash cycle along with the detergent. Baking soda helps neutralize the acids in the dirty diapers.
Add the vinegar to the rinse cycle to soften clothes and help remove the detergent.


BABY FORMULA STAIN REMOVER

1/4 cup lemon juice
1/4 cup water

Baby formula easily stains clothing because of it's high protein content. Keep this mix in a spray bottle in the refrigerator so it is handy to pre-treat stains as soon as possible. Let the garment air dry in the sun and then wash as usual.


BABY AND CHILD TOY DISINFECTANT

1/4 cup vinegar

Soak a clean cloth in the 1/4 cup of vinegar and wipe down all  non-plush toys. Allow items to air dry. The vinegar scent will fade away.


STUFFED ANIMAL CLEANER

1/2 cup baking soda

Not all plush toys can be put into the washing machine. To rid stuffed animals of odors, put them in a plastic zip lock bag along with the baking soda. Shake the bag to distribute the baking soda over the stuffed animals and let sit overnight. Remove the toys and shake off the excess baking soda.


URINE SMELL ELIMINATOR

2 cups vinegar
1 cup water
1 cup baking soda

Bed wetting can be frustrating for everyone. There are waterproof mattress covers to protect the mattress but if the deed is already done you'll want to get rid of the smell of urine. Mix the vinegar and water and apply with a sponge to the affected areas. Blot dry with a towel and cover the spot with the baking soda. Let the area fully dry and then vacuum.


MUDDY CARPET CLEANER

When kids or pets come charging into the house leaving a trail of muddy footprints behind them, resist the urge to try blotting it up. This could just drive the dirt deeper into the carpet fibers. Take a handful of plain old salt and sprinkle generously onto the messy spots and leave it. Give the salt time to absorb the liquid and once dry vacuum it up.


PRE-TREATMENT FOR GRASS AND OTHER STAINS 

1 Tbsp baking soda
1 Tsp lemon juice OR 1 tsp vinegar

Stained knees and shirt fronts are prime targets for stained clothes. Sprinkle baking soda on the area, followed up with the lemon juice or vinegar on top. As the mixture starts to fizz, rub the fabric or use a toothbrush to rub it in to make sure the mix is getting through the stain. Let it sit a few minutes and then launder as usual.


CHEWING GUM REMOVER

Before you grab the scissors to cut out gum stuck in your child's hair, try using a lemon. Cut a lemon in half and rub the cut side onto the gum to help it loosen its grip. Gently squeeze the lemon to release some juice. Lemons can cause some bleaching so rinse the hair. This method can work on clothes and carpets as well, just remember to blot it up so it doesn't lighten the carpet.


SWIMMER'S EAR PREVENTION

2 Tbsp vinegar
2 Tbsp isopropyl alcohol

After a day of swimming there is always a chance the protective layer of wax in the outer ear canal gets worn away. Bacteria rich water from swimming can get in there and cause an infection. To lower this risk, make a solution of equal parts vinegar and isopropyl alcohol and store in a bottle or jar. Soak a cotton ball in the mixture and squeeze a few drops into each ear after swimming.


POOL TOY MILDEW PREVENTION

Inflatable pool toys are susceptible to mold and mildew once deflated and stored away for the winter. To minimize this from happening, let them sit in the sun to thoroughly dry before storing. Sprinkle each deflated item with a handful of baking soda before rolling up.


FRUIT AND VEGETABLE WASH

1 Tbsp lemon juice
2 Tbsp baking soda
1 cup water

A homemade, very economical fruit and vegetable spray to remove waxy coatings and help clean off pesticides. Fill a spray bottle with the lemon juice, baking soda and water. Shake before use. Spray the produce before eating and rinse it well to remove any aftertaste from the wash. The spray will last about a week.


NEED SOMETHING TO DO KID ACTIVITIES

SALT PAINTING

4 to 5 small bowls of salt
Food coloring of different colors
School glue
sponge brush
Paper

Pour an equal amount of salt into a few small bowls. A few Tbsp in each should be plenty.
Add a drop of food coloring into each bowl and stir to create different colors.
Using the sponge brush, coat a piece of paper with a thin layer of glue and let the children sprinkle the colored salt to form pictures and patterns.

SALT CLAY DOUGH

1 cup salt
1 1/4 cups warm water
1 Tbsp vegetable oil
3 cups flour

Mix the salt with the warm water and stir to dissolve. Add the vegetable oil and flour and stir slowly to combine. Knead the dough till pliable, adding flour if necessary till not sticky. If desired, divide into smaller balls and add a few drops food coloring to each to make different color dough balls. Store the play dough in a zip lock bag or lidded container. If the kids want to save their creations, let them air dry a few days and paint them with watercolor or acrylic paints. A thin coating of clear nail polish will help preserve them.


Here are three other posts about natural care for adults and children:
All Natural Care for Mom and Baby

The Well Stocked Natural Child's First Aid Kit

Dealing with the Pitfalls of Summer, Naturally


Friday, August 21, 2015

The Battle of the Flea is Not just what's On your Pet


Fleas are tenacious critters and their ability to persevere regardless of all of our ways to get rid of them is amazing. We cannot solely blame our pets for the presence of fleas in our homes. Being attracted to warm blooded animals they will make your pet their temporary home for a food source, but there is also a very real possibility they are hitching a ride into your home by way of your shoes or clothing.

The key to flea control is quick action. If you see signs and ignore them, even for a few days, the situation could become a nightmare. Telltale signs of the presence of fleas go beyond actually seeing the buggers. Observe your pet. If he starts with the twitching and sudden jerks to lick, especially areas like the belly, groin area, under the neck and behind the tail along the backbone, it is time to pay attention. 
If you see black specks laying on the areas where your pet spends its time sleeping, that is a good sign that your pet has fleas even if they don't appear to be bothering him. Those specks are "flea dirt" which is actually dried pre-digested blood. 
If you see little, rice shaped worms on your pets back end or on their bedding, that means they have tapeworms (Dipylidium caninum).  Fleas are notorious for transmitting  tapeworms to your pets. When your pet itches, they lick and when they lick they ingest the flea, and once the flea is ingested the tapeworm can complete it's life cycle. Adult tapeworms can be several inches in length living in your pet's intestinal tract. What you see are the sections that break off.

It is important to understand the life cycle of the flea. There are four stages: egg, larva, pupa, and adult. The typical life cycle will take anywhere from a couple weeks to months. It depends on the temperature in their environment and humidity levels. Fleas like conditions between 70 to 85 degrees Fahrenheit and 70% humidity.

So let's start with the females that hitch a ride into your home. Those adult females lay eggs following a blood meal from the host animal. Without blood the flea is unable to reproduce and being that is their goal in life they can very quickly make your pet miserable. The eggs are slightly smaller than a grain of sand and white in color. They are laid in the fur in bunches of about 20. One adult female flea can lay about 40 eggs every day. As your pet moves around those eggs fall off which is how the problem can suddenly appear all over the house. Eggs represent 50% of the entire flea population in a home.

With optimal conditions the eggs can hatch in only two days. If the temperatures are cold and dry it'll take a bit longer, perhaps up to two weeks. If the temperatures are warm with high humidity, the eggs will hatch in a few days.

The larvae that emerge from those eggs need to avoid light, so will nestle in carpets, dark corners, clothing lying around and upholstery. What they live on is the flea dirt that is found amidst other organic debris in their environment. The larvae make up about 35% of the population. This is why it is ultra important to wash all bedding your pet uses and to have a good vacuum cleaner. Strongly recommended is a vacuum with a microfiber bag or the type of vacuum using water such as a Rainbow. With a bagless vacuum there is good chance that when you empty the canister into your trash, you will just release those fleas and eggs back into your home. Microfiber bags are made to trap allergens, dust and fleas debris with no escaping. Water canisters need to be emptied each time but the fleas are dead from drowning.
If left to their own devices, those larvae will spin cocoons in 5 to 20 days from the time of hatching from their eggs.

The cocoon or pupae stage is the last developmental stage before the adult emerges that we usually see. The purpose of the cocoon stage is to protect the pupae for as long as it takes for conditions to be ideal for the adults to emerge. This can take from just a few days to years. The cocoons have a sticky coating that allows them to attach to carpet fibers so having a powerful vacuum cleaner is paramount.

What triggers the adult flea to emerge once developed is a rise in nearby body heat, higher levels of carbon dioxide and vibrations. All these are associated with the nearby presence of a warm-blooded body nearby, be that a pet or a person. Once fleas emerge they need to eat within a few hours. After feeding they'll begin to breed, lay eggs and the cycle starts all over again. Adult fleas account for only about 5% of the entire population in the house, but while on your pet they'll continue to feed, breed and lay eggs.

Before dousing your home with toxic flea bombs and chemicals there are other safer weapons of destruction against them: Borax, Diatomaceous Earth and Vinegar and the all important Vacuum Cleaner!


Use borax, Not boric acid!
What you want is Disodium Tetraborate or Sodium Tetraborate which is Borax. Borax is mined from the earth as a complex form of boron bound with other minerals. Boric acid does not occur naturally in nature, but is made from borax by adding hydrochloric acid and water. This increases the toxicity level so it is not a good thing to have around your pets or children.

Borax looks like salt, has no smell and doesn't get absorbed by the skin when touched. It kills fleas by dehydrating them as it makes small cuts in their exoskeleton. This works on the larvae but won't help you get rid of the eggs. Vacuum, vacuum, vacuum to get rid of the eggs.

Borax is also good for killing ants, bed bugs and roaches.
Borax is safe to have in your home and is much less toxic than insecticides.
If you are pregnant, avoid using any Borate substance which includes borax.
You don't want small children crawling around on the floor if there is borax still in the carpet.
Keep your cats away from the borax powder. Breathing in the fumes could cause health problems.
Don't put borax directly onto your pets. You don't want prolonged skin contact.
Keep borax away from your plants.

How to use:
Sprinkle borax liberally all around your carpeted areas.
Use a stiff brush or broom to work the borax down into the carpet fibers.
Wait at least six hours before vacuuming up the borax.

An alternative to borax is Diatomaceous Earth. 


Borax may give quicker results, but diatomaceous earth (DE) is completely natural and much safer for the family and pets. It is a simple mineral-silica. The steps for application are the same as for the borax. It kills similar to the borax by cutting into the exoskeleton and sucks the fluids out of the fleas' bodies. The action is physical rather than chemical. Hundreds of microscopic DE get all over the insect's body, and as the bug moves the DE scratches off their waxy coating and they dehydrate.  
Diatomaceous earth comes in two forms, pool grade and food grade. The type you want is food grade! 

Diatomaceous earth is formed from algae with siliceous shells. When extracted, they are already dead, but the shells remain. Though these shells are sharp they are too small to have any effect on humans. A totally safe, non-toxic method to kill not only fleas but bed bugs and chiggers.

If you don't have carpets, diatomaceous earth can also be used on hardwood floors. Don't forget to apply to the corners and along baseboard edges. 

Don't use in areas with fans blowing. A high draft will send the fine granules all over into the air and may be irritating to breathe it in.

When purchasing diatomaceous earth, read the label and besides making sure it is food grade and not pool grade, also check to make sure the concentration is around 99%. Any other formulation may not be as pure and safe for your family and pets. The other blends may kill fleas faster, but may contain insecticides.

Once the fleas come into contact with the powder, they usually die about 4 hours later. If possible, leave the powder on the floor overnight to ensure the fleas are dead before vacuuming.

Since flea eggs hatch after about a week after the eggs had been laid, it is best to repeat the process once a week for a month. You need to get to all four stages of the flea's life cycle.

Don't be concerned if you feel you did breathe in some of the DE powder. Unless you are dusting a garden and expect to be exposed to the dust for a period of time (in which case you should wear a mask) you should be fine. However, those with asthma may want to wear a face mask.
Diatomaceous earth is also used internally to treat for parasites, so don't be concerned as long as you are using food grade DE.

DE can be used as a way of flea treating your dog, but in moderation. If applied to your pet on a daily basis it can cause dry skin. Also, don't use on kittens, puppies, rabbits, guinea pigs or hamsters. Their small body mass could be a problem. 
To use on a pet for fleas:
Once a week application.
Put a towel over the head so the powder doesn't get into their eyes irritate their lungs.
Rub about 1 Tbsp into the fur of a dog over 35 pounds.
For dogs less than 35 pounds or for cats use about 1 Tsp.

To use on a pet for worms:
Add to food once a day till see no more signs of worms (stool, vomit, coughing, on bedding)
Add 1 Tbsp to the food for dogs.
Add 1 Tsp to the food for cats.

Diatomaceous earth can also be used in chicken bedding boxes to help with mites and lice.
Just sprinkle around the bedding inside the boxes.


Don't let the DE get wet. Moisture will reduce the effectiveness.

Good sites to visit for more information about DE are:


Last we have yet another use for vinegar!
Vinegar has been used for centuries to clean and deodorize. It has been used to get rid of ants and fruit flies in the kitchen. It has its use in the garden to prevent aphids from destroying plants. Weeds can be controlled with vinegar. 
Our beloved pets can smell fresher with a vinegar rinse and then towel dried. Kill two birds with one stone and send fleas packing as well.

To use as a flea bath:
Use Dawn Dishsoap to lather up your pet. Pour vinegar over your pet and massage it in. Let this mix stay on the pet for at least 10 minutes while you massage it throughout the fur down to the skin. Then rinse it all out.

To repel fleas:
Add a bit of vinegar to your dog's drinking water. This makes the pet's blood and skin more acidic and unfavorable to a flea's taste. 
Vinegar added to a cat's water may be too acidic for a cat's system. 
Another option is to spray vinegar (dilute if too strong) on the fur and massage to distribute it all over your pet.
This is a good method for both dogs and cats.
Spray vinegar onto pet bedding to deter fleas.
It doesn't matter whether you choose to use white or apple cider vinegar for spraying onto the pet or it's bedding. 
But for adding to the drinking water, use apple cider vinegar.

Good prevention also must include a good flea comb. Long-haired dogs and those with thick undercoats can be a challenge to flea comb but for short-haired dogs and cats it is a wonderful, very practical tool. Get in the habit of going over your pet on a regular basis and make it part of your pet's grooming. Flea combing is the best method for cats. Since cats' systems are so touchy with toxins, just running a flea comb over them is ideal. The cat loves the attention, it gets its grooming and you can nip any problems in the bud. Have a bowl of water next to you with a dash of dish soap and drop the fleas into the water as you find them.

Here we have a pet safe flea powder consisting of Diatomaceous earth, Yarrow flower and leaf powder, Neem powder, and Geranium essential oil. The link below the picture takes you into the shop with all the details about this item.

Natural Dog and Cat Safe Flea Powder

Pictured below are two herbal vinegar blends useful for people and their pets to help deter not only fleas but pesty bugs as well. Click on the link below the pictures for more information on them.

Herbal Vinegar Insect Repellent, Plantain, Comfrey, Yarrow

Herbal Vinegar Insect Repellent, Lavender and Plantain

Your dog will enjoy these flea repellent, homemade dog treats! 
Click on this link to take you to the blog post with the recipe.


Thanks to Jennifer Kvamme, DVM for her informative article on flea control
Thanks to Natasha Anderson for her informative article on Diatomaceous Earth and Borax
Thanks to the article from FleaBites on the use of vinegar and as a great source for information and supplies.


Tuesday, October 28, 2014

Go Green in your Cleaning Routine, Safe, Non-Toxic Clean


Having already done a post on homemade ways to clean our laundry, this time we'll focus on the rest of the household.

Whether you're new to the movement towards "going green" or just always on the look-out for new recipes, it is good to know the word is spreading about what is happening to not only our natural environment, but the very health of our families and pets who depend on us to make wise choices for their care.  Due to the onslaught of toxins everywhere we turn, we are exposed to pesticides and carcinogens in the foods we eat, the clothes we wear, the water we drink, the air we breathe, and even the building materials that make up our homes and furniture.

We keep our homes clean in an effort to protect our loved ones from germs and illness. Look a little closer at those cleaning supplies and realize we just may be contributing to potential health risks through long term exposure to these chemical cocktails. We've long associated the meaning of clean with the smell of ammonia, bleach, moth balls, even the beloved scent of pine in Pine-Sol. We may have gagged as we scrubbed and polished; we may have had to wear rubber gloves to prevent skin irritation, but by darn, the place was grease and dust free. There hasn't been sufficient testing to point fingers should a health concern pop up, but just knowing this stuff cannot be good for us, if there are alternatives out there, why not be safe than sorry.
Here is a good article titled "8 Things to never bring into your Home."

Next time you wash your kitchen floor, think about your child or pet crawling around down there, where everything they touch usually ends up in their mouths. A good example is chlorine bleach, which is sodium hypochlorite, NaClO, the salt of hypochlorus acid. Chlorine is one of the main smells that we've come to associate with "clean". Yes, it is very effective as a disinfectant, a whitening agent for clothes and paper products, the care of swimming pools, bathroom cleaners, etc. It also is a toxic respiratory irritant, can burn the skin, worsen already existing heart or respiratory conditions and is in general, a poison. But because it works in its intended purpose and is dirt cheap, companies use it extensively. For cleaning and whitening, such as with laundry, bleach oxidizes many chemicals causing them to lose their color, and dissolve more easily into solution.

Back to our clean floor. Because chlorine is heavier than air, it tends to collect in low-lying areas. Children and pets are low to the ground, therefore are exposed at higher concentrations than those of us who stand 4 to 5 feet taller. Every time you open the dishwasher, those vapors drift right out into the room. I don't know about your kitchen, but when my kids were small they, and the dogs, were always right there too.

We have the same concerns with the use of ammonia, NH4OH. As a base, it does make a great glass cleaner, and a very effective method to cut grease, but like bleach it can be very irritating to the respiratory system. To make the mistake of mixing bleach and ammonia can be devastating. When these two combine, the result is a chemical reaction.  Chlorine gas, chloramine and other toxic chemicals are released in the air, which can result in poisoning, skin burns, even an explosion.


So what can we use to get the results we still expect in cleaning?
The good old basics we hear so much about but never really knew how to use them:
Baking soda, vinegar, lemons, hydrogen peroxide,and salt. All inexpensive and probably in your cabinets already. You don't even need all those. You could clean your home your entire home using just baking soda and vinegar.

I like to know the "why" for everything so in case you are interested, here is a little lesson on what is baking soda, what is difference between white vinegar and other vinegars , and why they clean so well.

Baking soda is NaHCO3. It is the weakest alkali of sodium compounds and being an alkaline substance as are many soaps, it neutralizes acids. When mixed with water, it splits into H+ and HCO3-, and that latter ion is absorbed onto any dirt to help break it up--and thus make it easier to remove.It is a mild abrasive, so it scrapes away dirt without scratching or doing harm to harder surfaces. Last, because it neutralizes acids, it works as a great way to deodorize.

Then again, vinegar is an acid, usually 5%, though white vinegar is stronger which is why it is used for cleaning. However, if you don't have white vinegar on hand, apple cider vinegar is fine too. Think of what happens when you soak something rusty in vinegar. The acidity breaks things down and dissolves mineral deposits, so good-bye rust.

Many of us played around with baking soda and vinegar as kids to make volcanoes spew forth the "lava". Perhaps you still play a bit to unclog that kitchen or bathroom sink by first pouring a half cup of baking soda down the drain, followed by a half cup of vinegar. The immediate chemical reaction is usually very effective at dissolving soap scum and hair. Let this mixture die down on its own and sit for a few hours, then pour a pot of very hot water down the drain to flush it all down. A lot safer and more fun than the risks of inhaling Drano or get burned if it should splash back up at you.

Want to use more natural ways to take care of your children's laundry challenges?
Read this post about using lemons, vinegar, baking soda and salt.

Ok, now for the recipes:

For the recipes that call for vinegar, water and castile soap, add the soap last to avoid clumping.

ALL PURPOSE HOUSEHOLD CLEANER
Ideal for kitchen and bathrooms to clean surfaces

16 oz. spray bottle
To the bottle, mix 2 tbsp. white vinegar with 1 tsp. borax
Fill the rest of the bottle with very hot water (this helps dissolve the borax)
Add 1/4 cup liquid soap (castile liquid soap or dish soap)
Drops of preferred essential oil or combination

Essential oils disinfect, deodorize, are antimicrobial, some such as tea tree are also antifungal.
Good by themselves or in combination. These recipes vary in the concentration of the oils. Use more or less to your liking.
Options are:

20 lavender
20 eucalyptus
6 tea tree oil

10 lemon
10 eucalyptus

8 - 10 drops tea tree oil
8 - 10 drops lavender
8 - 10 drops hyssop

ORANGE VINEGAR CLEANER
Ideal for kitchen and bathrooms to clean surfaces

Save your orange peels (can also use grapefruit) and put into a mason jar.
Cover the peels with undiluted white vinegar.
Cover with a plastic lid (don't use a metal lid, the vinegar will corrode it).
Label and include the date.
Let sit for 2 to 4 weeks (there isn't a set rule)
Strain out the peels.
To use:
Use full strength or dilute it with water into a spray bottle.
The strength depends on what you want to use it for.
Half water and half orange vinegar or one part vinegar to three parts water.
For further astringent and antiseptic value add orange essential oil (anywhere between 15 - 30 drops for 16 - 32 ounces vinegar/water mixture).

GLASS CLEANER

Use the above orange vinegar cleaner at the 50/50 dilution or just fill a spray bottle with half water and half vinegar.

NO SCRATCH SOFT SCRUB CLEANSER
Good for counter tops, stove tops, sinks and tubs, grout

1 2/3 cup Baking soda
1/2 cup Castile soap or dish soap
1/2 cup Water
2 tbsp. White vinegar
Essential oils are optional

Stir soap into the baking soda.
Add the water and stir until smooth.
Add the vinegar and essential oils.
Pour into a squeeze bottle.

NO SCRATCH WHITENING SCOURING POWDER
Use as you would a powder cleanser without worry about scratching your sink or stove top.

1 cup Baking soda
2 tsp. Cream of tartar
2 tbsp Borax
1/4 cup finely grated citrus peels
15 - 20 drops citrus essential oils

Pour into a shaker top container.
Pour onto surface and moisten to clean.

TOILET BOWLS

A simple method to clean the toilet bowl is to spray vinegar around the inside of the bowl and then add 1/2 cup of baking soda
OR
Add 1/2 cup of Hydrogen Peroxide into the bowl.

Swish around with the toilet brush, let sit an hour or so and flush.

WOOD FURNITURE POLISH
Vinegar makes an excellent wood cleaner because it won't damage wood finish.
Olive oil polishes

In a 16 oz spray bottle combine:
1 cup Olive oil
1/2 cup White vinegar

20 drops lemon or lemongrass essential oil if desired

Shake before each use.
After polishing, buff with a clean cloth

WOOD FLOORS
Vinegar won't strip the wax off floors like ammonia can do.

Mix one cup of vinegar into a gallon of warm water. Mop your floor as you usually do.

GENERAL FLOOR CLEANER
Make a batch as needed

1 cup White vinegar
1 gallon very hot Water
1 - 2 tbsp Liquid soap
Essential oils if desired (recipe calls for 100 drops or 1 tsp. but the amount is up to you)
Lavender, Eucalyptus and Rosemary are all nice by themselves or a combination.

CARPET FRESHENER
Great to deodorize
Mix the baking soda and essential oils in a bowl. Using your fingers, crush the essential oils to mix thoroughly with the baking soda. Sprinkle onto the carpet and let sit at least an hour. Then vacuum

1 cup Baking soda
Up to 25 drops any essential oil  or blend.
Options:
15 lavender
10 eucalyptus

15 sweet orange
10 lavender

For a flea problem use Borax instead of Baking soda. Don't let pets walk on the carpet until you have vacuumed up the borax.

FRESHENING AIR SPRAY

16 oz. spray bottle
Fill with water and add about 25 drops of any combination of preferred essential oils.
Spray around the room. Be aware when spray could land onto wood furniture for possible staining.
Good essential oils to use are:
Any in the citrus family such as lemon, grapefruit, tangerine, sweet orange, bergamot or lime.
Around the holidays use frankincense, sweet orange, cinnamon and/or cloves
For disinfecting use tea tree oil,  lavender, rosemary, lemon, eucalyptus, pine or thyme

If you want air sprays ready to go, check out the benefits of aromatherapy! Click on the link below the pictures to get more information of the use of essential oils for help in disinfecting the air and surfaces.

Lemon & Eucalyptus Air & Surface Spray
Evergreen Clean Air & Surface Spray
Germ Fighting Air & Surface Spray


HAPPY CLEANING! ENJOY BEING CLEAN AND GREEN!!


Did you know you can carry the many uses of baking soda, vinegar, and even salt into your beauty routine?


Sunday, July 20, 2014

Back to Beauty Basics with Baking Soda, Vinegar and Salt


Whether you've decided to simply clear out the clutter under your bathroom sink or just clear out the constant worrying about what hazards are in your personal care products, you may want to go back to the bare basics in what is really needed for personal hygiene.

Cleanliness and a holistic beauty routine can be achieved with three basic ingredients you probably already have in your home:
baking soda, salt, and apple cider vinegar

Everyone wants clean, white teeth, yet the expense of a professional treatment is usually a deterrent, and  the safety and efficiency of the over-the-counter whitening products may result in less than satisfactory results. So why not turn to the tried and true methods used by people long before commercial toothpastes were even available.

A combination of salt and baking soda is an inexpensive, safe and time tested methods of maintaining a healthy mouth and strong teeth.

Ideally, you want to use a natural, unbleached sea salt. Sea salt still contains nutrients such as calcium, magnesium, silicon, phosphorus, sodium, iodine and iron. These elements strengthen gums, helps remove plaque, protects against bad breath and over time, even whitens teeth. Being salt makes you salivate, an antibacterial barrier is created that protects tooth enamel.

Most of us can remember as children the remedy for a sore throat or toothache was to rinse with salt water. Mixing a half teaspoon of sea salt with about four ounces of water made a great mouth rinse to help relieve mouth and throat inflammation and destroy bacteria.


The natural method to whitening teeth is to use baking soda or sodium bicarbonate. Being highly alkaline, baking soda has many cleaning uses and eliminating tarter and plaque from teeth and gums is no exception. Tooth decay is caused by acids in the mouth. Baking soda counteracts this acidity, and in doing so kills bacteria and germs which causes decay and bad breath. It is gritty enough to clean yet not so abrasive that it will wear away tooth enamel.

The ratio is about 6:1, baking soda to sea salt. Combine the baking soda and the salt and store in a little container to keep it dry. Dip a wet toothbrush into about a half teaspoon of the mixture or if you use a shaker top container, shake a bit onto your wet brush. Then gently brush your teeth, rinse and spit, being careful not to swallow the mixture.

NOTE:  Don't brush your teeth more than twice a week with baking soda. Slightly abrasive to tooth enamel, used repeatedly over time can weaken the enamel.

If you have braces or permanent retainers, don't brush with baking soda. Reactions with the baking soda can leave behind dark spots.


Want a back-to-basics method for cleaning your hair?
 Use baking soda and apple cider vinegar.

If you're fed up with your hair and frustrated that no matter what a product claims to do, you still can't achieve the results you want, then maybe it is time to just start over with as basic as you can get.

The decision to steer away from commercially made shampoos usually stems from frustration with your hair, scalp sensitivity and/or the growing awareness of the potentially toxic chemicals often added to skin and hair care products.

Washing your hair with baking soda and vinegar, the No-Poo method, is cheap, shampoo-free, conditioner-free, natural hair care. Shampoos advertised as leaving your hair squeaky clean do so but eventually may strip away protective oils and dry out the hair. What happens is that when hair dries out the protective cuticle layers are open, resulting in hard to manage fly away hair.

Many of our hair care products are strongly alkaline and cause a dulling buildup on the hair shaft.
Healthy hair is on the mildly acidic side of the pH scale between 4.5 and 5.5. Apple cider vinegar has an acidic pH of 2.9. Apple cider vinegar rinses help to balance the pH and remove buildup, giving you a softer, shinier, easier to detangle head of hair. Rinsing will close the hair shafts resulting in a smoother surface.

Changing your routine will be met with a period of transition. Try not to use the poo method once and say it didn't work. For some people, this adjustment period could take a week or even a month or two. You'll find over time that you'll only need to shampoo every few days.
This is how it is done:

Have the following ready before going into the shower:
Add 1 Tbsp. baking soda to a dixie cup or whatever small cup you choose. Add just enough water to form a paste.
Have the vinegar handy in a plastic squeezy bottle. Have a plastic 1 or 2 cup size measuring cup.


 First:

Wet your hair. Apply the baking soda paste to your scalp and give yourself a wonderful massage to stimulate blood flow. Using your fingertips, start making a circle on top of your head, beginning with the back and fill in the circle with your fingers making little scrubbing motions. Don't forget your temples and the base at the neck. This massage method cleans the pores and loosens built up grime. It isn't necessary to work down the length of your hair. When you rinse, the runoff will clean the hair on its way down. Don't get any of this in your eyes.

Next:
 
There are two choices for applying the vinegar:
1. Dilute 1/2-1 Tbsp vinegar to 1 cup water for short hair or
1-2 Tbsp vinegar to 2 cups water for long hair.
Pour the vinegar/water mixture onto your hair and scalp. Repeat this again if desired. Let sit a minute or so and rinse with lukewarm water (a blast of cold water will seal the cuticles of the hair). Some people don't bother with a final rinse to wash out the vinegar. Leaving it in does help with tangles but for some this proves irritating to their skin.
OR
2. You can just pour a tablespoon or two of vinegar directly onto your scalp, let it sit on your hair a minute or so, and then rinse. Vinegar is rather strong so use your own judgement which method to use. Some people find this undiluted method too strong for their scalp.

Periodic apple cider vinegar hair rinses will also help prevent or get rid of a flaky or itchy scalp.
For help with dandruff it is recommended to use the direct application method. Massage the vinegar thoroughly onto the scalp and let sit for at least 15 minutes.
The acids and enzymes in the vinegar kill the "bottle bacillus", a bacteria that is one of the causes for many scalp and hair conditions. The bacteria clogs hair follicles allowing dry crusts to form that itch and flake.
Now to resolve any problems:
If your hair becomes frizzy, use less baking soda or don't let it sit on your hair as long. Baking soda is a very effective cleaner, so you may have to play around with how much to use.
If your hair becomes greasy, use less vinegar or try applying the vinegar only to the ends of your hair.
If your hair dries out, use coconut oil or jojoba oil by applying just a bit to ends and scrunch. Leave this in. Repeat once a week or as needed.

Note:
Vinegar will not strip hair color the way chemical lighteners will so it shouldn't remove hair dye. The effect of vinegar is more subtle.


Tuesday, September 24, 2013

Does Your Hair Do need No Poo for its Shampoo?


If you're fed up with your hair and frustrated that no matter what a product claims to do, you still can't achieve the results you want, then maybe it is time to just start over with as basic as you can get.

The decision to steer away from commercially made shampoos usually stems from scalp sensitivity and/or the growing awareness of the potentially toxic chemicals often added to skin and hair care products.

Washing your hair with baking soda and vinegar, the No-Poo method, is cheap, shampoo-free, conditioner-free, natural hair care. By using this form of hair washing you can avoid a number of chemicals used in conventional shampoo and conditioners. The skin is the largest organ on the body and whether a substance enters the body by mouth or topically on the skin, if it is toxic, it is going to be absorbed into the bloodstream and organ systems. When we think of the daily onslaught of products we use in our daily lives for beauty and hygiene, it can be disturbing to comprehend how hard our systems must have to work to try to eliminate these poisons. And for those that get stored in the fatty tissues, we can only imagine the potential for problems over time.

Emulsifiers, preservatives, solvents, and fragrances are all used to achieve the thick, creamy consistency we want and a long shelf life for the commercial market. However, they have their drawbacks and risks of toxicity.

Examples of common additives are as follows:
Propylene glycol is an inexpensive phytochemical that serves as a solvent and skin conditioner. The concern is that it alters skin structure, allowing the penetration of other chemicals into the bloodstream.

Methylparaben is a common synthetic preservative with concerns being possible hormonal changes and its link to certain types of cancer.

Sodium Laureth Sulfate is a surfactant which means it helps emulsify and blend different liquids. It can cause problems with skin irritation and again is a substance which alters skin structure.

Phthalates are fragrances which can effect the immune system, respiratory and endocrine function.

Shampoos advertised as leaving your hair squeaky clean do so but eventually may strip away protective oils and dry out the hair. What happens is that when hair dries out the protective cuticle layers are open, resulting in hard to manage fly away hair.

Many of our hair care products are strongly alkaline and cause a dulling buildup on the hair shaft.
Healthy hair is on the mildly acidic side of the pH scale between 4.5 and 5.5. Apple cider vinegar has an acidic pH of 2.9. Apple cider vinegar rinses help to balance the pH and remove buildup, giving you a softer, shinier, easier to detangle head of hair. Rinsing will close the hair shafts resulting in a smoother surface.

Problems such as overproduction of sebum and dandruff are often a part of the cycle of washing the hair on a daily basis, which may not always be necessary. Those of us who shower daily usually also feel the need to wash our hair, thinking if we don't we'll look like we didn't wash our hair, meaning drab and oily. Fact is, the oily secretions of our body become out of whack when we continually strip away the natural oils. We wash, our body responds to the demand to replenish by secreting more oil, we wash, our body secretes some more, and the cycle continues till things are out of balance. If you just stopped, yea for awhile there will continue to be an excess of oil dirtying up your hair, but in time the body slows down this oil production and balance is achieved.

Changing your routine will be met with a period of transition. Try not to use the poo method once and say it didn't work. For some people, this adjustment period could take a week or even a month or two. You'll find over time that you'll only need to shampoo every few days.

This is how it is done:

Have the following ready before going into the shower:
Add 1 Tbsp. baking soda to a dixie cup or whatever small cup you choose. Add just enough water to form a paste.
Have the vinegar handy in a plastic squeezy bottle. Have a plastic 1 or 2 cup size measuring cup.

First:
Wet your hair. Apply the baking soda paste to your scalp and give yourself a wonderful massage to stimulate blood flow. Using your fingertips, start making a circle on top of your head, beginning with the back and fill in the circle with your fingers making little scrubbing motions. Don't forget your temples and the base at the neck. This massage method cleans the pores and loosens built up grime. It isn't necessary to work down the length of your hair. When you rinse, the runoff will clean the hair on its way down. Don't get any of this in your eyes.

Next:
There are two choices for applying the vinegar:
1. Dilute 1/2-1 Tbsp vinegar to 1 cup water for short hair or
1-2 Tbsp vinegar to 2 cups water for long hair.
Pour the vinegar/water mixture onto your hair and scalp. Repeat this again if desired. Let sit a minute or so and rinse with lukewarm water (a blast of cold water will seal the cuticles of the hair). Some people don't bother with a final rinse to wash out the vinegar. Leaving it in does help with tangles but for some this proves irritating to their skin.
OR
2. You can just pour a tablespoon or two of vinegar directly onto your scalp, let it sit on your hair a minute or so, and then rinse. Vinegar is rather strong so use your own judgement which method to use. Some people find this undiluted method too strong for their scalp.

Periodic apple cider vinegar hair rinses will also help prevent or get rid of a flaky or itchy scalp
For help with dandruff it is recommended to use the direct application method. Massage the vinegar thoroughly onto the scalp and let sit for at least 15 minutes.
The acids and enzymes in the vinegar kill the "bottle bacillus", a bacteria that is one of the causes for many scalp and hair conditions. The bacteria clogs hair follicles allowing dry crusts to form that itch and flake.

Now to resolve any problems:
If your hair becomes frizzy, use less baking soda or don't let it sit on your hair as long. Baking soda is a very effective cleaner, so you may have to play around with how much to use.
If your hair becomes greasy, use less vinegar or try applying the vinegar only to the ends of your hair.
If your hair dries out, use coconut oil or jojoba oil by applying just a bit to ends and scrunch. Leave this in. Repeat once a week or as needed.

Note:
Vinegar will not strip hair color the way chemical lighteners will so it shouldn't remove hair dye. The effect of vinegar is more subtle.

 A wonderful option for your vinegar rinse is to use an herbal vinegar.
The addition of herbs to the vinegar allows the rinse to enhance hair color, help bring out desired highlights, and condition hair at the same time.


Vinegar rinse for lighter hair
Chamomile and Calendula have long been used for home hair rinses to condition and try to keep that lovely blonde color from turning what we know as "dirty blonde".
Nettles are full of minerals, chlorophyll and antifungal properties used to prevent and treat scalp funk. Nettle is also a stimulant used to enhance hair growth.
Lemongrass and grapefruit essential oils are additional antimicrobial aides as well as offering their fresh citrus aroma.


Vinegar rinse for darker hair
Sage and Rosemary are often used to help darken greying hair and bring out auburn tones.
Sage, rosemary and nettles are a tonic for dry hair and itchy, flaky scalp. It is also said that these invigorating herbs enhance hair growth.
Basil and lavender essential oils combine for an uplifting, refreshing aroma.


Vinegar rinse for all hair types

Lavender has been called the 'mother of all essences'. Just as its skin-reparative properties have earned it a well-deserved reputation with skin care, lavender can also contribute to a healthy, conditioned head of hair. Its use helps to degrease oily hair and is among the list of herbs said to stimulate hair growth and prevent hair loss.


Sunday, August 25, 2013

Self-Reliant Clean, Homemade Laundry Soap


Once on the mindset of environmental awareness, leaving a green footprint, becoming more self-reliant, being an educated consumer, and of course saving money, we get on a roll of what next we can do for a healthier lifestyle.

Cleaning our clothes is a part of our everyday lives and how we go about it can be more than mindlessly doing what it takes to get the job done. Are you loyal to a certain brand detergent or do you buy whatever is on sale or for which you have a coupon? Do you faithfully use a clothes dryer because you have no choice or are always rushed for time, or do you try to use a clothes line whenever possible to save money or energy? All personal choices we may never have thought much about before environmental concerns became a public awareness movement.

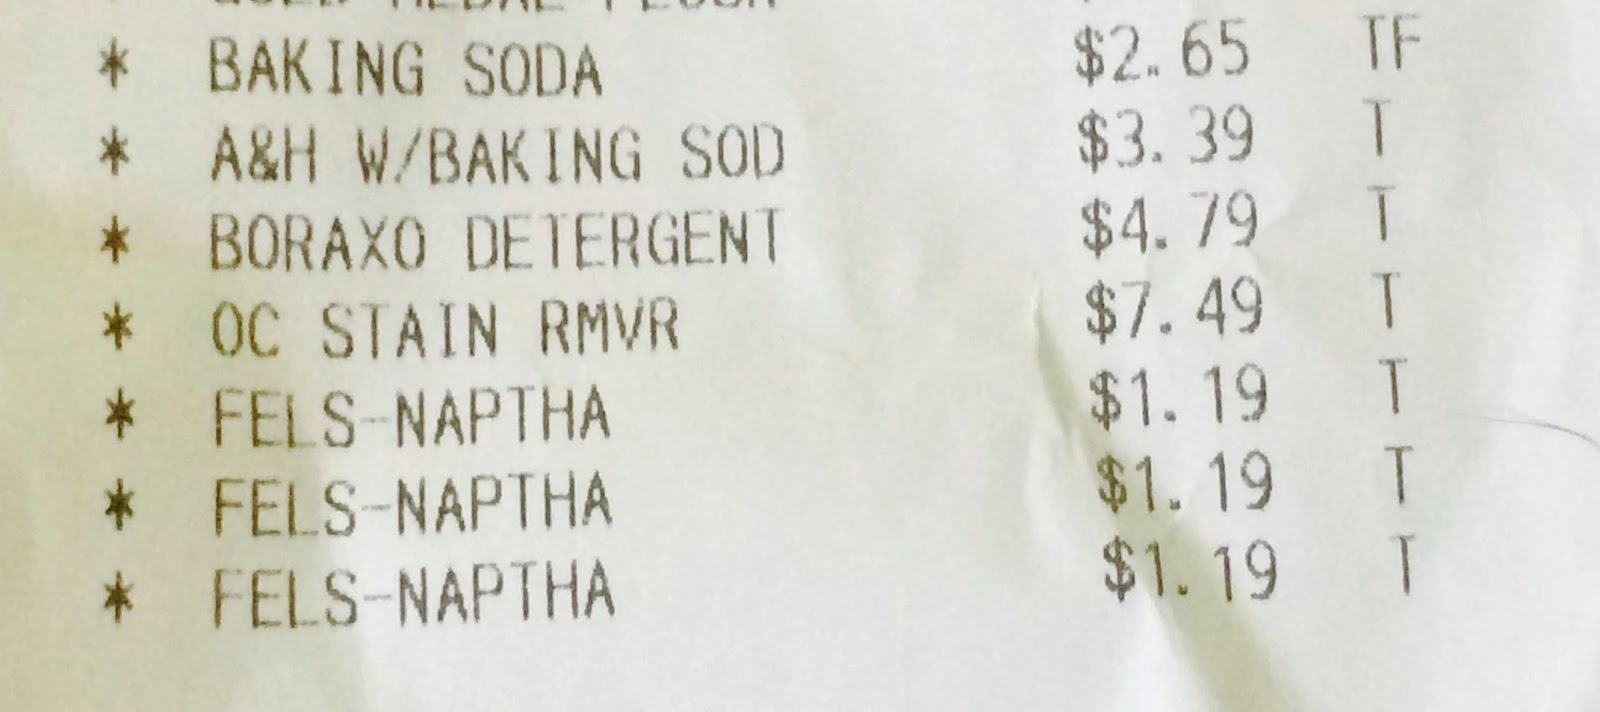
Making your own laundry soap may initially seem like something you would assume you hadn't the time to be bothered. But once you try it, you'll find that the ten minutes it takes to mix the ingredients is definitely worth it because one batch will last you for weeks. Not only that, but for a cost of less than $22, you'll have enough on hand for dozens of loads of laundry. Figure a typical laundry bottle of 50 fluid oz. has enough for perhaps 32 loads at about $5 a bottle. The recipe below for a powder laundry soap makes 32 cups.  You only use 1 - 2 tbsp. per load, so if one cup is equal to 16 tbsp. that means you'll get at least 8 loads per cup. Thirty-two cups of soap for $21.89 plus tax is a substantial savings.


There are other reasons to make your own. Perhaps you are sick of being part of the system capitalizing on the power of advertising with consumer spending. Perhaps, even though you recycle, you are tired of all those plastic bottles or boxes and the environmental impact to make the packaging in the first place. Perhaps you're tired of worrying about the soup of chemicals washed down the drain with every load. Making your own with any products means you are in control, you know exactly what the ingredients are, and how safe they are for both your family, the water table and the environment in general. For people with sensitive skin or allergies, understanding the ingredient list may be the most important.


Many people just assume that homemade isn't as good as commercial formulations. The billion dollar advertising industry has this mindset effecting every aspect of people's lives. Remember, you are paying for the name, you are paying for the cost of all that advertising. You will have to experiment with how much detergent you use for the type of dirt your family gets into, but you may be pleasantly surprised that a homemade version works just as good, if not better, than the chemical-laden commercial products on store shelves.

An additional plus with homemade soap is that commercial soaps may be too sudsy for water efficient washing machines. HE machines use less water and need detergents which rinse faster and more efficiently. Clothes with leftover soap residues end up looking dingy and we just assume it is because the soap isn't working. In reality, it is because the soap isn't being rinsed out properly.


Here is what you'll need:

HOMEMADE POWDERED LAUNDRY SOAP

1  4 lb. 12 oz. box Borax (2.15 kg) (Sodium Tetraborate)

1  4 lb. box Arm & Hammer Baking Soda (1.81 kg) (Sodium Bicarbonate)

1  3 lb. 7 oz. box Arm & Hammer Washing Soda  (1.56 kg) (Sodium Carbonate)

3  bars of Fels-naptha soap or pink Zote soap

1  container of Oxyclean (3.5 lb or 1.58 kg)

Start out by getting a 5 gallon bucket. Dump all the powdered ingredients into the bucket.
Using a cheese grater, grate the Fels-naptha or Zote soap so it falls right into the bucket as well.
Use a lid to the bucket and simply mix by shaking and turning the bucket upside down a few times OR use a large restaurant size spoon and hand mix to blend everything.
Store in a smaller container such as a large plastic tub or cookie jar. Just be sure to have a lid to keep out pets and children. Use a scoop of some sort that you can judge to measure from 1 - 2 tbsp. per load. The grated soap pieces will dissolve in the wash water even if you choose to use cold water.
The smell is nice and not overpowering. You can always add your own scent using lavender, sweet orange or tea tree essential oils. How much you use is up to your own experimentation with what you like.

If you want a homemade stain remover, here are three great recipes:

MIRACLE CLEANER

1/4 cup Baking Soda

Enough Hydrogen Peroxide to make a paste.

Rub a bit on the stain before washing.


ARMPIT AND COLLAR STAINS

1 cup Dawn dishwashing liquid

2 cups Hydrogen Peroxide

Mix in a spray bottle and use as needed on stains.


OXYGEN BLEACH

1/2 cup Baking Soda

1/2 cup Hydrogen Peroxide

2 cups water

Mix in a bottle and spot treat stains.


Enjoy not having laundry soap on every store list! 
Less to spend, less to haul.