Meadow Muffin Gardens logo

Sunday, October 18, 2015

The Warming Power of Ginger

Ginger root
Zingiber officinale
Tropical perennial
reed-like
Native to East Asia and tropical Australia


When it comes to preparing Asian food, there is no comparison between using fresh ginger root and the dried powdered ginger. The spicy, warming, yet sweet taste adds the touch you want in oriental cooking. The powdered version is hotter and spicier. One of the oleoresin compounds, gingerol, is why this rhizome is so spicy.

Traditionally, because of its antimicrobial properties, ginger has been used in cooking to help preserve food against Shigella, E. coli, and Salmonella.
But since it has such a variety of uses, it is one of the most popular herbs and with such positive studies behind it, it is one of the more accepted herbs in Western medicine.
Ayurveda calls ginger the "universal medicine" and it is one of the most prescribed hers in TCM (Traditional Chinese Medicine).

As a hot tea, ginger is a very healthy tonic and one of the best for improving digestion. Served with lemon and honey, ginger tea is a delicious way to control any type of nausea. Motion sickness, morning sickness and medication induced nausea can all be relieved with ginger. When you sip the tea, you can feel the heat from the tea warm up your core and then spread to your limbs. The term energetics is associated with ginger, which means the distribution of energy. Often circular, the release of heat is followed by a coolness.

At the onset of a cold or fever, start drinking hot ginger tea. By warming you up from the inside, it can stop the shivers.  Ginger stimulates fluid loss by way of sweating or getting stuck mucus flowing again, therefore great for loosening phlegm and relieving sinus congestion.
For headaches, stir two tablespoons of ginger powder into hot water at the first sign of pain.
Sore throats and coughs can be relieved by drinking ginger tea, sucking on ginger candy, taking ginger infused honey right off the spoon or adding it to your hot tea.

Honey, Lemon & Ginger Syrup
Here we have a syrup made up of raw honey, lemons and ginger root. Taken as is or made into a tea, this can be a winning combination to feel better. Honey actually absorbs moisture, called hygroscopic, so it is helpful for cold symptoms as it can bring moisture to tissues in the throat. Being antibacterial, it helps to kill infection causing bacteria.

Lemons have both antibacterial and antioxidant qualities. Rich in vitamin C, the antioxidants in lemons help with the common cold as free radicals are destroyed within the body.

Ginger candy is a great thing to have on hand to suck on when nauseated, have a belly ache, a cough or a sore throat. It makes a sweet, spicy snack on its own or can be added to a cup of hot tea.
Ginger candy can be found at most health food stores but here is a recipe to make your own:
Ginger candy found in the store is usually a pale yellow color because sulfates were added to keep the nice color. Unsulphured is available and the color will be a more tan color.
Recipe by Rosalee de la Foret


1 lb of fresh ginger root
1 lb of sugar
water
kitchen scale
wax paper
saucepan

Use a spoon to gently scrape off the papery sheath on the ginger. Wash the root.
Slice it fairly thin or cut into chunks.
Place the ginger pieces into the sauce pan and cover with water.
Bring to a boil and simmer for 30 to 40 minutes or until the ginger looks translucent.
Drain off the liquid which is really ginger tea but reserve 1/4 cup.
If you want to save the tea to drink later, dilute it since it'll be very strong.
To figure how much sugar you'll need, weigh the ginger. You'll be using the same amount of each.
For example, if you have 8 oz.volume of liquid, you'll need 8 oz. by weight of sugar.
Return the ginger pieces, the measured amount of sugar and the 1/4 cup of reserved liquid.
Turn the stove to medium high and stir frequently.
The sugar will quickly dissolve.
Turn the heat down and let it simmer until the liquid is reduced and crystalizes.
Stir frequently, you don't want the ginger to scorch.
Once the mixture looks a bit dry, lay the ginger pieces out onto a sheet of wax paper and let it cool.
Store in a covered container in a cool place. 


Ginger speeds up the delivery of healthy plant chemicals into the bloodstream. Working as a blood thinner, it increases blood flow throughout the system. This helps to relieve cramps and menstrual discomfort, cold fingers and toes from spasms, even helps prevent blood clots.  Symptoms of stagnant blood often results in pain. Ginger helps to relieve these symptoms as it dilates blood vessels and increases circulation.

Anti-inflammatory actions make ginger widely used for osteoarthritis and rheumatoid pain.
Taken internally as a tea is wonderful, but also take advantage of hot ginger compresses.
Muscular aches, abdominal cramps, kidney stone attacks, bladder inflammation, back ache, neck pain, neuralgia, etc. can be relived using a hot compress.

Directions for making a hot compress:
Bring a gallon of water to a boil and then turn down to a simmer. Meanwhile wash but don't peel a ginger root. Grate the root by hand using a rotating, clockwise motion instead of the usual back-and-forth movements. This helps keep the tough fibers from building up on the grater. Put the grated in the center of a clean muslin cloth cut into an 8-inch square. Draw up the corners and tie with a string. Once the water is no longer boiling, squeeze the grated ginger bag so some juice drops into the water, then lower the bag down into the pot. Cover and let simmer for about 7 to 10 minutes. Press the bag along the side of the pot to help release the juices. The water should turn a golden yellow. Remove the bag and set aside.
Holding a hand towel by the ends, dip the middle part into the pot to get it hot and wet. Carefully squeeze it out and lay it over the site of pain. Lay the ginger bag on the towel and cover this with another dry towel to help hold in the heat. Keep in place for 45 minutes, rewarming the towel in the hot water to keep the compress hot. Repeat every 4 hours or as needed.

Fresh grated ginger infused in olive oil creates a wonderful, warming oil to be used as a pain relieving massage oil, a post-workout muscle oil to prevent cramping, a chest oil for congestion, a bath oil or as a foot or hand rub to bring back circulation to cold fingers and feet.
To make your own, you'll need a bit of patience:
 Shred enough ginger root to give you 2 cups. Add to a small crock pot and cover with 3 cups of olive oil. Turn the crock pot onto the lowest setting, you don't want the oil to boil. Leave the cover ajar to allow the moisture from the ginger to evaporate. If the moisture cannot evaporate your oil will easily mold. Keep an eye on the pot. Should it begin to bubble, turn off the crock pot for a bit and then turn back on. The process will take about two days. The greenish color of the olive oil should turn a golden color and you'll be able to smell the zing of ginger in the oil. Once done, strain the oil by stretching a cheesecloth over a bowl held in place with a rubber band around the bowl. After the oil has strained through the cloth, gather up the ends and press the remaining juices out with a wooden spoon. Allow the oil to sit for a day so any moisture left in the oil will settle to the bottle and you can pour the oil into a jar, leaving the water behind.
If you don't want to make your own ginger oil, you can purchase it through the given link.

ginger oil
Too often we'll buy a ginger root and end up throwing part of it away because we don't use it fast enough. Here are a few ways to store it:

Don't frustrate yourself trying to peel the knobby thing with a potato peeler. Here are a few methods:

1. Use a spoon to remove the papery sheath. Use circular motions to grate it so the fibrous and stringy root doesn't get hung up on the grater. Lay the shredded ginger out onto a piece of plastic wrap, roll up and twist the ends to close. Put into the freezer and snip off a piece when needed.

2. Slice the peeled root into thin slices, lay out onto a tray or plate and freeze. Once frozen store the pieces in a ziploc plastic bag. Handy to have on hand to add a piece to a cup of tea.

3. Freeze the whole root without bothering to peel first. Frozen ginger will grate smoothly without all the strings.

4. Use alcohol to preserve:
Puree it with a little vodka and store in the fridge
or
Cover ginger slices with sherry and store in the fridge
or
Peel the whole root, put into a glass jar, cover with vodka and store in the fridge.


Information for this post came from Rosalee de la Foret and John Heinerman


Tuesday, September 22, 2015

Saving Seed, Here we have the Zinnia


September is the time of seasonal change when plants near the end of their cycle and set seed. Perennial flowers go to seed and then die back to a dormancy state for the winter. The above the ground parts of the plant are cut back after frost to about six inches above the soil surface and the root system rests till the following spring. Annuals grow to maturity, go to seed and die, as the life cycle is over in one growing season.

The rules for gathering seed are generally the same for most of our annual flowers but here we focus on the zinnia.
Zinnias will reseed themselves, so it you like where they were located or just don't get to gathering any of them, let them alone to dry on the stalk and clean up the old plants in the spring. Between the wind and the birds those seeds will be scattered here and there without any efforts from you. But if you want to choose certain colors or want to have seeds to put in another area, then here is how to do it:


Zinnias are a favorite for anyone wanting a flowerbed to attract butterflies, hummingbirds and insect pollinators. They are easy to grow, come in a wide array of colors, bloom all summer long, are drought resistant, pest hardy, not fussy about soil and if you choose, you can get varieties up to five feet tall. These beauties from Mexico do love the sun and warm weather so it is important to wait till the soil warms up in the spring to plant the seeds.


Only save seed from open-pollinated varieties. There are some hybrid zinnia types that won't grow true to the parent from saved seed. Here is a list of varieties that are open-pollinated:
Green Envy
Bright Jewels
Canary Bird
Candy Cane
California Giant
Lilac Queen
Lilliput
Miss Wilmott
Persian Carpet
State Fair Mix
Cut'n Come Again

Choose the strongest, biggest blossoms for seed saving. Though cutting off the spent flowers is tempting because of their unsightliness, resist the urge if you want the seed. The only way to get the seeds is to let the pods dry out on the plant. 

These flowers are drying but not ready yet to cut off:


The flower head has to be completely dry. It'll be dark brown and dry when ready to cut. Trying to harvest too early will result in immature seeds that won't germinate. Choose the ones you want and deadhead the rest. You won't need to save every flower unless you plan on selling them or giving them away. For your own use you'll be surprised how many seeds come from just one flower head.


Cut off the dried flower heads and choose one of two ways to prepare to save them:


Some people just put the entire seed head, petals and all, into a paper bag and store them in a dry, cool, dark place for the winter.
Other people like to do the work now rather than in the spring.
The dried petals need to be pulled off and the seed cone torn apart to gather the seeds. It'll be messy so do it over a tray or something to catch the seed and separate them from the dried petals. Once you pull off the dried petals, what you'll be looking at is an arrow-shaped base which is the seed bundle. This bundle is torn apart to expose and separate all the seeds.


There are also two ways to save your seeds:

Put them into a paper bag or envelope and store in a dark, cool, dry location away from heat and moisture. The bag needs to breathe so don't use plastic. If stored in a sealed plastic bag there is the risk of condensation from moisture and heat. Seeds stored properly have a good germination rate that will decrease at about 10% per year.

The other method of storage is refrigeration or freezer. This eliminates the three risks to seeds which are heat, air and the problem of condensation. The deterioration process is halted and seed can last for years with little drop in germination rates. Put the seeds in ziploc plastic bags or tightly sealed containers and store in your refrigerator or freezer till needed. In the late spring when you pull out those seeds, don't take more than you plan to plant at the time. You don't want the seeds defrosting and then putting those you don't need back into the cold.

Seed saving can turn into a really fun hobby, not just for flowers but for your garden vegetables as well. Depending on the vegetable, the seed saving process may differ from annual flowers.
Here is a good book on the subject of seed saving:


Sunday, September 6, 2015

Blackstrap Molasses...Good-bye Fatigue, Cramps


Starting a conversation with the phrase "back in the olden days" may immediately cause eyes to roll, with the thought being "here we go again", but many times those old days had the right idea.

Earl Mindell's Food as Medicine is a firm believer that what you eat can help prevent everything from colds to heart disease to cancer. The words "food" and "medicine" are once again being said in the same breath as physicians realize that it is necessary to treat the "whole body" rather than thinking that each bodily system needed its own specialist without the need to collaborate with one another to understand what is really going on with a patient.

Years ago before white sugar was the norm, blackstrap molasses was the principal sweetener used in cooking and baking. Cost and availability are usually the reason behind peoples' eating habits. The more processed a food gets the nutritional value usually decreases. Sugar is no exception.

Molasses is made from the sugar cane, a tropical grass that has been cultivated by humans for thousands of years. Light and brown, powdered and granulated white sugars are all highly refined with little nutritional value. The natural sugars we see in health food stores are made with fewer steps in their processing. The fewer the steps, the less impact on the environment as well as more of the naturally occurring vitamins and minerals will remain in the final product.

Blackstrap molasses contains significant amounts of vitamins and minerals. It is the syrup that remains after the sugar cane is made into table sugar. Blackstrap is the most concentrated and carmelized type. There are three different types of molasses: unsulfured, sulfured, and blackstrap.  To make molasses from sugar cane there are two tasks required. First the sugar cane juice has to be separated from the pulp, and then the sugar (sucrose) has to be extracted from the juice. To do that there are what they call "rounds of processing".

After a first round of processing, which involves spinning the juice and heating, the remaining syrup is the light molasses seen in the grocery store. It is light in color and has a mild taste. A second round of processing is done to extract more sucrose and that result is what is processed and sold as table sugar. The resulting syrup from that round is the dark molasses seen in the grocery store.

Finally, with a third round of processing, the result is known as blackstrap molasses. This syrup is dark, thick and the most nutritious. 

Significant amounts of calcium, copper, iron, magnesium, manganese, potassium and selenium are all found in blackstrap molasses.
Adding blackstrap molasses to the diet is like adding a source of power to your system. 

Anyone needing a boost in iron intake should consider working molasses into their food intake. Iron is critical for the proper transport of iron to all bodily tissues. Proper levels of hemoglobin and the formation of new cells in the body are maintained with ideal iron absorption. Compared to red meat, blackstrap molasses is lower in calories and doesn't contain any fat. 

Other health benefits of molasses include relief from diabetes, obesity, stress, acne and other skin problems, constipation, headaches, arthritis, anemia and even cancer. Bone health, electrolyte balance, hair care, the nervous system, stronger immune system and wound healing are all helped along with the nutritional benefits of blackstrap molasses.

It has also been found that blackstrap molasses is one of the best remedies around for menstrual cramps!
This is another one of those old-fashioned remedies our grandmothers swore by and fortunately such knowledge is making a comeback. 
Once a day, combine a tbsp of raw apple cider vinegar and a tbsp of blackstrap molasses in a glass of water. Raw Apple cider vinegar and raw honey is another combination that has survived the test of time for maintaining vitality. But being blackstrap molasses is so high in vitamins and minerals, it is ideal for helping with anemia, a real problem for menstruating women. Get the nutritional needs back in balance and a lot of those PMS symptoms will resolve themselves.   

Sulfur dioxide is often added to lighten the color of the molasses and extend its shelf life by preventing it from fermenting. Being there is a relationship between sulfur metabolism and sulfur dioxide and sulfites, the potential problems with allergic reactions to sulfites in foods may be good enough reason to look for unsulfured molasses. Another reason for that choice is that sulfur dioxide is a component in the production of acid rain.

It is doubtful you will find anyone today slathering their morning toast with blackstrap molasses as was done in Colonial days, but below are two great ways to sneak it in:


Iced Blackstrap Molasses (Earth Clinic) 

1 tbsp blackstrap molasses
hot water
3/4 cup milk or dairy substitute
ice

Add the molasses to a glass and add just enough hot water to cover the molasses. Stir until dissolved. Add the ice and top off with the milk, soymilk, almond milk or whatever you choose. Vanilla or chocolate almond, soy or coconut milk are all tasty additions.


Ginger Molasses Muffins (Marlene Falsetti from Taste of Home magazine)

1/2 cup vegetable oil
1/4 cup sugar
1/4 cup packed brown sugar

Beat the above three ingredients in a large size bowl.

1 egg
1 cup blackstrap molasses

Beat in the molasses and the egg.

In another bowl combine and sift together:

3 cups all-purpose flour or 1/2 all-purpose flour and 1/2 cup wheat flour 
1 1/2 tsp baking soda
1 tsp ground cinnamon
1 tsp ground ginger
1/2 tsp salt

Stir the dry mixture into the molasses mixture alternatively with 

1 cup water

Fill greased or paper lined muffin cups 2/3 full.
Bake at 350 degrees for 18 - 20 minutes.
Cool in pan for 10 minutes and remove muffins to a wire rack.
Makes about 20 muffins


Another hearty muffin recipe:

Molasses Raisin Muffins


Blackstrap Molasses Cookies (the hungry hounds blog)


3/4 cup butter, room temperature
1 cup brown sugar
1 egg
1/4 cup blackstrap molasses
1/4 cup corn syrup

Using a stand mixer or a hand mixer, beat the butter and brown sugar together at high speed for 3 minutes for stand mixer or 6 minutes with hand mixer.

Add egg, molasses and syrup
Mix to combine

2 1/4 cups flour
2 tsp baking soda
1 tsp cinnamon
3/4 tsp ground ginger
1/2 tsp allspice
1/2 tsp ground cloves
1/4 tsp ground black pepper
1/2 tsp salt

In another bowl, sift together the above dry ingredients.

Add the dry ingredients to the butter egg mixture. Mix only enough to blend together.

Refrigerate for at least an hour. Allows the dough to firm up for easier handling.

Preheat the oven to 375 degrees 

Make a sugar topping using:
1/2 cup sugar

Make dough balls with your hands and roll in the sugar
Place on greased cookie sheets
Bake 11 minutes
You are looking for the edges to be done, but the middles to appear under-cooked, this slight under baking helps cookies achieve the wanted soft texture yet crackly appearance

Saturday, September 5, 2015

The Nicotine Habit, Why Smoking is so Tough to Give up


 As with many medical issues, people often don't change their lifestyles until faced with their own mortality by losing their health. So what is in tobacco anyway? 


Tobacco plants evolved the ability to make a nerve gas against insects. That ability is called nicotine, an alkaloid pesticide that plants evolved to defend themselves against insect pests. 


Cigarettes are the source of many irritants and poisons such as: reactive metal fragments, ammonia fumes, the paint stripper chemical acetone, hydrogen sulfide, methane, hydrogen cyanide, nitric oxide and formaldehyde. That certainly is not an inclusive list. According to David Bodanis in his book, "The Secret House", the reason cigarettes are the source of all these is because once lit the cigarette makes them itself.  During inhalation the glowing tip of the cigarette can reach 1,700 degrees F. That heat rips the tobacco and paper compounds into their constituent parts and from those basic parts, builds them up again into the poisonous, complex chemicals we started with. This is possible because under the intense heat hydrogen and oxygen come together to form water, which then superheats into steam and condenses as it cools. The chemicals have time to form in between the puffs on the cigarette which starts that process again and again. All that is going on just inside the cigarette, the dim glow behind the red hot tip.


Now imagine what is really in that smoke stream anyone around you has no choice but to breathe. The newly created chemicals of poison clot together in extremely small balls. By the time the cigarette is burned half-way down those little hydrogen cyanide balls are falling, ready to stick to whatever or whomever they land. In addition to that, the exhalation from the smoker is spewing out ammonia, cyanide, formaldehyde and mucus constituents from the nasal lining. 

According to Dr. Mehmet Oz, "Nicotine is one of the most toxic addictions-especially because of its physiological effect on the rest of the body. But the addiction itself is manifested in not only an emotional need for the drug but also a physical need; your brain tells your body it needs nicotine to prevent the symptoms of withdrawal. One reason that nicotine is addictive is that it creates pleasure in the brain, causing a feeling of relaxation. Over time, nicotine keeps your brain from supplying these chemicals that create these good feelings, and you end up craving more nicotine and the feeling it produces."


Everyone is told not to smoke. So why do people continue with such a harmful habit?  In his book, "The Secret Family", David Bodanis claims that nicotine works on the limbic system cells in the brain. By giving a boost in self-confidence many people crave, they soon think they need the stress relief cigarettes appear to offer.  Another reason that people, especially girls, enjoy their smokes is because the nicotine slows the stomach's usual movements which diminishes an appetite. Supposedly ideal for anyone trying to stay slim or lose weight. Women don't seem to realize that their idealistic body image could become an oxygen starved, wrinkled figure with thinning bones prone to fracture. Little is more harmful for maintaining a youthful facial complexion than the damage from free radicals caused by cigarettes.

The tobacco industry understands human nature. Young people vulnerable to peer pressure and normal insecurities are at a higher risk for poor decision making. Once the addictive properties of nicotine take hold, often people smoke for years until they can finally break the habit. Truth be told, many smokers claim to actually enjoy their cigarettes. Reaching for a cigarette while under emotional stress can be like having a good friend. Only true friends don't haunt you down the road.


A little encourage from popular herbalist Susun Weed:
"Tobacco is highly addictive and you can beat it. Get an extra edge on quitting by nourishing yourself with a handful of freshly toasted sunflower seeds and a cup of nettle or oatstraw infusion daily for 4-6 weeks before you stop smoking. Sunflower seeds reduce cravings for nicotine by filling nicotine receptor sites. Nettles and oatstraw strengthen nerves and cushion the impact of withdrawal."

Susun recommends the following book to help quit the habit:


The No-Nag, No-Guilt, Do-It-Your-Own-Way Guide to Quitting Smoking by Tom Ferguson, MD, Ballantine, 1987.


Tuesday, September 1, 2015

Late Season Nesters....American Goldfinch


While it may seem to us that the harvest season begins the winding down of summer, in actuality, the latter part of the season is nesting time for some of our bird friends. Cardinals, Mourning Doves and Robins all have multiple broods right up until the fall months. 
But the American Goldfinch doesn't even begin to nest until late June.

The reason for the goldfinches being such late nesters is that rather than feeding their young insects, their search is for seeds. Wildflowers are going to seed by July and August, just in time to be the food source for goldfinch hatchlings. 


When you plan your wildlife friendly landscaping, in addition to choosing native plants that offer food sources, also consider what can offer nesting material. Seed fluff is the type of seed from plants such as thistles and milkweed. Goldfinches utilize this fluff to line their nests to create a soft and warm home for their nestlings as the nights begin to get chillier. 

Sunflower going to seed

Once your sunflowers start going to seed, you can hear when the goldfinches arrive. Their sound is very distinctive and pleasant. It is wonderful to hear their chatter and song amidst the drooping flower heads of these bountiful plants.

Milkweed going to seed
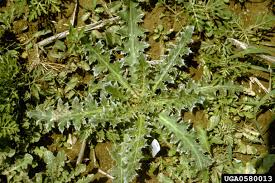
Milkweeds, sunflowers and native thistles are excellent choices for plants that will attract goldfinches to your yard and gardens. Many people aren't too keen on allowing thistles to go to seed in their garden areas. Granted, it isn't pleasant to work around the prickly thistle plant and even more aggravating to enjoy going barefoot and stepping on such plants. But if you have a naturalized, out of the way place that you want to encourage natural plantings, then let the thistles alone and allow them to offer the birds their seed fluff.


Other late blooming plants to have in your yard and gardens which will attract late nesters are Coneflowers, Asters and Goldenrods. These plants not only offer seeds, but they also attract insects which are a food source for many types of birds. Mourning doves and robins depend on insects rather than seeds, so having a variety of plant types is important.

Plant host trees such as the Oaks, which in turn attract caterpillars, also an important food source for the adults and chicks.

Shrubs (preferably berrying types, an example being the Viburnums) will provide shelter and hiding spots for the fledglings as they learn to fly and are more able to evade predators. Young birds are so vulnerable at this stage and many fall victim to prowling animals in search of an easy catch.

Provide a water source. Birds definitely need water, but it is also very enjoyable for them to have a place to just splash around.

Here is an excellent post on the American Goldfinch by The Cornell Lab of Ornithology


Fall Asters, Goldenrod

Coneflowers
New England Fall Asters


Viburnums and Carolina Rose

Wednesday, August 26, 2015

The Slow Fade of Dementia, Ambiguous and Anticipatory Loss, Grief


Caregivers bear the tremendous burden of witnessing the early signs of change in the behavior of their loved one and dealing with the anger and denial of trying to get through to the rest of the family. One very important thing family members don't understand is that unless you actually live with someone day in and day out you just don't see the same person as does the caregiver. The social stimulation of visits and the fussing from loved ones brought out conversation and smiles, only to return home and sink right back down under that black cloud.

Taking care of my mother for over two years has left me a puddle of tearful grief for the slow fading of my precious Mom and the bewildering, questioning of my own sanity. Changes in behavior brought the constant questions of what is normal for her personality, what is part of her condition, what could be a side effect from medications? Dealing with memory loss and confusion is bad enough for a person, but to add a chronic condition such as COPD on top of that and the resulting depression was enough to pull her down into a pit of despair. My desperation for her to fight only resulted in the wall between us to build brick by brick.


Together, we went through all the stages of grief: denial, anger, bargaining, depression and acceptance. Accepting this "new normal" as her life, having no choice but to leave her home and give up control and independence, was incomprehensible.  My reaction was to push, nag, beg, cry, whatever it took to get her to fight to maintain her strength, physically and mentally.  It was all- consuming, while my Mom continued to slowly lose a bit more of her spirit with each new day she woke to realize she had to get through another day. Fast forward three years and now that another sibling is caring for our mother, she is a medicated, zombie of her former self. The solution to the constant anxiety of struggling to breathe is that if the anxiety is relieved we can avoid the tendency to hyperventilate and thus panic. Welcome to the world of narcotics.

The stage of acceptance has arrived and she just doesn't care anymore. The version of Mom that is in the present is what the siblings actually interpret as her being "better". There is quiet and peace in the household only because there is no longer anyone "making waves" by pushing for alternatives and therapies. Palliative care is all there is now.

Gone is the frustration between what she "won't" versus "can't" do for herself. Now it is just the tender care as though she were our child. Now we deal with the guilt associated with our past reactions and emotions while dealing at that time with the craziness. But at that time we didn't understand what was going on. To reflect back now, bits and pieces make more sense. But that war of guilt continues to rage within our own minds, struggling for self-forgiveness for whatever we imagine we did so wrong.

Ambiguous loss and Anticipatory grief can be described as unresolved grief. It is different from the loss and grief surrounding a death. Closure is not possible and there is no peace because the loved one is still physically alive. This is the world surrounding and consuming a family dealing with dementia. This is the world of the patient herself as she must accept the slow loss of her own self and be very aware of it while it is happening.

There is confusion of the use of the words dementia and Alzheimer's disease. They are used interchangeably, but are not the same thing. Alzheimer's is a disease, dementia is not. Dementia is group of symptoms that affect mental tasks like memory and reasoning. Dementia can be caused by a variety of conditions, with Alzheimer's being the most common.

One of those conditions is called Vascular Dementia which is problems with the blood vessels. The brain needs a good supply of oxygen rich blood and if this supply is hindered and the brain is deprived of enough oxygen, as is with COPD, the brain cells could die. Symptoms may appear suddenly or gradually. A major stroke will cause symptoms to appear suddenly, while a series of mini strokes that may have happened over time, will cause a slower progression of symptoms.

There are several ways that COPD may affect thinking and memory. As less air is taken into the lungs, over time the blood oxygen levels in the blood become too low. Low levels of oxygen to the brain may cause neural damage with could increase the risk for memory problems. One big problem with a condition like COPD is that there is inflammation not just with the lungs, but inflammation of the entire body. Elevated levels of certain body chemicals related to inflammation can be linked to memory problems. Another issue is that because the body is working so hard to breathe and get enough oxygen there is the need to sleep more. If a person has trouble sleeping, the resulting fatigue can further interfere with thinking straight.

Since behavior changes can be so subtle, they may only be noticed by the patient himself/herself or by those who live with him or her. So the battle can begin with getting the message across to other family members that something is wrong and getting them to respect the patient or the caregiver's suspicions. It is interesting how differently people react to a physical condition versus something being wrong with the mind. At a time when family should be sticking together and supporting one another, it can become a nightmare when denial, fear, and/or the need for control over decisions, interferes with the big picture of what is best for the loved one.


Aside from going on and on with that, what it all boils down to is the fact that we miss our Mom. I miss the phone calls to rehash whatever event just happened in the family. I miss rambling on and on about the busy lives of our children. Gone is the interest she used to have in our world. Our children are going through the most exciting times in their lives with graduations, weddings, new careers, new homes...and though their beloved Nana is physically here, there is no longer the two way street of sharing in all those precious moments. The conversation is sadly one sided and often forgotten by the next day.
The strain to maintain a close relationship is becoming more difficult and though they call and visit, their lives are going on and their Nana is being left behind.

Witnessing the slow fade of someone we love is heart wrenching and everyone reacts differently in terms of their personal loss. Some hover and some run. We all deal with grief and loss in our own way and we need to respect one another without judgement. The emotional strain and pain of losing someone bit by bit is such a crazy state of limbo to have to go through. Though the mind may come to terms with the realities of the disease and expected outcome, it is unrealistic to expect the heart to be on the same time schedule. We have no choice but to anticipate that final loss, but to have to play the waiting game can be a horrendous, surreal roller coaster ride.


The best medicine in this world is love. When there is little else anyone can do, it is time to up the dose!


Friday, August 21, 2015

The Battle of the Flea is Not just what's On your Pet


Fleas are tenacious critters and their ability to persevere regardless of all of our ways to get rid of them is amazing. We cannot solely blame our pets for the presence of fleas in our homes. Being attracted to warm blooded animals they will make your pet their temporary home for a food source, but there is also a very real possibility they are hitching a ride into your home by way of your shoes or clothing.

The key to flea control is quick action. If you see signs and ignore them, even for a few days, the situation could become a nightmare. Telltale signs of the presence of fleas go beyond actually seeing the buggers. Observe your pet. If he starts with the twitching and sudden jerks to lick, especially areas like the belly, groin area, under the neck and behind the tail along the backbone, it is time to pay attention. 
If you see black specks laying on the areas where your pet spends its time sleeping, that is a good sign that your pet has fleas even if they don't appear to be bothering him. Those specks are "flea dirt" which is actually dried pre-digested blood. 
If you see little, rice shaped worms on your pets back end or on their bedding, that means they have tapeworms (Dipylidium caninum).  Fleas are notorious for transmitting  tapeworms to your pets. When your pet itches, they lick and when they lick they ingest the flea, and once the flea is ingested the tapeworm can complete it's life cycle. Adult tapeworms can be several inches in length living in your pet's intestinal tract. What you see are the sections that break off.

It is important to understand the life cycle of the flea. There are four stages: egg, larva, pupa, and adult. The typical life cycle will take anywhere from a couple weeks to months. It depends on the temperature in their environment and humidity levels. Fleas like conditions between 70 to 85 degrees Fahrenheit and 70% humidity.

So let's start with the females that hitch a ride into your home. Those adult females lay eggs following a blood meal from the host animal. Without blood the flea is unable to reproduce and being that is their goal in life they can very quickly make your pet miserable. The eggs are slightly smaller than a grain of sand and white in color. They are laid in the fur in bunches of about 20. One adult female flea can lay about 40 eggs every day. As your pet moves around those eggs fall off which is how the problem can suddenly appear all over the house. Eggs represent 50% of the entire flea population in a home.

With optimal conditions the eggs can hatch in only two days. If the temperatures are cold and dry it'll take a bit longer, perhaps up to two weeks. If the temperatures are warm with high humidity, the eggs will hatch in a few days.

The larvae that emerge from those eggs need to avoid light, so will nestle in carpets, dark corners, clothing lying around and upholstery. What they live on is the flea dirt that is found amidst other organic debris in their environment. The larvae make up about 35% of the population. This is why it is ultra important to wash all bedding your pet uses and to have a good vacuum cleaner. Strongly recommended is a vacuum with a microfiber bag or the type of vacuum using water such as a Rainbow. With a bagless vacuum there is good chance that when you empty the canister into your trash, you will just release those fleas and eggs back into your home. Microfiber bags are made to trap allergens, dust and fleas debris with no escaping. Water canisters need to be emptied each time but the fleas are dead from drowning.
If left to their own devices, those larvae will spin cocoons in 5 to 20 days from the time of hatching from their eggs.

The cocoon or pupae stage is the last developmental stage before the adult emerges that we usually see. The purpose of the cocoon stage is to protect the pupae for as long as it takes for conditions to be ideal for the adults to emerge. This can take from just a few days to years. The cocoons have a sticky coating that allows them to attach to carpet fibers so having a powerful vacuum cleaner is paramount.

What triggers the adult flea to emerge once developed is a rise in nearby body heat, higher levels of carbon dioxide and vibrations. All these are associated with the nearby presence of a warm-blooded body nearby, be that a pet or a person. Once fleas emerge they need to eat within a few hours. After feeding they'll begin to breed, lay eggs and the cycle starts all over again. Adult fleas account for only about 5% of the entire population in the house, but while on your pet they'll continue to feed, breed and lay eggs.

Before dousing your home with toxic flea bombs and chemicals there are other safer weapons of destruction against them: Borax, Diatomaceous Earth and Vinegar and the all important Vacuum Cleaner!


Use borax, Not boric acid!
What you want is Disodium Tetraborate or Sodium Tetraborate which is Borax. Borax is mined from the earth as a complex form of boron bound with other minerals. Boric acid does not occur naturally in nature, but is made from borax by adding hydrochloric acid and water. This increases the toxicity level so it is not a good thing to have around your pets or children.

Borax looks like salt, has no smell and doesn't get absorbed by the skin when touched. It kills fleas by dehydrating them as it makes small cuts in their exoskeleton. This works on the larvae but won't help you get rid of the eggs. Vacuum, vacuum, vacuum to get rid of the eggs.

Borax is also good for killing ants, bed bugs and roaches.
Borax is safe to have in your home and is much less toxic than insecticides.
If you are pregnant, avoid using any Borate substance which includes borax.
You don't want small children crawling around on the floor if there is borax still in the carpet.
Keep your cats away from the borax powder. Breathing in the fumes could cause health problems.
Don't put borax directly onto your pets. You don't want prolonged skin contact.
Keep borax away from your plants.

How to use:
Sprinkle borax liberally all around your carpeted areas.
Use a stiff brush or broom to work the borax down into the carpet fibers.
Wait at least six hours before vacuuming up the borax.

An alternative to borax is Diatomaceous Earth. 


Borax may give quicker results, but diatomaceous earth (DE) is completely natural and much safer for the family and pets. It is a simple mineral-silica. The steps for application are the same as for the borax. It kills similar to the borax by cutting into the exoskeleton and sucks the fluids out of the fleas' bodies. The action is physical rather than chemical. Hundreds of microscopic DE get all over the insect's body, and as the bug moves the DE scratches off their waxy coating and they dehydrate.  
Diatomaceous earth comes in two forms, pool grade and food grade. The type you want is food grade! 

Diatomaceous earth is formed from algae with siliceous shells. When extracted, they are already dead, but the shells remain. Though these shells are sharp they are too small to have any effect on humans. A totally safe, non-toxic method to kill not only fleas but bed bugs and chiggers.

If you don't have carpets, diatomaceous earth can also be used on hardwood floors. Don't forget to apply to the corners and along baseboard edges. 

Don't use in areas with fans blowing. A high draft will send the fine granules all over into the air and may be irritating to breathe it in.

When purchasing diatomaceous earth, read the label and besides making sure it is food grade and not pool grade, also check to make sure the concentration is around 99%. Any other formulation may not be as pure and safe for your family and pets. The other blends may kill fleas faster, but may contain insecticides.

Once the fleas come into contact with the powder, they usually die about 4 hours later. If possible, leave the powder on the floor overnight to ensure the fleas are dead before vacuuming.

Since flea eggs hatch after about a week after the eggs had been laid, it is best to repeat the process once a week for a month. You need to get to all four stages of the flea's life cycle.

Don't be concerned if you feel you did breathe in some of the DE powder. Unless you are dusting a garden and expect to be exposed to the dust for a period of time (in which case you should wear a mask) you should be fine. However, those with asthma may want to wear a face mask.
Diatomaceous earth is also used internally to treat for parasites, so don't be concerned as long as you are using food grade DE.

DE can be used as a way of flea treating your dog, but in moderation. If applied to your pet on a daily basis it can cause dry skin. Also, don't use on kittens, puppies, rabbits, guinea pigs or hamsters. Their small body mass could be a problem. 
To use on a pet for fleas:
Once a week application.
Put a towel over the head so the powder doesn't get into their eyes irritate their lungs.
Rub about 1 Tbsp into the fur of a dog over 35 pounds.
For dogs less than 35 pounds or for cats use about 1 Tsp.

To use on a pet for worms:
Add to food once a day till see no more signs of worms (stool, vomit, coughing, on bedding)
Add 1 Tbsp to the food for dogs.
Add 1 Tsp to the food for cats.

Diatomaceous earth can also be used in chicken bedding boxes to help with mites and lice.
Just sprinkle around the bedding inside the boxes.


Don't let the DE get wet. Moisture will reduce the effectiveness.

Good sites to visit for more information about DE are:


Last we have yet another use for vinegar!
Vinegar has been used for centuries to clean and deodorize. It has been used to get rid of ants and fruit flies in the kitchen. It has its use in the garden to prevent aphids from destroying plants. Weeds can be controlled with vinegar. 
Our beloved pets can smell fresher with a vinegar rinse and then towel dried. Kill two birds with one stone and send fleas packing as well.

To use as a flea bath:
Use Dawn Dishsoap to lather up your pet. Pour vinegar over your pet and massage it in. Let this mix stay on the pet for at least 10 minutes while you massage it throughout the fur down to the skin. Then rinse it all out.

To repel fleas:
Add a bit of vinegar to your dog's drinking water. This makes the pet's blood and skin more acidic and unfavorable to a flea's taste. 
Vinegar added to a cat's water may be too acidic for a cat's system. 
Another option is to spray vinegar (dilute if too strong) on the fur and massage to distribute it all over your pet.
This is a good method for both dogs and cats.
Spray vinegar onto pet bedding to deter fleas.
It doesn't matter whether you choose to use white or apple cider vinegar for spraying onto the pet or it's bedding. 
But for adding to the drinking water, use apple cider vinegar.

Good prevention also must include a good flea comb. Long-haired dogs and those with thick undercoats can be a challenge to flea comb but for short-haired dogs and cats it is a wonderful, very practical tool. Get in the habit of going over your pet on a regular basis and make it part of your pet's grooming. Flea combing is the best method for cats. Since cats' systems are so touchy with toxins, just running a flea comb over them is ideal. The cat loves the attention, it gets its grooming and you can nip any problems in the bud. Have a bowl of water next to you with a dash of dish soap and drop the fleas into the water as you find them.

Here we have a pet safe flea powder consisting of Diatomaceous earth, Yarrow flower and leaf powder, Neem powder, and Geranium essential oil. The link below the picture takes you into the shop with all the details about this item.

Natural Dog and Cat Safe Flea Powder

Pictured below are two herbal vinegar blends useful for people and their pets to help deter not only fleas but pesty bugs as well. Click on the link below the pictures for more information on them.

Herbal Vinegar Insect Repellent, Plantain, Comfrey, Yarrow

Herbal Vinegar Insect Repellent, Lavender and Plantain

Your dog will enjoy these flea repellent, homemade dog treats! 
Click on this link to take you to the blog post with the recipe.


Thanks to Jennifer Kvamme, DVM for her informative article on flea control
Thanks to Natasha Anderson for her informative article on Diatomaceous Earth and Borax
Thanks to the article from FleaBites on the use of vinegar and as a great source for information and supplies.