
 A major part of sustainable living is dealing with your own garbage. Adding kitchen scraps to your trash only adds to landfill bulk and because of its moisture content, lowers the temperature of the heap slowing down decomposition.
Perhaps you have a garbage disposal system but would rather utilize the waste. Those vegetable scraps, egg shells, coffee grounds and tea bags are a great source of nutrients.
Or if you're like our family with the "garbage bucket" under the sink, that bucket has to get dumped on a daily basis. In the middle of winter it is far nicer to just go into the basement rather than trudge out to the frozen compost pile. Besides, that compost pile just sits there during cold weather and attracts wild critters.
The main question most people have with an indoor worm bin is "Does it smell?" If properly maintained, meaning you don't overload it, the only odor should be a musty, earthy smell and little to no fruit flies. You'll learn for yourself how much is too much. The general rule is one pound of kitchen waste a day. Anaerobic conditions can be remedied simply by turning and aerating the garbage which also redistributes the worms. Fruit flies can be taken care of with a mason jar of apple cider vinegar. Vinegar attracts the flies and they fly right in.
A good source for information on vericomposting is the book "Worms Eat My Garbage" by Mary Appelhof. She explains the entire set up process and answers most any question thought up on the subject.
The Gardener's Supply Company, is a great source in which to purchase your worm bin. The worm bin itself will cost about $125 and the red wigglers worms (Eisenia foetida) are about $40 for 2 pounds which is around 1500 worms. My bin is round in shape but they can also be square.
How it works is the bin is made up of four sections. You have the base with four legs which serves as the drainage part by collecting the leachate, which is the liquid by-product of the break down of the garbage. This "tea" gets collected in a small bucket (you have to provide) as it drains from an attached spout.
 Actual worm tea is the liquid fertilizer created by steeping the castings/compost in water for a period of time, then diluted and used to foilage spray your plants or add to the watering can. The leachate can be used too, just be aware that if your worm bin isn't the healthiest (anaerobic conditions) the liquid may have unstable metabolites which can harm your plants. If unsure, let the liquid aerate and dilute before using. Outdoor plants aren't as touchy as houseplants and can tolerate such variations. I use my liquid tea and haven't had a problem but my bin has been established for a few years so I'm assuming is pretty stable.
To begin your set up, add the following to the top tier: shredded newspaper and twigs, bark or leaves. Just use the black ink part of the newspaper. Colored inks may contain toxic metals. The twigs and bark are good as aerators for drainage. Add about one pound of kitchen waste followed by your red wigglers.
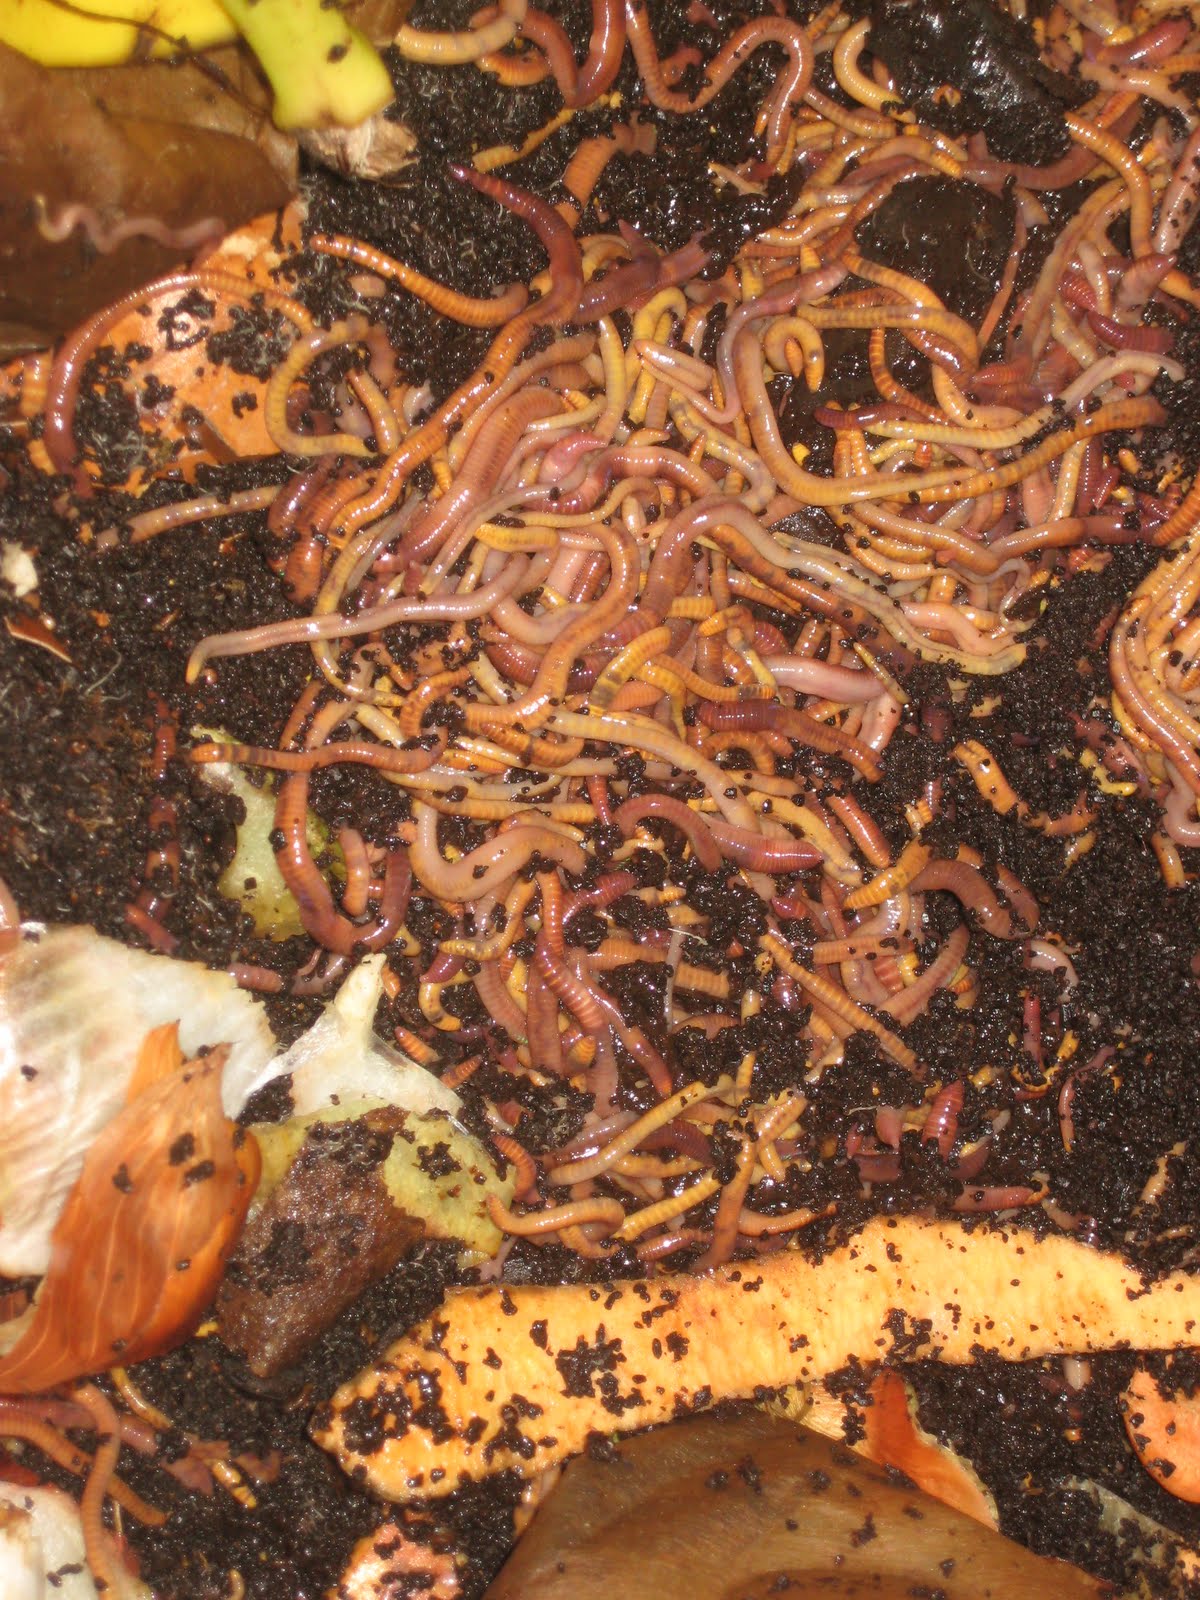
 If you have pets such as guinea pigs, rabbits, chinchillas, rats, mice, their bedding and droppings are great additions to your worm bin. Don't add any waste from meat eating animals. Do not add bones or fatty scraps. Your worms will really appreciate egg shells. When it comes time to sort your worms you'll notice how many worms make egg shells (the halves from when we crack out eggs) their little home.
The worms you dig up in your yard won't survive for this purpose. Soil-dwelling types don't process large amounts of organic material. Besides, earthworms don't like when their burrows are disturbed as we dig around. Anyone with horses is probably familiar with these redworms living in the manure piles. They are also at home in piles of decaying leaves. Transferring red wigglers to your garden may seem like a good idea but most likely they won't survive being they aren't soil dwellers.
Over the next few months, you'll notice how your garbage is transformed into black, moist castings. This manure is like gold for your plants. When the top tier is full, rotate the top tier to the middle and bring an empty tier to the top. The worms will work their way through any remaining scraps and then work their way up through the holes in the tier bottoms seeking fresh garbage. You'll notice that once the worms have exited the worm castings they are ready for your use. The rotation process can be done again with the remaining empty tier.
 I empty my full tiers about twice a year, spring and late autumn. Let the castings in the tiers until spring and by then the whole unit will be pretty heavy. The easiest way to sort out any remaining worms before transporting the castings/compost to your garden is to get an old tablecloth or shower curtain and lay it on the basement floor (somewhere you can easily clean up) or outside. Carry one tier at a time, it will be heavy. Dump the castings out of the tier onto the tablecloth or shower curtain. The redworms do not like light so they will escape the light by going to the bottom of the pile. They will sort themselves. Just wait a bit and scoop off the top layer by layer until you are left with your pile of worms on the bottom. Repeat with remaining full tiers.
Refresh the empty tiers with shredded newspaper and twigs again, add fresh garbage and return your worms. If you have a healthy worm bin you won't have to purchase new worms again. They reproduce easily which you'll recognize as little white babies. Should your population dwindle it may mean your bin is too wet. Provide dry paper and aerate by turning the mix.
The castings can be used either by adding a scoop directly to your planting hole when first putting in your tomatoes, peppers, etc. or use as a side dressing later in the growing season. What is great about worm castings is you needn't worry about burning your plants. This type of fertilizing isn't like chemical fertilizers. It becomes part of your soil as it breaks down and the plants use what they need when they need it.
The worm bins are now ready for the next six months before emptying again before winter. Add these castings to your garden in readiness for the next growing season.
So get past the "eewwwness" of touching these little guys and enjoy your new hobby!
No comments:
Post a Comment