Meadow Muffin Gardens logo

Sunday, August 25, 2013

Self-Reliant Clean, Homemade Laundry Soap


Once on the mindset of environmental awareness, leaving a green footprint, becoming more self-reliant, being an educated consumer, and of course saving money, we get on a roll of what next we can do for a healthier lifestyle.

Cleaning our clothes is a part of our everyday lives and how we go about it can be more than mindlessly doing what it takes to get the job done. Are you loyal to a certain brand detergent or do you buy whatever is on sale or for which you have a coupon? Do you faithfully use a clothes dryer because you have no choice or are always rushed for time, or do you try to use a clothes line whenever possible to save money or energy? All personal choices we may never have thought much about before environmental concerns became a public awareness movement.

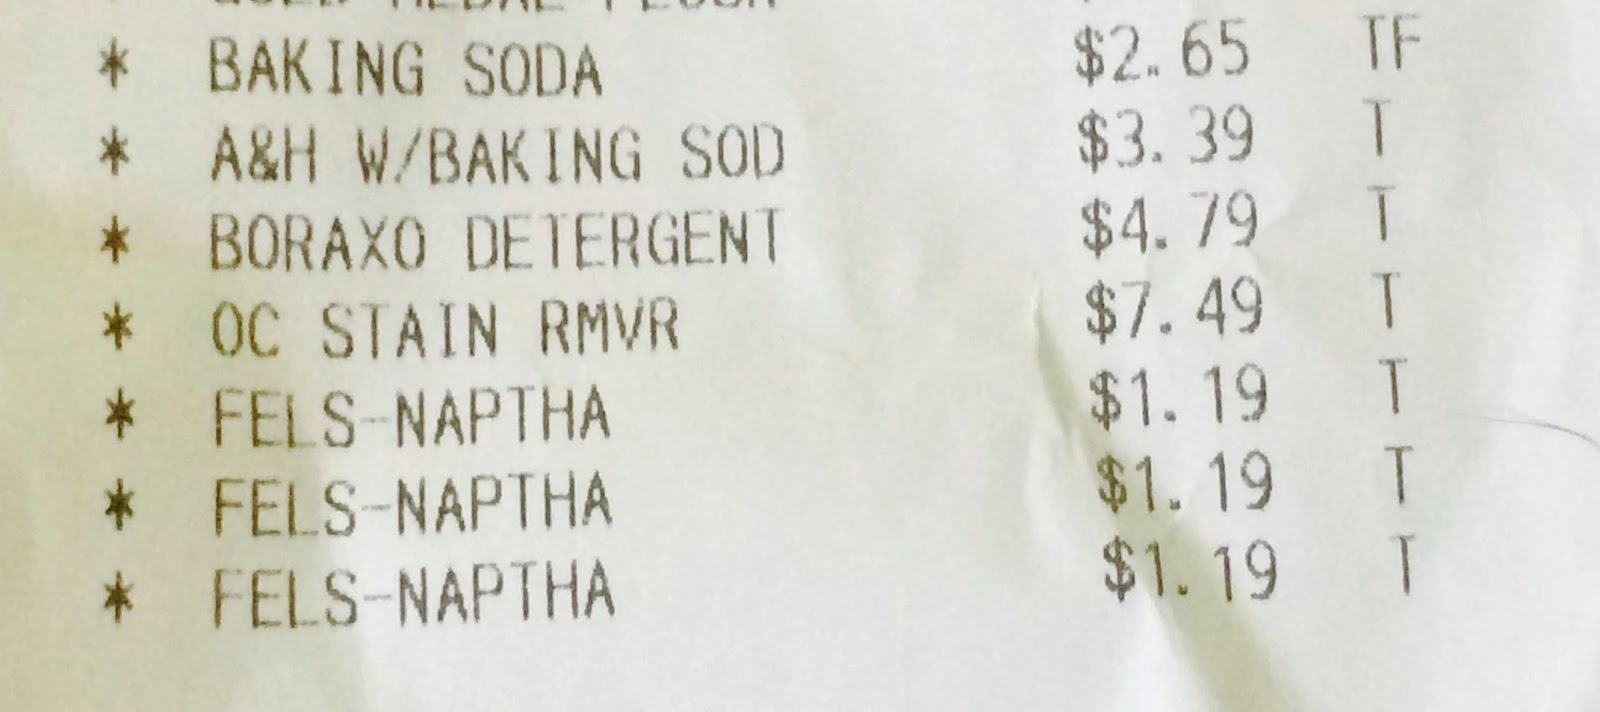
Making your own laundry soap may initially seem like something you would assume you hadn't the time to be bothered. But once you try it, you'll find that the ten minutes it takes to mix the ingredients is definitely worth it because one batch will last you for weeks. Not only that, but for a cost of less than $22, you'll have enough on hand for dozens of loads of laundry. Figure a typical laundry bottle of 50 fluid oz. has enough for perhaps 32 loads at about $5 a bottle. The recipe below for a powder laundry soap makes 32 cups.  You only use 1 - 2 tbsp. per load, so if one cup is equal to 16 tbsp. that means you'll get at least 8 loads per cup. Thirty-two cups of soap for $21.89 plus tax is a substantial savings.


There are other reasons to make your own. Perhaps you are sick of being part of the system capitalizing on the power of advertising with consumer spending. Perhaps, even though you recycle, you are tired of all those plastic bottles or boxes and the environmental impact to make the packaging in the first place. Perhaps you're tired of worrying about the soup of chemicals washed down the drain with every load. Making your own with any products means you are in control, you know exactly what the ingredients are, and how safe they are for both your family, the water table and the environment in general. For people with sensitive skin or allergies, understanding the ingredient list may be the most important.


Many people just assume that homemade isn't as good as commercial formulations. The billion dollar advertising industry has this mindset effecting every aspect of people's lives. Remember, you are paying for the name, you are paying for the cost of all that advertising. You will have to experiment with how much detergent you use for the type of dirt your family gets into, but you may be pleasantly surprised that a homemade version works just as good, if not better, than the chemical-laden commercial products on store shelves.

An additional plus with homemade soap is that commercial soaps may be too sudsy for water efficient washing machines. HE machines use less water and need detergents which rinse faster and more efficiently. Clothes with leftover soap residues end up looking dingy and we just assume it is because the soap isn't working. In reality, it is because the soap isn't being rinsed out properly.


Here is what you'll need:

HOMEMADE POWDERED LAUNDRY SOAP

1  4 lb. 12 oz. box Borax (2.15 kg) (Sodium Tetraborate)

1  4 lb. box Arm & Hammer Baking Soda (1.81 kg) (Sodium Bicarbonate)

1  3 lb. 7 oz. box Arm & Hammer Washing Soda  (1.56 kg) (Sodium Carbonate)

3  bars of Fels-naptha soap or pink Zote soap

1  container of Oxyclean (3.5 lb or 1.58 kg)

Start out by getting a 5 gallon bucket. Dump all the powdered ingredients into the bucket.
Using a cheese grater, grate the Fels-naptha or Zote soap so it falls right into the bucket as well.
Use a lid to the bucket and simply mix by shaking and turning the bucket upside down a few times OR use a large restaurant size spoon and hand mix to blend everything.
Store in a smaller container such as a large plastic tub or cookie jar. Just be sure to have a lid to keep out pets and children. Use a scoop of some sort that you can judge to measure from 1 - 2 tbsp. per load. The grated soap pieces will dissolve in the wash water even if you choose to use cold water.
The smell is nice and not overpowering. You can always add your own scent using lavender, sweet orange or tea tree essential oils. How much you use is up to your own experimentation with what you like.

If you want a homemade stain remover, here are three great recipes:

MIRACLE CLEANER

1/4 cup Baking Soda

Enough Hydrogen Peroxide to make a paste.

Rub a bit on the stain before washing.


ARMPIT AND COLLAR STAINS

1 cup Dawn dishwashing liquid

2 cups Hydrogen Peroxide

Mix in a spray bottle and use as needed on stains.


OXYGEN BLEACH

1/2 cup Baking Soda

1/2 cup Hydrogen Peroxide

2 cups water

Mix in a bottle and spot treat stains.


Enjoy not having laundry soap on every store list! 
Less to spend, less to haul.


Saturday, August 24, 2013

Green Beans Galore, what to do with an Abundance


Green beans are one of those garden vegetables that you look so forward to, yet once they start coming in, the plants may soon have you asking for help with the picking. Unless checked every two days or so, the beans soon become large and tough and the plants slow down in production. Many people plant the pole bean varieties for the reason that the bending with bush beans requires an ability to tolerate the strain on the back and knees. Once the chore is done and you are rewarded with an abundance of beans, the next question is what to do with them. Blanching and freezing are always an option, but if you are looking for recipes to use a lot of beans at once and as more than just a boring side dish, then perhaps you will like the following ideas.

This recipe is very popular with Mediterranean  cooking. Eaten along with orzo and some crusty bread for dipping in the juices, it can be hearty enough to be the main course.
STRING BEANS (RUNNER BEANS) and TOMATOES
Fassolakia prassina yahni

2 - 3 pounds string beans
1 - 2 pounds fresh tomatoes
2 medium size onions
1 cup olive oil
2 tablespoons fresh parsley
salt and pepper to taste

Trim the beans and either leave whole or snap into halves. Wash to remove any dirt from the garden.
Wash the tomatoes and cut up into quarters.
Peel and chop the onions.
Add the olive oil to a large pot (a cup might sound like a lot but remember olive oil is a very healthy oil and that amount is needed for the final consistency of this dish). Saute the onions until soft, followed by the tomatoes. Crush the tomatoes with your spoon to bring out their juices.
Add the green beans, parsley, salt and pepper.
Add enough water to bring almost cover the beans, about 3/4 full.
Bring to a boil, adjust the pot lid to allow evaporation, turn the heat down to a simmer.
This dish needs to be started hours ahead of meal time. The idea is for a slow simmer allowing time for the water to evaporate until only an oil remains as a sauce. 

Orzo is a pasta that looks like grains of rice. To just boil and strain like any other pasta is ok but finding a strainer with small enough holes to prevent the orzo from slipping through may be a challenge. My method of cooking is done a little differently. Add about a tablespoon of butter and enough olive oil to coat the orzo to a saute or frying pan. Heat slowly as not to brown the butter or smoke the olive oil. Add the orzo pasta and stir to coat. The idea is to saute just a bit to coat and flavor the orzo, it doesn't take long. Slowly add some salted water and using a spatula that can scrape the bottom of the pan, continuously stir the orzo to avoid clumping. You must stay with this to keep an eye on it. As the water is absorbed, add some more and continue stirring. Continue to do this until the orzo is tender but not mushy. Orzo should be served immediately to remain loose. If left sit in the pan it soon clumps and sticks together, which is ok but not as appealing upon serving.

Serve the orzo, along with the green beans and tomatoes, and a crusty bread for sopping up the delicious, oily sauce from the beans. Yum and very healthy!


Living in Pennsylvania Dutch country, many foods are pickled with sugar and vinegar. To use up a lot of green beans at once and keep in the refrigerator to keep until needed, this dish is very practical.
SWEET AND SOUR GREEN BEAN SALAD

There isn't really a recipe for this dish. You just wash and trim the ends off enough beans to fill a large soup pot, add about two inches of water, bring to a boil, turn down to a simmer, and cook till tender but not too soft. You want them to hold their shape. Strain the beans but be sure to save the cooking water. As the beans cool in the strainer, add about a cup of sugar and a cup of apple cider vinegar to the saved cooking water. Stir to dissolve. Dump the cooled beans into a large bowl and top with the sugar/vinegar water. Stir to coat, cover the bowl and leave in the refrigerator for a few hours for the beans to absorb the flavors. I remember as kids, we were given a bowl of beans as a snack and ate them as finger food.


This last recipe is a slow cooker recipe that is a hearty meat and potato dish.
Total cooking time is about 4 1/2 hours.

Use a 5 quart crock pot
2 pounds fresh green beans, rinsed, trimmed and snapped in half
1 large onion, chopped
1 1/2 pound potatoes, peeled and quartered
2 - 3 ham hocks
1 teaspoon garlic powder
1 teaspoon onion powder
1 teaspoon seasoning salt
1 tablespoon chicken bouillon granules
ground black pepper to taste

Place the beans, onion and ham hocks in the crock pot. 
Add enough water to barely cover.
Cook on High until simmering. Reduce heat to Low and cook for 2 - 3 hours until beans are softening but not yet done.
Add the potatoes and cook for another 45 minutes.
Remove the ham hocks from the cooker and when cool enough to handle, remove the meat from the bones. Shred the meat and return to the crock pot.
Season with the garlic powder, onion powder, seasoning salt, bouillon, and pepper.
Continue to cook until the potatoes are done.
Taste to adjust the seasonings.
To serve, use a slotted spoon to dip out the beans, potatoes, and ham without having too much broth. If you want a soup like meal, then by all means serve with a ladle to catch the broth too.
Enjoy


Wednesday, August 14, 2013

The Well Stocked Natural Child's First Aid Kit


From the moment a woman knows she is expecting she becomes concerned about anything and everything that goes into or onto her body. It is a known fact that our babies come into this world already exposed to environmental toxins beyond out control. What we can control is the types of products we buy to be used in taking care of our kids.

Kids can't bounce off the walls when there aren't any! Getting them outside is wonderful even if it increases the possibility of bumps and scrapes. Kids are meant to move. Give them every opportunity possible to experience the classroom and playground of the outdoors.

Having children is a lesson for any parent in putting the old Boy Scout rule into action: Always Be Prepared! Avoid the stress of being faced with a crisis (and to an over dramatic child any pain or sight of blood is a crisis) by having the supplies on hand for whatever turns up.

Here are a dozen products that no doubt will be needed at some point in raising children. Make your life easier by having such remedies on hand, as well as the peace of mind in knowing there are no warning labels needed.  Of course, always check with your doctor with any questions you have about anything when it comes to your children. Each of the products below have a highlighted link which will take you into the Etsy shop of Meadow Muffin Gardens for more information and shopping cart for purchase.

 
Children learn by doing, which means they will be using all five senses to check out whatever interests them. An active child is bound to get into a scrape now and then. Two absolute musts for the home first aid kit are a boo boo balm and a drawing salve.

Healing Boo Boo Balm

Herbal salves use the healing properties of nature's healers, such as Calendula, Comfrey, Plantain, St. Johnswort, Chamomile, Chickweed and Lavender. Nature's medicine has long been man's pharmacy, and over time certain plants have gained a reputation for helping with various conditions. These plants are infused in olive oil and then solidified with beeswax for long lasting salves and balms to deal with wound care, bumps and bruises, rashes and inflammation.


Black Drawing Salve
Scraped knees and splinters are probably the most common plights of our kids. Cuts and scrapes may look scary but once covered with a band-aid, they usually become something to talk about. Now a splinter and the fear of someone digging around to get it out is enough to bring on a child version of a panic attack. An old folk remedy for removing splinters is not to dig at all, but to cover with a salve made with ingredients to actually draw the foreign object to the surface while at the same time fight any brewing infection. Cover with a band-aid and in the morning often the splinter is gone.


Sunburn Relief Spray
Overexposure to the sun or a finger against a hot pot can result in painful first degree burns. The proper care for any minor burns is to first cool and release the heat in the damaged skin. Aloe and lavender are wonderful for immediate relief in the form of a spray. Aloe feels so pleasantly cool to the skin and used for soothing many a skin problem, but on a burn it is wonderful. For a burn that will need healing, the three plants we turn to for a salve are Comfrey, St. Johnswort and once again, Lavender. Applied early enough,  there is a good chance there won't be any peeling.


Sunburn, Minor Burn Salve


Outdoor adventures should be a part of every child's world, even if inevitably it means exposure to insect bites and poison ivy. Rather than worrying about the long term effects of using chemical products such as DEET, why not utilize the same thing the plants themselves use to protect themselves. The essential oils within plants are their own defense mechanisms to ward off disease and deter plant munching insects. These two body sprays are safe for children in that they either utilize only the properties of the herbs themselves or include only lavender as the essential oil. Essential oils are very concentrated and one has to use caution which ones are used on a child. Vinegar is the base for these sprays for three reasons; bugs don't care for it, it makes for great herbal infusions, and it evaporates, therefore there is no need to worry about smelling like vinegar.
 The two choices are Plantain, Yarrow and Comfrey and Plantain and Lavender combinations. 
 
Herbal Bug Spray
Herbal Bug Spray


Poison Ivy Spray
Exposure to the misery of poison ivy is a given if your child plays in the woods or open field or hedgerow. Poison ivy and camping are almost like partners to threaten your good time. Wherever there is poison ivy or nettles, you will probably see Jewelweed or Dock growing nearby. This poison ivy or nettles relief spray once again uses vinegar to extract the beneficial properties of the entire jewelweed plant.


Hurting Tummy Massage Oil
A hectic schedule, long hours in a car, fast food...any of these can be the culprit in the so common childhood complaint of a belly ache. This belly massage oil starts with peppermint infused olive oil and adds the essential oils fennel, chamomile, and lemongrass. All helpful to relief cramping and gas. A warm cup of peppermint or chamomile tea would be a very comforting addition to the belly massage.


Earache oil
The dread of every parent is the cry during the night that their child's ear hurts. Have a remedy on hand to get you through the night and by morning the earache may be significantly less or even gone. With the hesitancy of doctors to prescribe antibiotics, watchful waiting may be the better method of handling middle-ear infections in our children. But if you don't see any improvement after a day or two, don't hesitate to make that appointment.
Before the discovery of penicillin in 1928 by Alexander Fleming, garlic was relied heavily upon for the treatment of infection. Along with the garlic in this olive oil base are the antibacterial properties of Calendula, Mullein, and St. Johnwort. Just a bit of warmed oil in the hurting ear followed by a small wad of cotton to keep it from draining out, should help reduce the pain.


Sniffles, sneezing and scratchy throats are so common, yet if you nip a cold in the bud, hopefully it won't develop into anything. Give your child's immune system a boost with a few cups of a delicious tea made from lemons, honey and ginger root. The three ingredients are blended together and over time actually turn into a thick, pulpy syrup. A dollop in a hot cup of water or simply taken right off the spoon will ease a sore throat and fight the brewing infection.

Cold, Sore Throat Syrup


Vapor Rub
Headaches, sinus problems, and head colds can all be helped without resorting to the use of over the counter cold remedies. There is no need to give a child a product with potential problems if there are other options. Homemade vapor balms are herbal alternatives to Vick's. Applied to the temples, under the nose, on the chest and back, and even on the soles of the feet, any
will help with headaches and open up the airways to make breathing easier.


Sleepy Spray
Finally, there are going to be nights when your child just needs a little help calming down to fall asleep. This sleepy spray is ideal as an air spray or can be sprayed right onto the bed sheets. Chamomile, Lavender, Sweet Orange and Ylang Ylang are amazing at calming a parent's jangled nerves and the ticket for an overtired child to slip away into blissful sleep.

So, while your little super hero heads out to save the world, be prepared for anything!


Monday, August 12, 2013

Close the Tap of Energy Drainers

"It’s great to be a giver, a carer and a feeler (sometimes), but now and then we need to take a stand with certain people.. because if we don’t, we begin to suffer and then nobody wins."           

Craig Harper


As social creatures, most of us thrive when our lives involve other people and receive great personal satisfaction in helping others and knowing we made a difference. But sometimes we have to stand outside of ourselves and observe the situation with a practical and objective perspective. We may think that if we work harder, love harder, invest more of our time, we can help. Sometimes, we just have to realize what we are dealing with and take a step back for our own good.

Craig Harper is a self-help educator and motivational speaker from Australia who uses a blunt, cut to the chase attitude to get through to people. The article below was taken from his blog, and focuses on how to deal with what he describes as energy vampires, those people in our lives whose negative energy seem to suck the very life out of those around them. We have to realize that we have control over whom we allow to influence our lives, even if those drainer types are members of our own family. Though we may feel trapped within certain situations, there are coping skills to keep ourselves above it all and preserve our own happiness, vitality and sanity. Learn how to live and love these types without destroying your own spirit for life.

Dealing with Energy Vampires

They live among us.
In human form.
To the untrained eye, it is almost impossible to tell the difference.
Typically they look like you and I.
But they’re not.
They’re not like us at all.
They are Vampires and their modus operandi is not to steal your blood but rather, your precious energy.
Your life-force.
Your mojo.
To drain you emotionally and psychologically.
To frustrate you with their repetitious, self-indulgent, attention-seeking diatribe.
They are often bitter, angry and resentful…. and they want you to share their pain.
They don’t want solutions, they want pity.
They don’t want constructive feedback, they want attention.
They don’t want to take responsibility, they want to blame and vent.
They seem to revel in their own misery.
Day in, day out.
They have the same conversations about the same issues with the same people and produce the same result; no change.
They major on minors.
They bring others down.
They have a gift for finding the negative.
They are emotionally exhausting to be around.
They inhabit our work places, our families, our schools and they permeate every corner of society.

Note: I will point out that Energy Vampires are not to be confused with the vast majority of people who simply need help, support, direction and care… and are serious about working on themselves and their situation. They are also not to be confused with people who are genuinely looking for answers (not attention or sympathy) and are prepared to accept responsibility, be accountable and be proactive.
No, the people I’m talking about here are relentless in their negativity and their ‘woe-is-me’ ness (a Craigism).

As most of you know, I am serious about helping people create their best life and I choose to spend much of my life working with a wide range of people to help them confront and deal with their issues and create their own version of amazing… but I’m not about letting people monopolise (or waste) my time and energy and I won’t buy into their crap attitude or their negativity. I don’t care how messed up someone’s life or situation is, if they have a good attitude, I’ll help them.
Gladly.
If they’re a Vampire, I’m outa there.
See ya, wouldn’t wanna be ya.
It’s great to be a giver, a carer and a feeler (sometimes), but now and then we need to take a stand with certain people.. because if we don’t, we begin to suffer and then nobody wins.

So here are my tried and proven tips for dealing with Energy Vampires.
(Not every tip is appropriate for every person and situation but you might find some of them useful)
1. Identify the Vampires in your life, acknowledge the impact they have on you and make a resolution to change the way you communicate (interact with, exist with) those people.

2. Don’t buy into their life’s-not-fair-and-nobody-understands-me monologues. Feed it and you’ll create a monster.

3. Be straight with them and tell them that you will not have the same conversations about the same issues any more (yes this takes courage).

4. This sounds harsh, but some Vampires need to be avoided.

5. Don’t give them too much time. When a Vampire walks into my office I stand as if I’m about to go somewhere. I’ll give them a few minutes and if I feel we’re heading down the same old path, I’ll start walking and shut the conversation down.

6. Ask them questions like “so you’ve identified the issues, tell me how you can change things for the better?”

7. If you have a Vampire who is in your life to stay (family perhaps), create some rules of engagement… “I will not talk about ‘these’ issues again until I see you doing XYZ.”

8. Choose your friends and acquaintances wisely. Make sure you spend (lots of) time with people who will drag you up, not down. You need to keep your tank full.
Spending lots of time with Vampires is draining and unenjoyable.

Came across another great article on this subject by Erin Janus


Wednesday, August 7, 2013

What's Eating My Dogwoods!?


Dogwood Sawfly

Always trying to give bugs the benefit of the doubt before hurting any good guys, I did my research as to what is decimating my dogwood shrubs. Turns out the Dogwood Sawfly, Macremphytus tarsatus, is a significant pest to the dogwood (Cornus) species.

Variegated Dogwood

Defoliated Varigated Dogwood


The different forms during the larvae stage may make it seem there is more than one type of pest on your plants. The  non-stinging cousin of wasps, adult sawflies lay eggs that hatch on the undersides of  leaves. They are almost a translucent yellow.


The second stage looks like they are covered with a white,  chalky powder, and by the last stage they are about an inch long, yellow with a black head and spots.
The only way to distinguish between caterpillars and sawfly larvae is that caterpillars have five pairs of false legs (prolegs) behind the six true legs while sawflies have seven pairs. 

 Pictured above is a shrublike variegated dogwood, but other susceptible types of dogwood are the gray dogwood, red-twig dogwood, and pagoda dogwood. The common flowering dogwood doesn't seem to be as affected. Being these aren't caterpillars, the natural control that is so safe for such soft bodied pests will do nothing to stop sawfly larvae.

The best way to control them is to understand their life cycle. Adult sawflies emerge from decaying wood in May or June. The females lay eggs inside the leaf tissue and once they hatch, they go through all three phases devouring the leaves, leaving only the midveins behind. Since it is summer's end anyway and the plant is near the end of its growing season, the dogwoods usually survive and leaf out again in the spring. As for the larvae, once they mature, they stop eating, drop to the ground, and burrow into decaying wood matter for the next nine months.

To have control over this natural life cycle, the best you can do is check your dogwood plants at the first larvae sightings and kill the larvae by squeezing them with your fingers or spraying with an insecticidal soap that smothers them. This has to be done before the larvae reach one inch in size, since by then they have begun to prepare for overwintering. Remove any decaying wood lying around the ground and replace rotting wood on out buildings.

As usual, by the time I notice, the damage is done and I am looking at my poor skeleton of a plant. But knowing that it will recover without any help from me, I decided to stay out of nature's business.

The source for this information came from Michael Martin Mills, The Inquirer, Philadelphia, PA

adult dogwood sawfly


Tuesday, August 6, 2013

Hover and Hum of the Hummingbird Moth


For children, a love for their natural world all begins with those moments of wonder that spark their interest for more. Those memories of receiving a hands-on education of the environment that stirs and intrigues their curiosity. Wonderful for any child is to feel one with this miraculous web of life we are privileged to be a part of.  To visually study the colors and patterns, t
o smell the aromatics of the flowers, to taste the bitter grass, to hear the rustling wind and touch anything they can. 

Such moments to cherish are the first sightings of the sphinx or hummingbird moth. First, you may hear the humming of the sings as they whirl past you at speeds that can go up to 30 mph. With a laugh you and your child may play the guessing game of, Was it a bee? Was it a dragonfly? Was it a bird? Was it a hummingbird?

The hummingbird clearwing moth, Hemaris thysbe, also called sphinx or hawk moth, has several similarities to the hummingbird, but they are not related. They have the same wingspan, both pollinate flowers and sip nectar, and both can fly forwards, backwards and hover in place. However, the hummingbird moth doesn't have a beak and tongue, but uses a proboscis, and is not a bird, but a six legged insect. These moths feed by hovering in front of a flower to sip nectar through the extended proboscis, which then rolls up like a party noisemaker when not in use

Common in the eastern U.S. and Canada, these moths are members of the sphinx moth family. It gets its family name from the way the caterpillars pull up their front ends like a sphinx pose when disturbed. Most sphinx moths are out at night to feed, the hummingbird moths are often seen in broad daylight. Gardeners don't have to plant special flowers to attract the adults, but the larvae do require specific host plants for food. The honeysuckle vine, hawthorns, and shrubs in the viburnum family are preferred plants, so provide these host plants for the caterpillars if you want to see the adults..


Viburnum
Rather than spinning a cocoon to go through metamorphasis, they dig into the soil and blend in with the fallen leaves.  Some pupae spend the winter there, transforming into flying adults the following spring. In the southern climates, a brood is produced in the spring as well as in the fall.


Moonflower
Morning Glory
Deep-throated flowers such as petunias, morning glories, nicotiana, moonflowers, and 4 o'clocks are favorite food sources by all the types of sphinx moths. Plant plenty of these and you'll be treated with sightings from all types: some day-flying, some at dusk, and others during the night hours.

4 o'clocks
Children will be the caretakers of the earth in their Future. Help them to appreciate their earth in the Now.


Phlox

.