Meadow Muffin Gardens logo
Showing posts with label recipes. Show all posts

Friday, November 12, 2021

Homemade Granola


Making your own granola puts you in full charge of what goes into it. The nutritional powerhouse list in this recipe can be altered however you want. Some people may want to add things like chia seeds, hemp seeds, oat bran, millet, lecithin granules or cacao nibs. As long as the general ratio of dry to wet ingredients is about the same you can leave out or substitute ingredients. 

Granola is a great way to get your family to ingest not only more fiber in their diet but the abundance of vitamins, minerals, antioxidants, amino acids found in these grains, nuts and seeds.


HOMEMADE GRANOLA

6 - 8 cups rolled oats 

(alternative or addition to oats can be rolled rye, spelt, kamut, wheat or barley)

2 cups shredded coconut

(I use unsweetened coconut but that is a personal decision)

1 cup wheat germ

(I use raw wheat germ but you can use toasted wheat germ)

1 cup ground flax seeds

(Whole flax seeds tend to pass right through the body so better to grind them or purchase them already ground. Once they're ground they oxidize so you'll find them in the refrigerated section of the store)

1 cup slivered almonds

1 cup hulled sunflower seeds

(I use roasted unsalted sunflower seeds but you can get them raw or salted)

1 cup pumpkin seeds

(I use roasted unsalted pepita seeds but you can get them raw or salted) 

1 cup hulled or unhulled sesame seeds

1 cup roasted soybeans

1 cup dried apple pieces

1 - 2 cups raisins (don't add raisins until after granola is baked)


Combine the dry ingredients in a large bowl


3/4 cup vegetable oil

1 cup honey

2 tsp vanilla extract


Combine oil and honey in a saucepan and heat till blended but don't let boil

Add vanilla extract


Stir wet ingredients into the dry ingredients till everything is coated with the honey/oil blend

Grease two large greased baking sheets 

(the type with edges makes stirring easier without making a mess)

(stoneware pans work very nicely)


Bake in a 250 degree oven 20 minutes, stir (edges bake faster so blend into center)

Bake another 20 minutes till developing a light toasted look to it, don't overbake or the mix will be too crunchy and dry once it cools.

Cool on sheets and then add the raisins

Store in an airtight container


Granola can be eaten in a number of ways:

As a cereal with milk

Sprinkle on top of yogurt

Make homemade granola bars

Eat dry as a trail mix type snack

Substitute for rolled oats in a cookie recipe


Monday, April 12, 2021

SNEAK IT IN POWER MUFFINS


EMPIRE STATE MUFFINS

(Taste of Home...Beverly Collins)


2 CUPS SHREDDED UNPEELED APPLES

1 1/3 CUPS SUGAR

1 CUP CHOPPED CRANBERRIES

1 CUP SHREDDED CARROTS

1 CUP CHOPPED WALNUTS

2 ½ CUPS ALL-PURPOSE FLOUR

1 TBSP BAKING POWDER

2 TSP BAKING SODA

½ TEASPOON SALT

2 TSP GROUND CINNAMON

2 EGGS, SLIGHTLY BEATEN

½ CUP VEGETABLE OIL


In a large mixing bowl, combine the apples and sugar.

In another bowl combine the flour, baking powder, baking soda, salt and cinnamon.

To the dry ingredients add the cranberries, carrots and walnuts.

Add the apple/sugar mixture and mix well to combine.

In a small bowl, mix the eggs and oil.

Stir eggs and oil into the batter.

Fill about 18 greased muffin tins 2/3 full.

Bake at 375 F for 20 – 25 minutes or until a toothpick tests done.

Cool about five minutes before removing muffins.


MORNING GLORY MUFFINS

(Taste of Home...Paddy Webber)


2 CUPS FLOUR

1 ¼ CUPS SUGAR

2 TSP BAKING SODA

2 TSP CINNAMON

½ TSP SALT

2 CUPS SHREDDED CARROT

½ CUP RAISINS

½ CUP SHREDDED COCONUT

½ CHOPPED PECANS

3 EGGS

1 CUP VEGETABLE OIL

1 CUP SHREDDED UNPEELED APPLE

2 TSP VANILLA EXTRACT


In a large mixing bowl, combine flour, sugar, baking soda, cinnamon and salt.

Stir in the carrots, raisins, coconut and pecans.

In another bowl, combine eggs, oil, apples and vanilla.

Add to flour mixture.

Stir only until combined.

Fill about 18 greased muffin tins 2/3 full and bake at 350 F for 15 – 20 minutes


Thursday, October 24, 2019

Oat-Hemp-Peanut Butter-Chocolate Chip Cookies.....So Good

Whether you just have to include chocolate in your cookies or simply want the treat to at least be a little bit healthy to make it worth the indulgence, this recipe is a winner. Ideal for those milk and cookie after school snacks, coffee breaks, holiday cookie exchanges or gift ideas. They freeze well too!

Taken from Taste Of Home magazine, contributed by Jaymie Noble of Michigan, this recipe just has one alteration which is the addition of hemp seeds.

OAT-RAGEOUS CHOCOLATE CHIP COOKIES


1 cup butter, softened (2 sticks)
1 cup creamy peanut butter
1 cup sugar
2/3 cup brown sugar
2 large egg
1 tsp vanilla extract
2 cup all-purpose flour
3/4 cup oats or oatmeal
1/4 cup hemp seeds
2 tsp baking soda
1/2 tsp salt
2 cups or 12 oz semisweet chocolate chips

DIRECTIONS

In a large bowl, cream butter, peanut butter, sugar and brown sugar
Beat in the eggs and vanilla

In another bowl, combine the flour, oats, hemp seed, baking soda and salt. 

Add the dry mixture to the creamed mixture and mix well
Stir in the chocolate chips

Drop by rounded teaspoonfuls onto ungreased baking sheets
Bake at 350 for 10 - 12 minutes till lightly browned 
Cool a bit before removing to wire racks so they don't fall apart
Makes about 4 dozen
ENJOY


Tuesday, October 24, 2017

CRANBERRY PUMPKIN COOKIES, ENERGY BOOST BITES


This little cookie nugget is the perfect grab and go morning meal for those who say they just don't have time for breakfast. Loaded with hearty ingredients that will hold you over without the empty calories of typical baked goods.

The prep time on the recipe said 10 minutes, but it took me 15 minutes just to gather together all the ingredients! With 14 ingredients your counter will be crowded but what a win win for a cookie. There is oat flour rather than wheat. There is only a fraction of the usual sugar called for and the type used is brown sugar rather than white. There is no added fat such as unhealthy shortening. The fat comes from peanut butter and needed moisture comes from pumpkin. Rolled oats help hold it all together and additional taste and sweetness come from dried cranberries and coconut.

Basically, this sounds like a granola shaped into a more portable form. Not sweet at all, it is still tasty and delicious, great with milk or coffee. Perfect for morning but also wonderful for the lunchbox or after school snack

These cookies are chewy rather than crispy. They freeze well and are good warmed up, still half frozen or room temperature from the cookie jar.


CRANBERRY PUMPKIN BREAKFAST COOKIES
By Sarah@The Gold Lining Girl

1 1/2 cup old-fashioned oats
1 cup oat flour
1/4 cup packed brown sugar
1/2 tsp. baking powder
1/2 tsp. baking soda
1 tsp. cinnamon
pinch of salt

In a large bowl, whisk together the above dry ingredients

1 1/4 cup canned pumpkin puree
1 egg
1/4 cup melted peanut butter (smooth or chunky)
2 tsp. vanilla extract

In another bowl, whisk together the above wet ingredients
Add the wet ingredients to the dry ingredients and stir until just moistened

1/2 cup chopped pecans or walnuts
1/2 cup shredded coconut
1/2 cup sweetened dried cranberries

Fold in the nuts, coconut and cranberries

Drop by spoonfuls onto either parchment lined or greased baking sheets
Bake at 350 degrees
10 minutes for small cookies or 12 - 14 minutes for large cookies
Cookies are ready when lightly browned
Remove to wire racks to cool
Store in a cool, airtight container


Saturday, April 8, 2017

The Perfect Chocolate Chip Cookie


If you like your chocolate chip cookies soft yet chewy than this recipe just may replace your old favorite. The recipe came from The Ladies Corner and they even let us in on the secret behind these cookies. It's something as simple as the amount of salt that is added, leaving out an egg white and a lower oven temperature.

CHEWY CHOCOLATE CHIP COOKIES

Preheat the oven to 325 degrees F

2 cups all-purpose flour
1/2 tsp baking soda
1/2 tsp salt

Sift together the flour, baking soda and salt and set this bowl aside.

3/4 cup or 1 1/2 sticks butter, softened or almost melted
1 cup packed brown sugar
1/2 cup white sugar

In a larger bowl, blend the butter and sugars till nice and creamy.

1 tbsp vanilla extract
1 egg
1 egg yolk

Beat the vanilla and the eggs into the butter/sugar mixture.
Blend till creamy.

Add the sifted, dry ingredients to the wet ingredients and mix just until blended.

2 cups chocolate chips

If you used a hand blender for the previous steps, for this part use a wooden spoon.
Gently stir in the chocolate chips

Either lightly grease your cookie sheets or line them with parchment paper.

For MONSTER COOKIES
Drop cookie dough 1/4 cup at a time onto the cookie sheets 3 inches apart
Makes 6 cookies
Bake 15 - 17 minutes

For LARGE COOKIES
Drop large spoonfuls of cookie dough onto the cookie sheets 2 inches apart 9 cookies per sheet
Makes about 2 dozen cookies
Bake 13 - 14 minutes

For REGULAR SIZE COOKIES
Drop spoonfuls of cookie dough onto the cookie sheets 2 inches apart 12 cookies per sheet
Makes about 4 dozen cookies
Bake 11 - 12 minutes 

Remove cookies from oven and allow to cool a few minutes before removing to a wire rack to cool.


ENJOY!


Tuesday, December 6, 2016

Almond Sugar Cookies..Addition to the Sweet Treat Tradition of the Holiday Season


The trick to holiday baking is to get it done early enough to ease the stressful time crunch of the "to do" list before Christmas Eve. But the downside around this house is that between event contributions and all those people who deserve a little something, by the time the big day rolls around there is often little left. 
But the tradition is rewarding even if we do swear we'll cut back on the "unnecessary" work every year. New, untried and enticing recipes flood our Facebook pages and magazines, adding to the craziness of what makes for holiday cheer.

This new recipe is a keeper. It was cut out years ago from a Taste Of Home magazine and was tucked away in a cookie cookbook.

What sets it apart from the usual sugar cookie is the almond extract rather than the usual vanilla.
The buttery taste makes this a definite melt-in-your mouth gem of a cookie.


ALMOND SUGAR COOKIES

Preheat oven to 400 degrees

1 cup softened butter (no substitutions)
3/4 cup sugar
1 tsp almond extract

In a large mixing bowl, cream butter and sugar. Beat in the almond extract.

2 cups all-purpose flour
1/2 tsp baking powder
1/4 tsp salt

Sift these three dry ingredients.
Add this dry mixture to the creamed mixture.

With your hands, roll into 1 inch balls.

Place two inches apart on an ungreased cookie sheet.

Coat the bottom of a glass with cooking spray.
Dip the glass into a bit of sugar and flatten the cookie balls.

Baked at 400 for 7 - 9 minutes or longer (12 minutes) if the cookie dough balls were larger.
Remove the cookie sheet when the edges of the cookies are lightly brown.
Cool for 1 minute and remove the cookies to a wire rack.

For Glaze:
1 cup confectioners' sugar

1 1/2 tsp almond extract
2 - 3 tsp water.
sliced almonds, toasted

In a small bowl, whisk together the confectioners' sugar, almond extract and enough water to achieve a glaze consistency to drizzle.

Tint with food coloring if desired and drizzle a bit onto each cookie.
Let the cookies cool before you add the drizzle or the icing melts into the cookie.
Sprinkle with almond slices.

Makes 3 - 4 dozen, depending how big the dough balls were.


Sunday, November 27, 2016

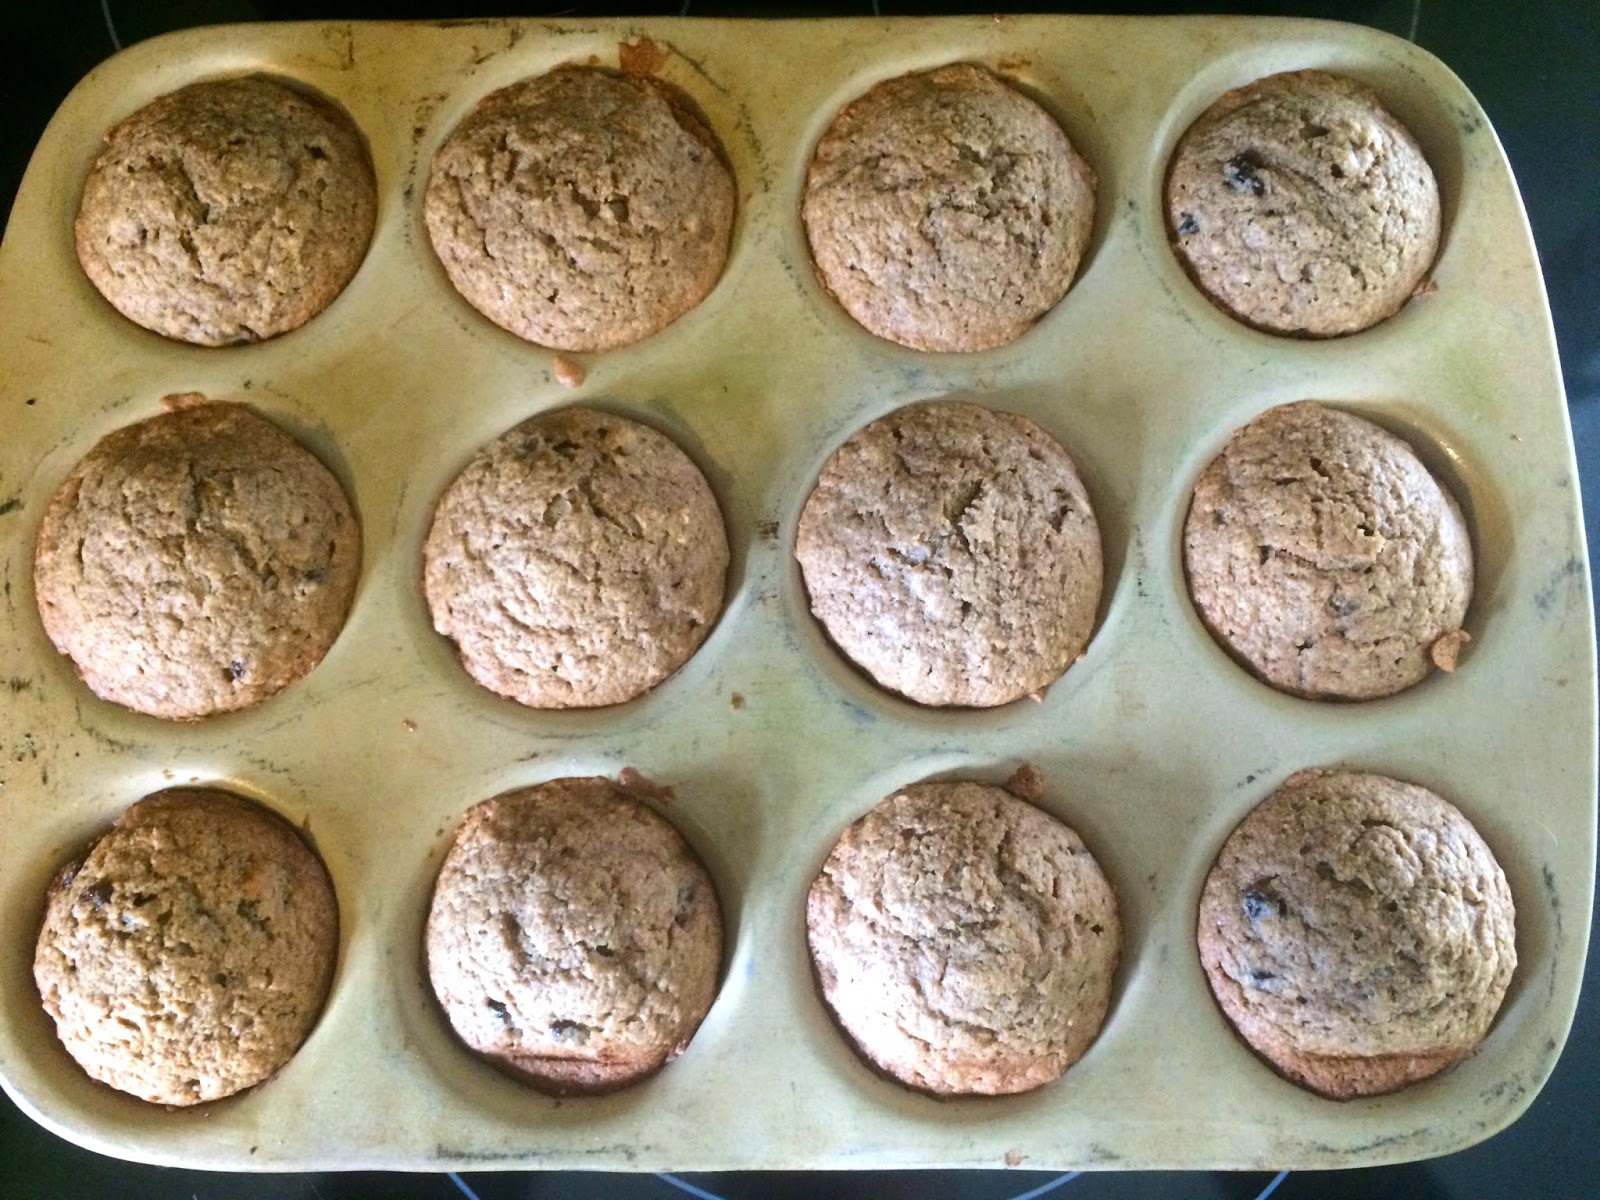
Applesauce Raisin Muffins, Cold Weather Goodness


 Cold weather weekend mornings are perfect for homemade goodness at breakfast or mid-day snacking. Better yet if these muffins started with homemade applesauce!


This recipe was probably cut from a Taste of Home magazine but who knows from what issue.


MOTHER'S APPLESAUCE MUFFINS

4 cups flour (you can use 1/2 all-purpose and 1/2 oat or wheat)
1 tbsp ground cinnamon
1 tbs ground allspice
2 tsp baking soda

Combine and sift to blend these four dry ingredients in a large bowl.

1 cup butter (soften in microwave if right out of refrigerator)
2 cups sugar

Cream the butter and the sugar in a mixing bowl
Then beat in:

2 eggs
2 cups applesauce
2 tbsp vanilla extract

Fold the butter/sugar mixture into the dry mixture and stir just until moistened. 

Add 1 cup raisins
Don't over mix or muffins can be tough.

Grease muffin pans
Pour the batter into 24 muffin cups about 3/4 full each

Bake at 350 degrees F
20 - 25 minutes or until a toothpick tests done

Cool in pan 10 minutes before removing or muffins may stick.
Cool on a wire rack

Yield 2 dozen
Freeze for later if desired


Enjoy this old-fashioned, healthy recipe!
Ideal for a quick, nutritious breakfast, lunch or anytime snack.
Perfect to make ahead and save for holiday gift giving and party contributions.

Sunday, November 20, 2016

Apple Crisp, Cross between a cookie and a pie


Apple season is here and you can never have too many recipes on ways to enjoy them. It is the week before Thanksgiving and the weather has taken a downhill spiral seemingly overnight. So what is there to do on a blustery Sunday afternoon but enjoy home baked goodness and a steaming hot cup of coffee.

This recipe for Apple Crisp is a combination of a crisp oatmeal cookie and apple pie. But you don't have to deal with making a pie crust and most likely the ingredients are already in the cupboard. Originally from an issue of Taste Of Home magazine, this recipe was contributed by Gertrude Bartnick of Wisconsin.

APPLE CRISP

Preheat the oven to 350 F

In a mixing bowl, combine these four ingredients:
 1 cup all-purpose flour
3/4 cup rolled oats
1 cup packed brown sugar
1 tsp ground cinnamon

Cut in:
1/2 cup butter which is 1 stick.

If right out of the refrigerator, soften for 20 seconds in the microwave. You want it softened a bit but not melted.
Use a pastry blender tool to cut in the butter until the mixture is crumbly.
Press half of this mix into a greased baking pan.
The recipe says to use a 2 1/2 qt. baking dish or a 9 inch square baking pan.
I had doubled the recipe so in the photo shown I had used a 9 x 12 in. baking dish.

Peel and chop:
4 cups apples

Add the chopped apples to cover the crumbly mixture already in the baking pan.

In a saucepan, combine:
1 cup sugar
2 tbsp. cornstarch or arrowroot powder
1 cup water
1 tsp. vanilla extract

Cand stir this sugar mixture until it comes to a slight boil and turns thick and clear.


Pour the sugar mixture over the apples which are already in the baking pan.

Sprinkle with the remaining crumb mixture.

Bake at 350 degrees for about 1 hour or until the apples are tender and the topping is golden brown.

Let sit to thicken up before cutting into it to serve.
Serve warm as is or add a scoop of vanilla ice cream to each serving.


Saturday, October 8, 2016

Nasturtiums, Cottage Garden, Children's Garden


Nasturtiums are everything a gardener could want in a flower. Easy to grow, drought resistant, totally carefree as they cheerfully meander their way around to quickly fill in bare spots.
Not only pretty to look at, these annuals can be used as a companion crop, an edible, part of herbal medicine and a source of play for a child's imagination.

When one thinks of their grandmother's garden or a cottage garden, Nasturtiums (Tropaeolum majus), most likely are at the top of the list. This self-sowing annual flower germinates easily, usually within 10 - 14 days. Some people like to soak the seeds overnight to speed things up a bit.


Being the seeds are fairly large, these are perfect for the little hands of children to handle. Just press the seeds down into the warm soil about 1/2" deep and a foot apart. Children will be delighted when the little umbrella shaped leaves emerge since they are so easy to recognize.

Though planted after the threat of frost is past in the spring, these flowers are cool season annuals and wait till late summer to really put on their show. They like full sun and will grow in partial sun, but the result will be more lush foliage than flowers. Drought resistant, these plants need well-drained soil and actually thrive on neglect.


Once established, they'll reseed themselves, so there really isn't any need to collect the seeds and store for the winter unless you want to plant them elsewhere in a different spot.

Nasturtiums come in two forms: compact (dwarf) and trailing. The compact variety is low and stays bushy at around 12" tall. This type is good in spots where you want a lot of dense growth and color such as in borders, places where you need the plants to behave and not spread out onto the walkways. The trailing types are great for areas you want a tumbling effect such as in hanging baskets or down rocks or walls. If simply planted without caring where they go, nasturtiums will meander around other plants and by early fall they will fill in any bare spots.

These beautiful, carefree flowers really come into their own once the heat subsides in September. They just seem to bounce back from the heat of summer with renewed energy.


There are climbing varieties such as "Canary Creeper" or "Jewel of Africa". These have runners that climb six to eight feet, good for a trellis.

Though the stems break off easily, don't think these are delicate plants. They are actually very durable and even when our dogs bumble right through them, they always bounce right back. The leaves look like little water lily pads, flat and round with the stem attached to the center and the vein radiating out from there. Some think of the leaves as parasols held up by their stems but the actual name is called peltate or shield shaped leaves.


 The traditional colors are a bright yellow and orange, but there are varieties available now such as "Empress of India", which have brilliant red blooms, and the "Whirlybird", which can be described as mixed colors of soft salmon, tangerine as well as a deep cherry rose. Then there are the "Peach Melba" which are the color of cut peaches. Try "Alaska" for varigated leaves.

The blooms have spurs at the back, sort of like the Columbine, which are nectar tubes and a draw for hummingbirds.

Before the age of pesticides gardeners utilized companion planting to deter pests. With the awareness of just how damaging insect killing sprays are to our pollinators, organic gardening is thankfully making a comeback. Plant nasturtium amidst your vegetable plants to deter slugs. Aphids love nasturtiums, therefore they make a good "catch crop" for your other plants. Years ago, nasturtiums were often seen among those large truck patches of potatoes.

Nasturtiums originated in South America and brought back to Spain in the 1500's. Once introduced to European gardens, their popularity quickly took off. Monet had them planted in his pathway borders. Thomas Jefferson loved them and they are now seen in American historical gardens.

The actual meaning of the word nasturtium is "nose-tweaker". Victorian ladies used to include the flowers and leaves in their tussie mussies to help alleviate bad smells.
The latin, Tropaeolum, is a reference to the battle victory trophies which the Romans hung on poles, called tropaeum. The flowers resemble hemets and the leaves resemble shields.

Medicinally, the leaves were used in teas to treat respiratory conditions and bladder infections. High in vitamin C, nasturtiums are a natural antibiotic. Minor cuts could be treated topically by using the leaves as a poultice.

In the kitchen, the flowers, leaves and seeds can all be utilized.
During WWII, the dried seeds were ground and used as a substitute for black pepper.
The chopped leaves add a zesty zing to mayonnaise, vinaigrettes, cheese spreads and dips.
That peppery spicy taste gets hotter as the summer progresses.
Add the flowers to salads for a beautiful visual effect and spicy flavor.
Make pretty tea sandwiches with both the leaves and the flowers.
Children love stuffing the blossoms with egg, chicken or tuna salad or cream cheese mixtures. Guacamole is another great option as a filler. Used as appetizers, these stuffed flowers are a hit with summer parties.

Put the flowers up in vinegars. Place some blossoms in a decorative bottle and cover with hot (not boiling) white wine vinegar. Use about five blossoms per cup of vinegar. Strain when ready to use or strain and add fresh blossoms to give as gifts.


Sunday, September 18, 2016

Homemade Pizza For Pennies

Friday night pizza is a mainstay in many a tired household by the end of a long week. Even if on a tight budget you can enjoy a good pizza and even have control of what goes in and on it for variety and better nutrition.

The recipe originally came from a cookbook called The Food Processor Bread Book by the editors of Consumer Guide, but I got it from a wonderful book called The Tightwad Gazette by Amy Dacyczyn There are three books to this set described as "promoting thrift as a viable alternative lifestyle". This recipe came from book two.

Bread dough made in a food processor requires no hand kneading, just a few spins to form a dough ball, a short rest and you're ready to roll it out and get it in the oven.


THICK AND CHEWY PIZZA DOUGH

1/4 - 3/4 cup warm water (105 to 115 degrees F, you don't want it too hot or it'll kill the yeast)
1 package or 1 tablespoon dry yeast
1 teaspoon sugar
2 cups flour
1 tablespoon vegetable oil
1/2 teaspoon salt

Combine 1/4 cup of the water with the yeast and the sugar in a small bowl.
Stir to dissolve the yeast and let it stand about five to ten minutes till the yeast starts to bubble and rise.

Put the flour, oil, and salt into the food processor and process on blend for about five seconds. Use the steel blade.

Add the yeast mixture to the flour mixture and process about 10 seconds or until blended.

While the food processor is running, slowly drizzle just enough of the remaining water through the feed tube so the dough forms a ball that cleans the sides of the bowl. Once the ball is formed let it spin around about 25 to 30 times.

Put the dough ball onto a 14-inch greased pizza pan. I used a pizza stone and sprinkled corn meal over the surface but if I don't have any cornmeal I grease it with coconut oil.
Cover the dough ball with plastic wrap of a bowl and let it rest for about 10 minutes.

Using your fingers or a lightly floured rolling pin press out the dough into a circle shape, leaving a ridge along the sides.
Spread with pizza sauce or spaghetti sauce if you don't have pizza sauce, add your choice of cheese, toppings and pizza seasoning if desired.

Bake at 425 degrees F for 15 - 20 minutes, or until the crust is golden and the cheese is bubbly.

Remove the pizza pan from the oven, cut and enjoy!

Note:
You can make the dough ball(s) ahead of time and freeze them so you have them on hand.
Wrap the dough ball in plastic wrap and freeze up to 3 months. When ready to use, remove from the freezer about 12 hours before you need to make the pizza and put in the refrigerator to thaw. Bring out of the fridge about 30 minutes to warm up before attempting to roll it out.


Friday, September 16, 2016

Flour Free Blender Muffins, Healthy Snacking


When I discovered this recipe on Facebook for a flourless muffin I was intrigued to try it as a great, healthy idea to cut back on the amount of wheat based bread our family eats. The recipe seemed simple enough but the first time around I certainly didn't have them on the table as quick as suggested. Here's why, so should you try these you don't waste time out of frustration and toss the whole idea.

Preheat the oven to 400 degrees F
Use cooking spray or add muffin cup liners to your muffin pan.
Recipe makes 12 muffins

Gather your Ingredients:

2 cups rolled oats
2 ripe bananas
2 eggs
1 cup Greek yogurt  (I don't see why it specifies Greek yogurt other than it is nice and thick. I used vanilla yogurt rather than plain but that is up to you)
3 tbsp honey
1 1/2 tsp baking powder
1/2 tsp baking soda
1/2 tsp vanilla extract
dash of salt which is about 1/8 tsp

Topping Suggestions:

-cinnamon and apple chunks
-strawberries and blueberries
-chocolate chips and almonds
-strawberries and chocolate chips
-unsweetened coconut
-granola

I found these also make a healthy snack idea for our dogs. Just be sure not to include raisins or chocolate as toppings if your dog will be sharing them with you.


The original recipe says to just add all ingredients to a blender, blend for 1-2 minutes and voila. Well, this is the part that can get you to say, umm...what am I doing wrong...and bag it.
From this picture you can see I added the ingredients in the order listed which is the oats first. When I turned on the blender it just seem to strain the motor. Since the liquid (which there isn't much anyway) couldn't drip down to the blades, my blender wasn't strong enough to get things going. So I ended up dumping the whole thing out into a big bowl and stirring it to blend a bit. I put it all back in and tried again...to no avail. So out it goes again into my bowl and I added it back to the blender in parts. I put about a fourth in and blended it before adding some more, continuing to do this about four times till it was all in and churning nicely. Blend till smooth but don't over do it cause we all know that an overly mixed muffin ends up a tough muffin.


Pouring the batter over into the muffin cups was easy enough since it was in a blender and not a bowl where you have the drips from having to scoop them into the pan.

I chose granola for my topping since that is what I had but fresh fruit would probably be delicious and you can't lose with chocolate chips. Vanilla, butterscotch or cinnamon chips are also ideas to try. I also want to see how it works with dried fruit, like blueberries, cranberries, cherries and of course raisins. Keep off the raisins or the chocolate chips if giving to your dog. The other type chips should probably be avoided too since there's no reason a dog needs sugary sweets.


So in the oven they go for 15 minutes. Maybe it's just my oven but they weren't done in only 15 minutes so I baked them another five minutes and my toothpick came out clean. I let them cool a bit so they wouldn't stick when getting them out. They didn't just pop out (maybe your type of pan will, but I used a stone muffin pan), so I ran a dull knife around the edges to loosen first. Don't use a sharp knife or you may scratch your muffin pan.

These muffins are very tasty, but were a little spongy. I don't know if that is normal or perhaps I mixed the batter too long or maybe they could've baked a bit longer. Future trial and error will tell me that.
Since one batch only makes 12 muffins I had no need to freeze them so don't know how that would work out. I have a feeling they would defrost and be even more spongy than they are now. But I'd have to try it to know for sure.
With all the ideas for toppings, these muffins do have a lot of potential to be made frequently.
They are easy and quick and very healthy. One muffin is said to have about 115 calories, 2 grams fat, 20 grams carbs, 5 grams protein, 2 grams fiber, 8 grams sugar.
If it says anything, my dogs loved them!


Friday, August 12, 2016

Shrubs, A Healthy, Energizing, Fruit Vinegar Drink


The benefits of drinking unpasteurized, raw vinegar has long been documented and utilized for improved health and beauty. Combining raw honey and raw vinegar are described as the "elixir of youth" and is even believed to fight cancer by helping to maintain an alkaline body pH.

But if you have trouble acquiring a taste for the honey and vinegar blend in a daily glass of water, then perhaps making shrubs is the next best alternative. Now this recipe uses sugar rather than honey but the use of honey could easily be substituted to see how it turns out. I do make my elderberry syrup with honey so I don't see why it couldn't be used in place of the white sugar.

The word "shrub" comes from the Arabic sharbah which means "a drink". Drinking vinegar isn't as common today as in the past, but using vinegar has a history going back to the Babylonians and Romans. Without preservatives, wine turned to vinegar and never went to waste. it was also added to water to make it safer to drink. The acetic acid in vinegar acts as a preserving agent so recipes were recorded on how to enjoy seasonal fruits year round. High in antioxidants, shrubs were an excellent way to get enough vitamin C during the winter months and to help ward off illness. Colonial period sailors made sure to carry shrubs on their boats to help prevent scurvy.

The most common way to make shrubs is to create a fruit-flavored vinegar and sweeten it with sugar. The resulting syrup is then added to water when needed for a very refreshing, energy boosting drink. People laboring long hours in the fields during the heat of the summer were extremely grateful for the energy boost of such refreshment.

Be sure to use raw, unpasteurized vinegar that still contains the "mother". The Mother of Vinegar occurs naturally as strand-like enzymes of connected protein molecules. Though commercial vinegar contains the 5% acidity, the powerful enzymes and minerals are destroyed during the distilling process. Public demand for clear, pretty vinegar is the reason raw vinegar is rarely seen on store shelves. For the health benefits of minerals, pectin for fiber, and amino acids, be sure to use raw vinegar.

If you have access to seasonal fresh fruit, use whatever you have. If you don't or during the off season for fresh fruit, you can find frozen berries in the grocery store. I used Costco's Kirkland brand since they sell in money saving larger size bags. The berry blend here uses rasperries, blueberries and blackberries but you can use strawberries, cherries, cherries, peaches, elderberries, etc.

TO MAKE SHRUB

Place 2 cups of berries in a pot.

Pour 1 cup raw Apple Cider Vinegar over the berries.

Heat the berries on low heat and add 1 1/2 cup sugar.

Stir to blend and dissolve the sugar.

Bring to a boil and remove from the heat.

Mash the mixture to crush the berries and put through a strainer to remove any pulp.

Pour the concentrate into a jar and store in the refrigerator. Try to use within six months.

To use:
Add ice cubes to a glass along with 2 - 4 tbsp of syrup (depends on how you like it).
Top with cold water and drink up!


Thursday, February 18, 2016

Salt, Lemons, Vinegar, Baking Soda...Helping Hand to Raising Children


Though many of us are aware how useful the Fab Four (Salt, Lemons, Vinegar, and Baking Soda) by Shea Zukowski can be around the house for anyone seeking earth-friendly solutions, it is difficult to actually remember which is for what purpose.

I came across this little gem of a book and now I have all these tips in one place for reference instead of forgetting where I read those tips and to where I filed them away. The book is categorized into sections including kitchen, laundry, personal, pet and outdoors. For this post I am just going to center on what can be useful to make life easier in raising children.

CLOTH DIAPER CLEANER

1/2 cup baking soda
1/4 cup vinegar
Fragrance-free liquid laundry detergent

Add the baking soda to the wash cycle along with the detergent. Baking soda helps neutralize the acids in the dirty diapers.
Add the vinegar to the rinse cycle to soften clothes and help remove the detergent.


BABY FORMULA STAIN REMOVER

1/4 cup lemon juice
1/4 cup water

Baby formula easily stains clothing because of it's high protein content. Keep this mix in a spray bottle in the refrigerator so it is handy to pre-treat stains as soon as possible. Let the garment air dry in the sun and then wash as usual.


BABY AND CHILD TOY DISINFECTANT

1/4 cup vinegar

Soak a clean cloth in the 1/4 cup of vinegar and wipe down all  non-plush toys. Allow items to air dry. The vinegar scent will fade away.


STUFFED ANIMAL CLEANER

1/2 cup baking soda

Not all plush toys can be put into the washing machine. To rid stuffed animals of odors, put them in a plastic zip lock bag along with the baking soda. Shake the bag to distribute the baking soda over the stuffed animals and let sit overnight. Remove the toys and shake off the excess baking soda.


URINE SMELL ELIMINATOR

2 cups vinegar
1 cup water
1 cup baking soda

Bed wetting can be frustrating for everyone. There are waterproof mattress covers to protect the mattress but if the deed is already done you'll want to get rid of the smell of urine. Mix the vinegar and water and apply with a sponge to the affected areas. Blot dry with a towel and cover the spot with the baking soda. Let the area fully dry and then vacuum.


MUDDY CARPET CLEANER

When kids or pets come charging into the house leaving a trail of muddy footprints behind them, resist the urge to try blotting it up. This could just drive the dirt deeper into the carpet fibers. Take a handful of plain old salt and sprinkle generously onto the messy spots and leave it. Give the salt time to absorb the liquid and once dry vacuum it up.


PRE-TREATMENT FOR GRASS AND OTHER STAINS 

1 Tbsp baking soda
1 Tsp lemon juice OR 1 tsp vinegar

Stained knees and shirt fronts are prime targets for stained clothes. Sprinkle baking soda on the area, followed up with the lemon juice or vinegar on top. As the mixture starts to fizz, rub the fabric or use a toothbrush to rub it in to make sure the mix is getting through the stain. Let it sit a few minutes and then launder as usual.


CHEWING GUM REMOVER

Before you grab the scissors to cut out gum stuck in your child's hair, try using a lemon. Cut a lemon in half and rub the cut side onto the gum to help it loosen its grip. Gently squeeze the lemon to release some juice. Lemons can cause some bleaching so rinse the hair. This method can work on clothes and carpets as well, just remember to blot it up so it doesn't lighten the carpet.


SWIMMER'S EAR PREVENTION

2 Tbsp vinegar
2 Tbsp isopropyl alcohol

After a day of swimming there is always a chance the protective layer of wax in the outer ear canal gets worn away. Bacteria rich water from swimming can get in there and cause an infection. To lower this risk, make a solution of equal parts vinegar and isopropyl alcohol and store in a bottle or jar. Soak a cotton ball in the mixture and squeeze a few drops into each ear after swimming.


POOL TOY MILDEW PREVENTION

Inflatable pool toys are susceptible to mold and mildew once deflated and stored away for the winter. To minimize this from happening, let them sit in the sun to thoroughly dry before storing. Sprinkle each deflated item with a handful of baking soda before rolling up.


FRUIT AND VEGETABLE WASH

1 Tbsp lemon juice
2 Tbsp baking soda
1 cup water

A homemade, very economical fruit and vegetable spray to remove waxy coatings and help clean off pesticides. Fill a spray bottle with the lemon juice, baking soda and water. Shake before use. Spray the produce before eating and rinse it well to remove any aftertaste from the wash. The spray will last about a week.


NEED SOMETHING TO DO KID ACTIVITIES

SALT PAINTING

4 to 5 small bowls of salt
Food coloring of different colors
School glue
sponge brush
Paper

Pour an equal amount of salt into a few small bowls. A few Tbsp in each should be plenty.
Add a drop of food coloring into each bowl and stir to create different colors.
Using the sponge brush, coat a piece of paper with a thin layer of glue and let the children sprinkle the colored salt to form pictures and patterns.

SALT CLAY DOUGH

1 cup salt
1 1/4 cups warm water
1 Tbsp vegetable oil
3 cups flour

Mix the salt with the warm water and stir to dissolve. Add the vegetable oil and flour and stir slowly to combine. Knead the dough till pliable, adding flour if necessary till not sticky. If desired, divide into smaller balls and add a few drops food coloring to each to make different color dough balls. Store the play dough in a zip lock bag or lidded container. If the kids want to save their creations, let them air dry a few days and paint them with watercolor or acrylic paints. A thin coating of clear nail polish will help preserve them.


Here are three other posts about natural care for adults and children:
All Natural Care for Mom and Baby

The Well Stocked Natural Child's First Aid Kit

Dealing with the Pitfalls of Summer, Naturally


Sunday, January 24, 2016

CRANBERRY OAT COOKIES...Take a Break From the Cold


Shoveling out from under a snowstorm is what you make of it. It can be nothing but a cursing with every shovelful or it can be a steady, take your time, meditative type of chore. Whatever it may be, there is little else more motivating than to know that when you're done you can leisurely sit and enjoy a plate of homemade cookies.

This recipe comes from Taste of Home magazine, sent in by Heather Breen
With the addition of oats and dried cranberries, it is a tasty, a bit healthy cookie, crunchy on the outside, chewy on the inside.


CRANBERRY OAT COOKIES

Mix these three ingredients together in a large bowl:
1 1/4 cup packed brown sugar
1/2 cup sugar
2/3 cup oil of choice, the recipe called for canola

Beat in:
2 eggs
2 tbsp milk
1 1/2 tsp vanilla

Combine and sift together in another medium size bowl:
2 1/2 cups quick-cooking oats
1 3/4 cup all-purpose flour or you can divide that up with wheat or oat flour

1 tsp baking soda
1 tsp salt

Gradually add the flour mixture to the sugar mixture.
Stir in:
1 cup dried cranberries

Drop by teaspoonfuls onto a greased baking sheet.
Bake at 375 degrees F for 10 minutes.
Only let cool about 3 minutes and then remove to a wire rack. If cookies remain on pan too long they will stick.

This batch makes about 4 dozen


Thursday, December 17, 2015

Gingerbread Cookies, Frugal Holiday Treasure

I stumbled upon what may be the perfect holiday cookie with more perks going for it than dietary downfalls.

Busy days have always deterred me from doing cut-out cookies for Christmas since rolling out dough usually became a frustrating experience. Drop cookies were so much less of a mess and took half the time, so I thought till now.

Gingerbread cookies have to be the one holiday treat that is guaranteed to lighten the mood and produce a smile.  No matter what a person's age, he or she cannot eat one without murmuring an "ahhhh, I remember when..." moment from childhood.

Most cut-out cookie recipes are made up of the ingredients we are usually trying to avoid: white flour, white sugar and solid shortening. This recipe I discovered is a gem. It is probably from the lean years of the Great Depression or the rations of war time because it doesn't contain any white sugar or eggs. Years ago such simplicity was out of necessity or availability, but today it can be seen in a more positive light:

A nutritional boost of iron
No white sugar
No eggs or milk
Very easy handling dough
Perfect for those who want a not-so-sweet cookie.
Ideal for dipping in milk, tea or coffee.
They are a crisp cookie so hold up well for packing into tins as gift ideas or shipping.


GREAT-GREAT GRANDMA'S OLD-FASHIONED GINGERSNAPS
By Helen E. Goodwin 
"Yankee Church Supper Cookbook"

1 Cup baking Molasses (Blackstrap if want the nutritional boost and not as sweet)
1/2 Cup Butter
1 Tbsp ground Ginger spice
1 rounded Tsp Baking Soda
3 Cups Flour

Boil together the molasses and butter.
Let cool.
In a large bowl, sift together the ginger, baking soda and flour.
Add the molasses, butter mixture and blend well.
Roll dough thin (about 1/8 inch thick) on a floured board or surface.
Cut out with cookie cutters.
Space out on greased cookie sheet so fit from 9 to 12 cookies, depending on their size.
Add desired decorations, such as raisins for eyes or cinnamon hearts for belly buttons.
Bake at 350 degrees F for 8 - 10 minutes
Makes 2 - 3 dozen gingerbread men or 4 - 6 dozen smaller cookie cutter shapes.


Yankee Church Supper Cookbook


HAPPY HOLIDAYS!